Backup recommendations for Analytics Engine and Visualizer
When a cluster (more than 1 node) is deployed in the Analytics Engine, you cannot just backup the data folder anymore. The shards could be mid-transfer and you won't be able to capture all data properly. Shinydocs recommends using the built-in Snapshot API to achieve this.
While Shinydocs recommends this strategy, the Elasticsearch Snapshot API is developed by Elastic Co. We are able to assist with implementing this strategy with your organization, but Shinydocs does not take responsibility for the Snapshot technologies from Elastic. Issues with the Snapshot API can be resolved with Elastic.
Considerations
Size of Snapshots
The size of your snapshot depends on the size of your index/indices. You can view the current size of your indices by running GET _cat/indices?v in the Visualizer Dev Tools Console. If using compression in your snapshots, you may see compression of approximately 40%. Ensure your destination has enough disk space available.
Repository location
This guide will focus on using a Windows-based shared UNC path.
Official API Documentation
You can view Elastic’s official documentation on this API here: https://www.elastic.co/guide/en/elasticsearch/reference/6.8/modules-snapshots.html
Instructions for using Elasticsearch Snapshot
Luckily, they have a solution! Hellllloooooo snapshots! This can be done and stored in a repo in the cloud, but also locally via UNC.
https://www.elastic.co/guide/en/elasticsearch/reference/6.8/modules-snapshots.html
Step 1
Add the "path.repo" line to your elasticsearch.yml file
path.repo: ["\\\\ACME\\share\\ESBackups"]Save the file and restart Analytics Engine service
Step 2
Register the repo with Elasticsearch and name the "snapshots" repository. This information is submitted in the Visualizer’s Dev Tools console.
PUT /_snapshot/name_of_repository
{
    "type": "fs",
    "settings": {
        "location": "\\\\path\\noted\\in\\path.repo",
        "compress": true
    }
}
Step 3
Once the repository has been registered with the cluster, you are now able to initiate a snapshot!
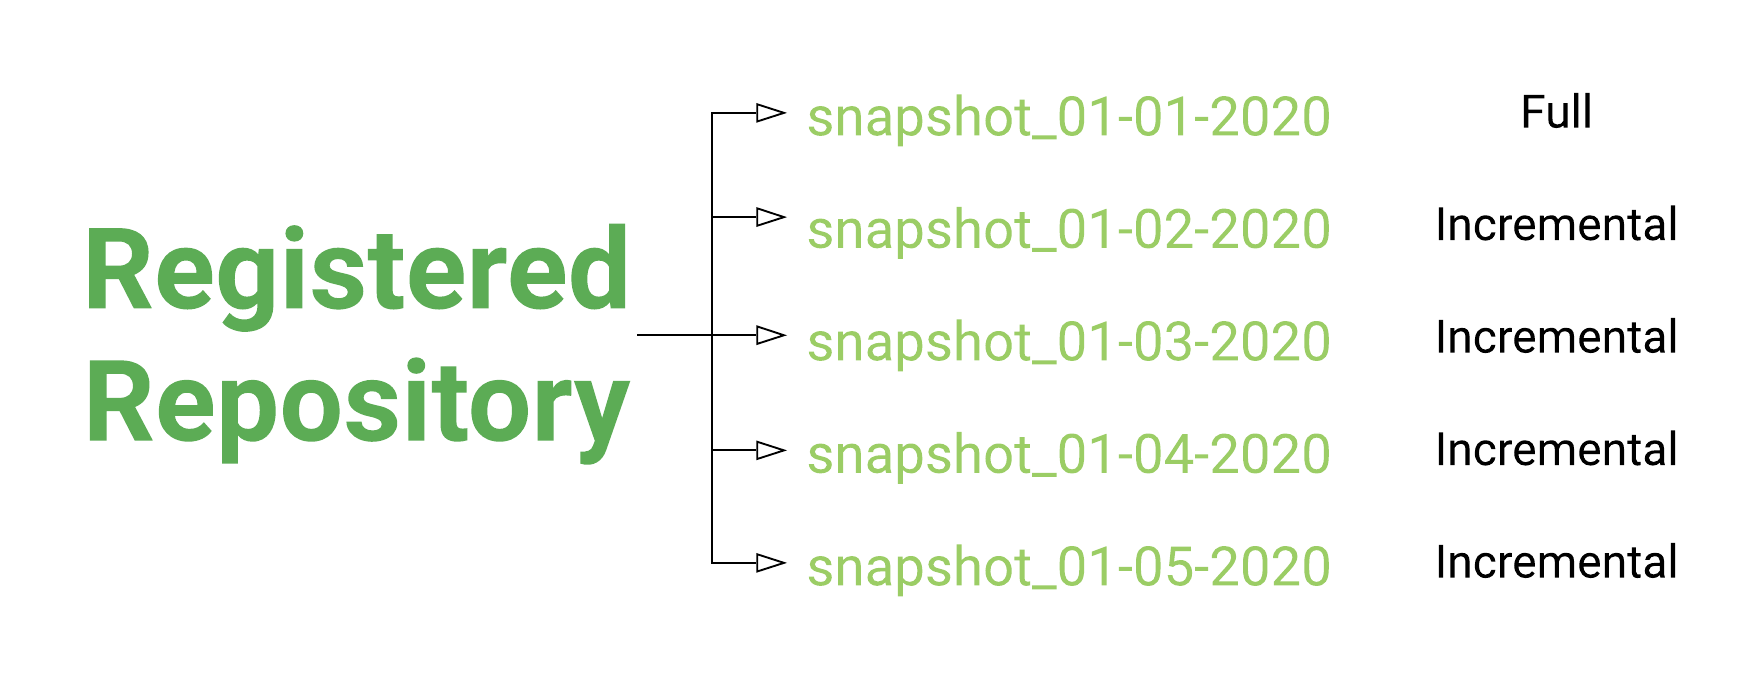
The first snapshot you do will be a full snapshot and will take the longest. Once the next snapshot is initiated in the same repository, an incremental snapshot is performed (sometimes referred to as delta). Incremental snapshots run relatively quickly, only changes (addition and removal) are processed.
To initiate a snapshot, the following can be run in the Visualizer’s Dev Tools console:
PUT /_snapshot/name_of_repository/name_of_snapshot?wait_for_completion=true
OR
If you would like to just snapshot individual indices, you can add a body to the command and specify the index/indices to be included
PUT /_snapshot/name_of_repository/name_of_snapshot?wait_for_completion=true
{
  "indices": "index_1,index_2",
  "ignore_unavailable": true,
  "include_global_state": false
}Restore
You can restore the snapshot to the original cluster or in a whole new environment. If restoring to a new environment, ensure sufficient hardware requirements are met.
The following can be run in the Visualizer’s Dev Tools console:
PUT /_snapshot/name_of_repository/name_of_snapshot/_restore
There are various options for advanced restoring. We encourage you to visit Elasticsearch’s website for the official API documentation for more advanced details.