SharePoint Online settings
This article describes how to set up SharePoint Online integration with Discovery Search, including changes needed on the Azure Portal and within the configuration for Discovery Search.
Configure Microsoft Azure Active Directory
Register the Discovery Search App
Open a browser and navigate to the Azure Portal (Microsoft Azure Portal)
Select Azure Active Directory on the homepage
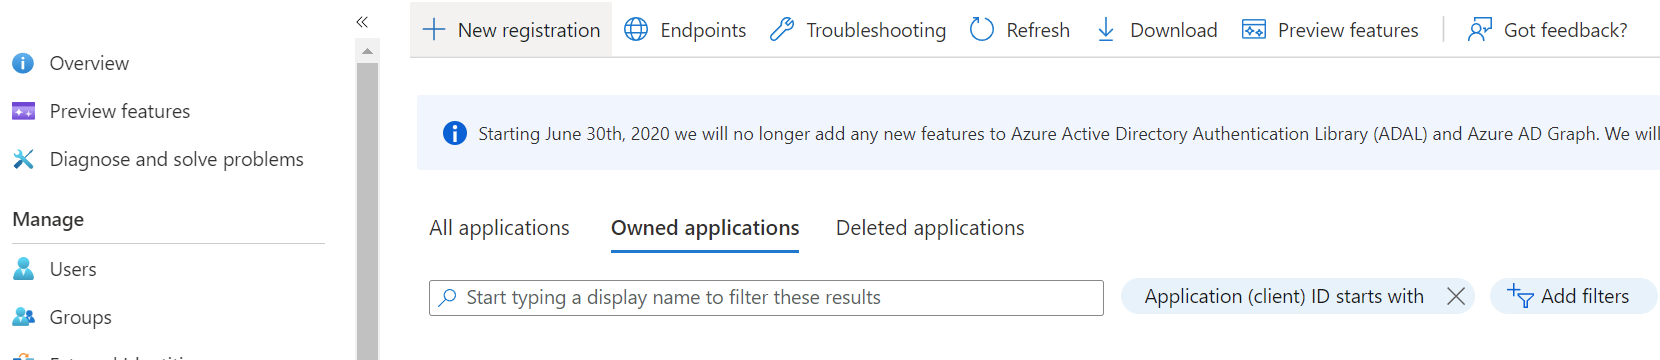
Select App Registrations from the navigation panel in Azure Active Directory (Azure AD)
Click + New Registration to add a new App Registration
On the Register Page, you will need to provide the following information:
Name: This is a display name for the application. It will be used in the portal to identify what the application is used for, so make it descriptive.
Supported Account Types: This typically should be Accounts in this organizational directory only (Single tenant). This limits logins to the organization that is using the SharePoint instance.
Redirect URI: This is the URL that Azure should redirect to once the login is successful. Typically this should be the fully qualified domain name of your Discovery Search. If you are using a load balancer, it should be the URI used to hit the load balancer, not the individual machines located behind the load balancer.
Click the Register button
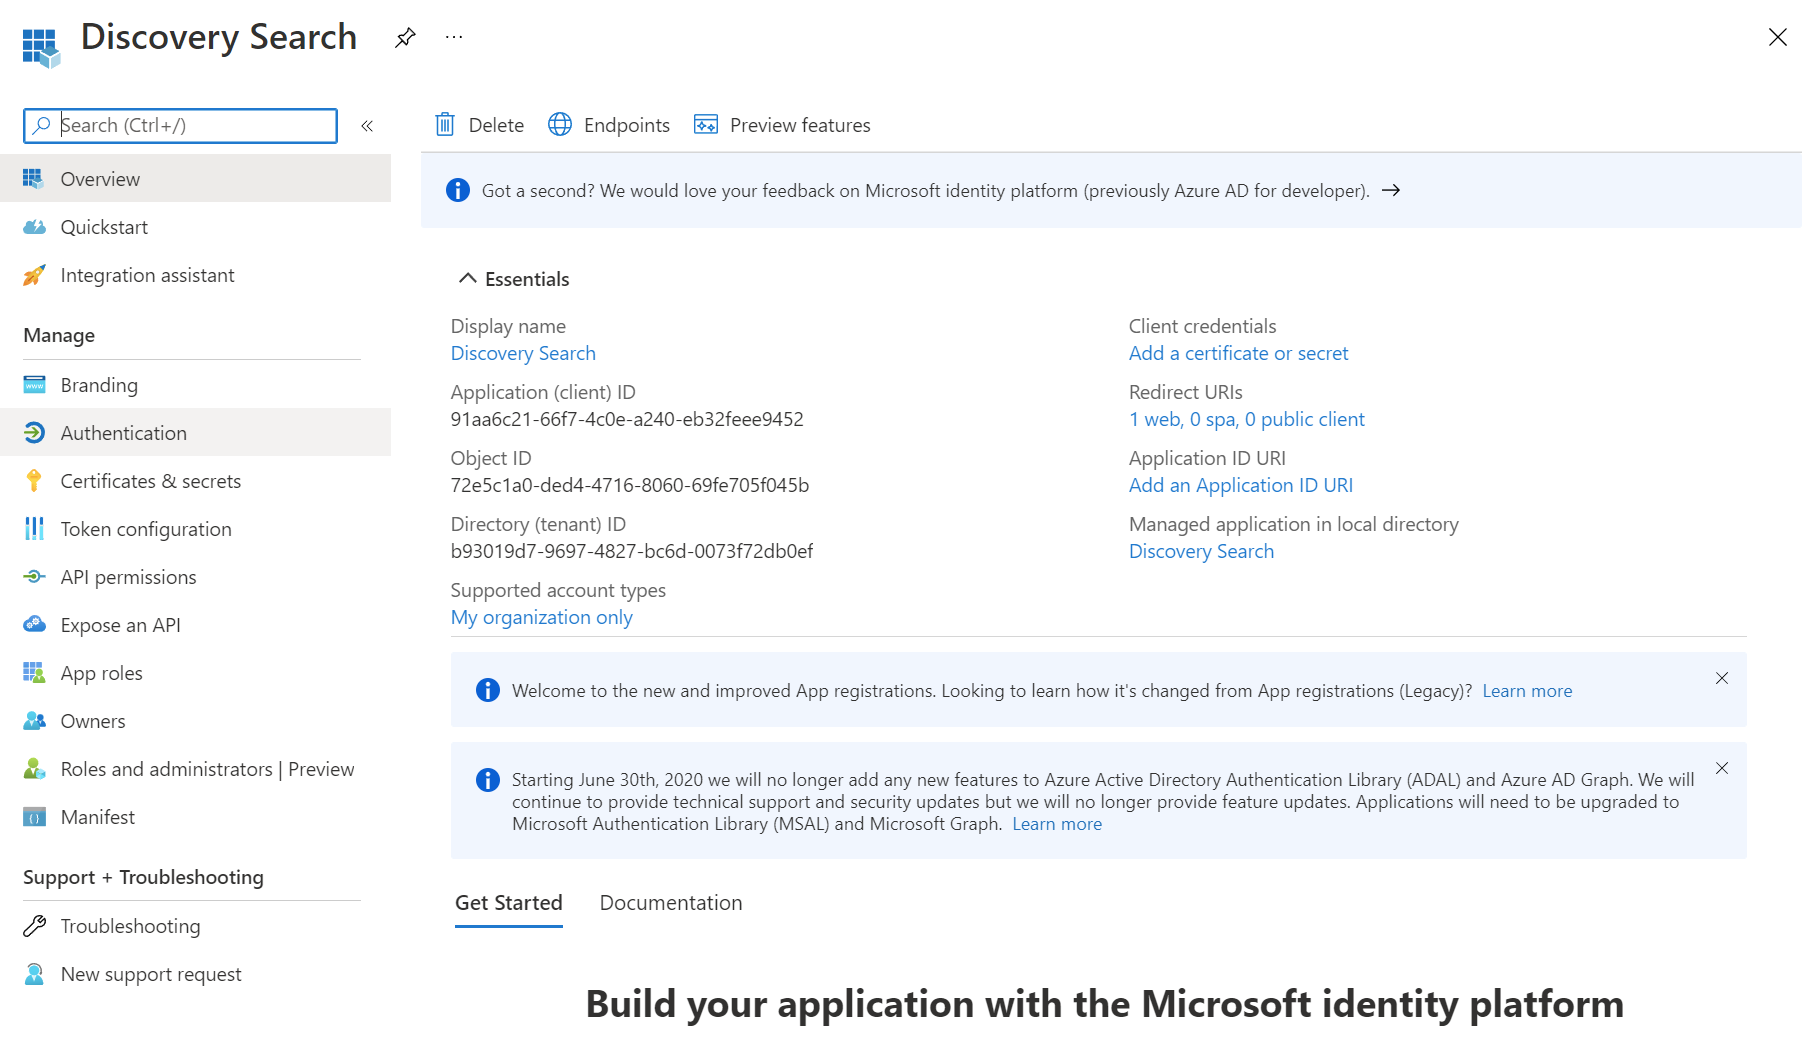
Overview page after registering the Discovery Search app.
Set up Authentication
Click on the Authentication link on the navigation sidebar
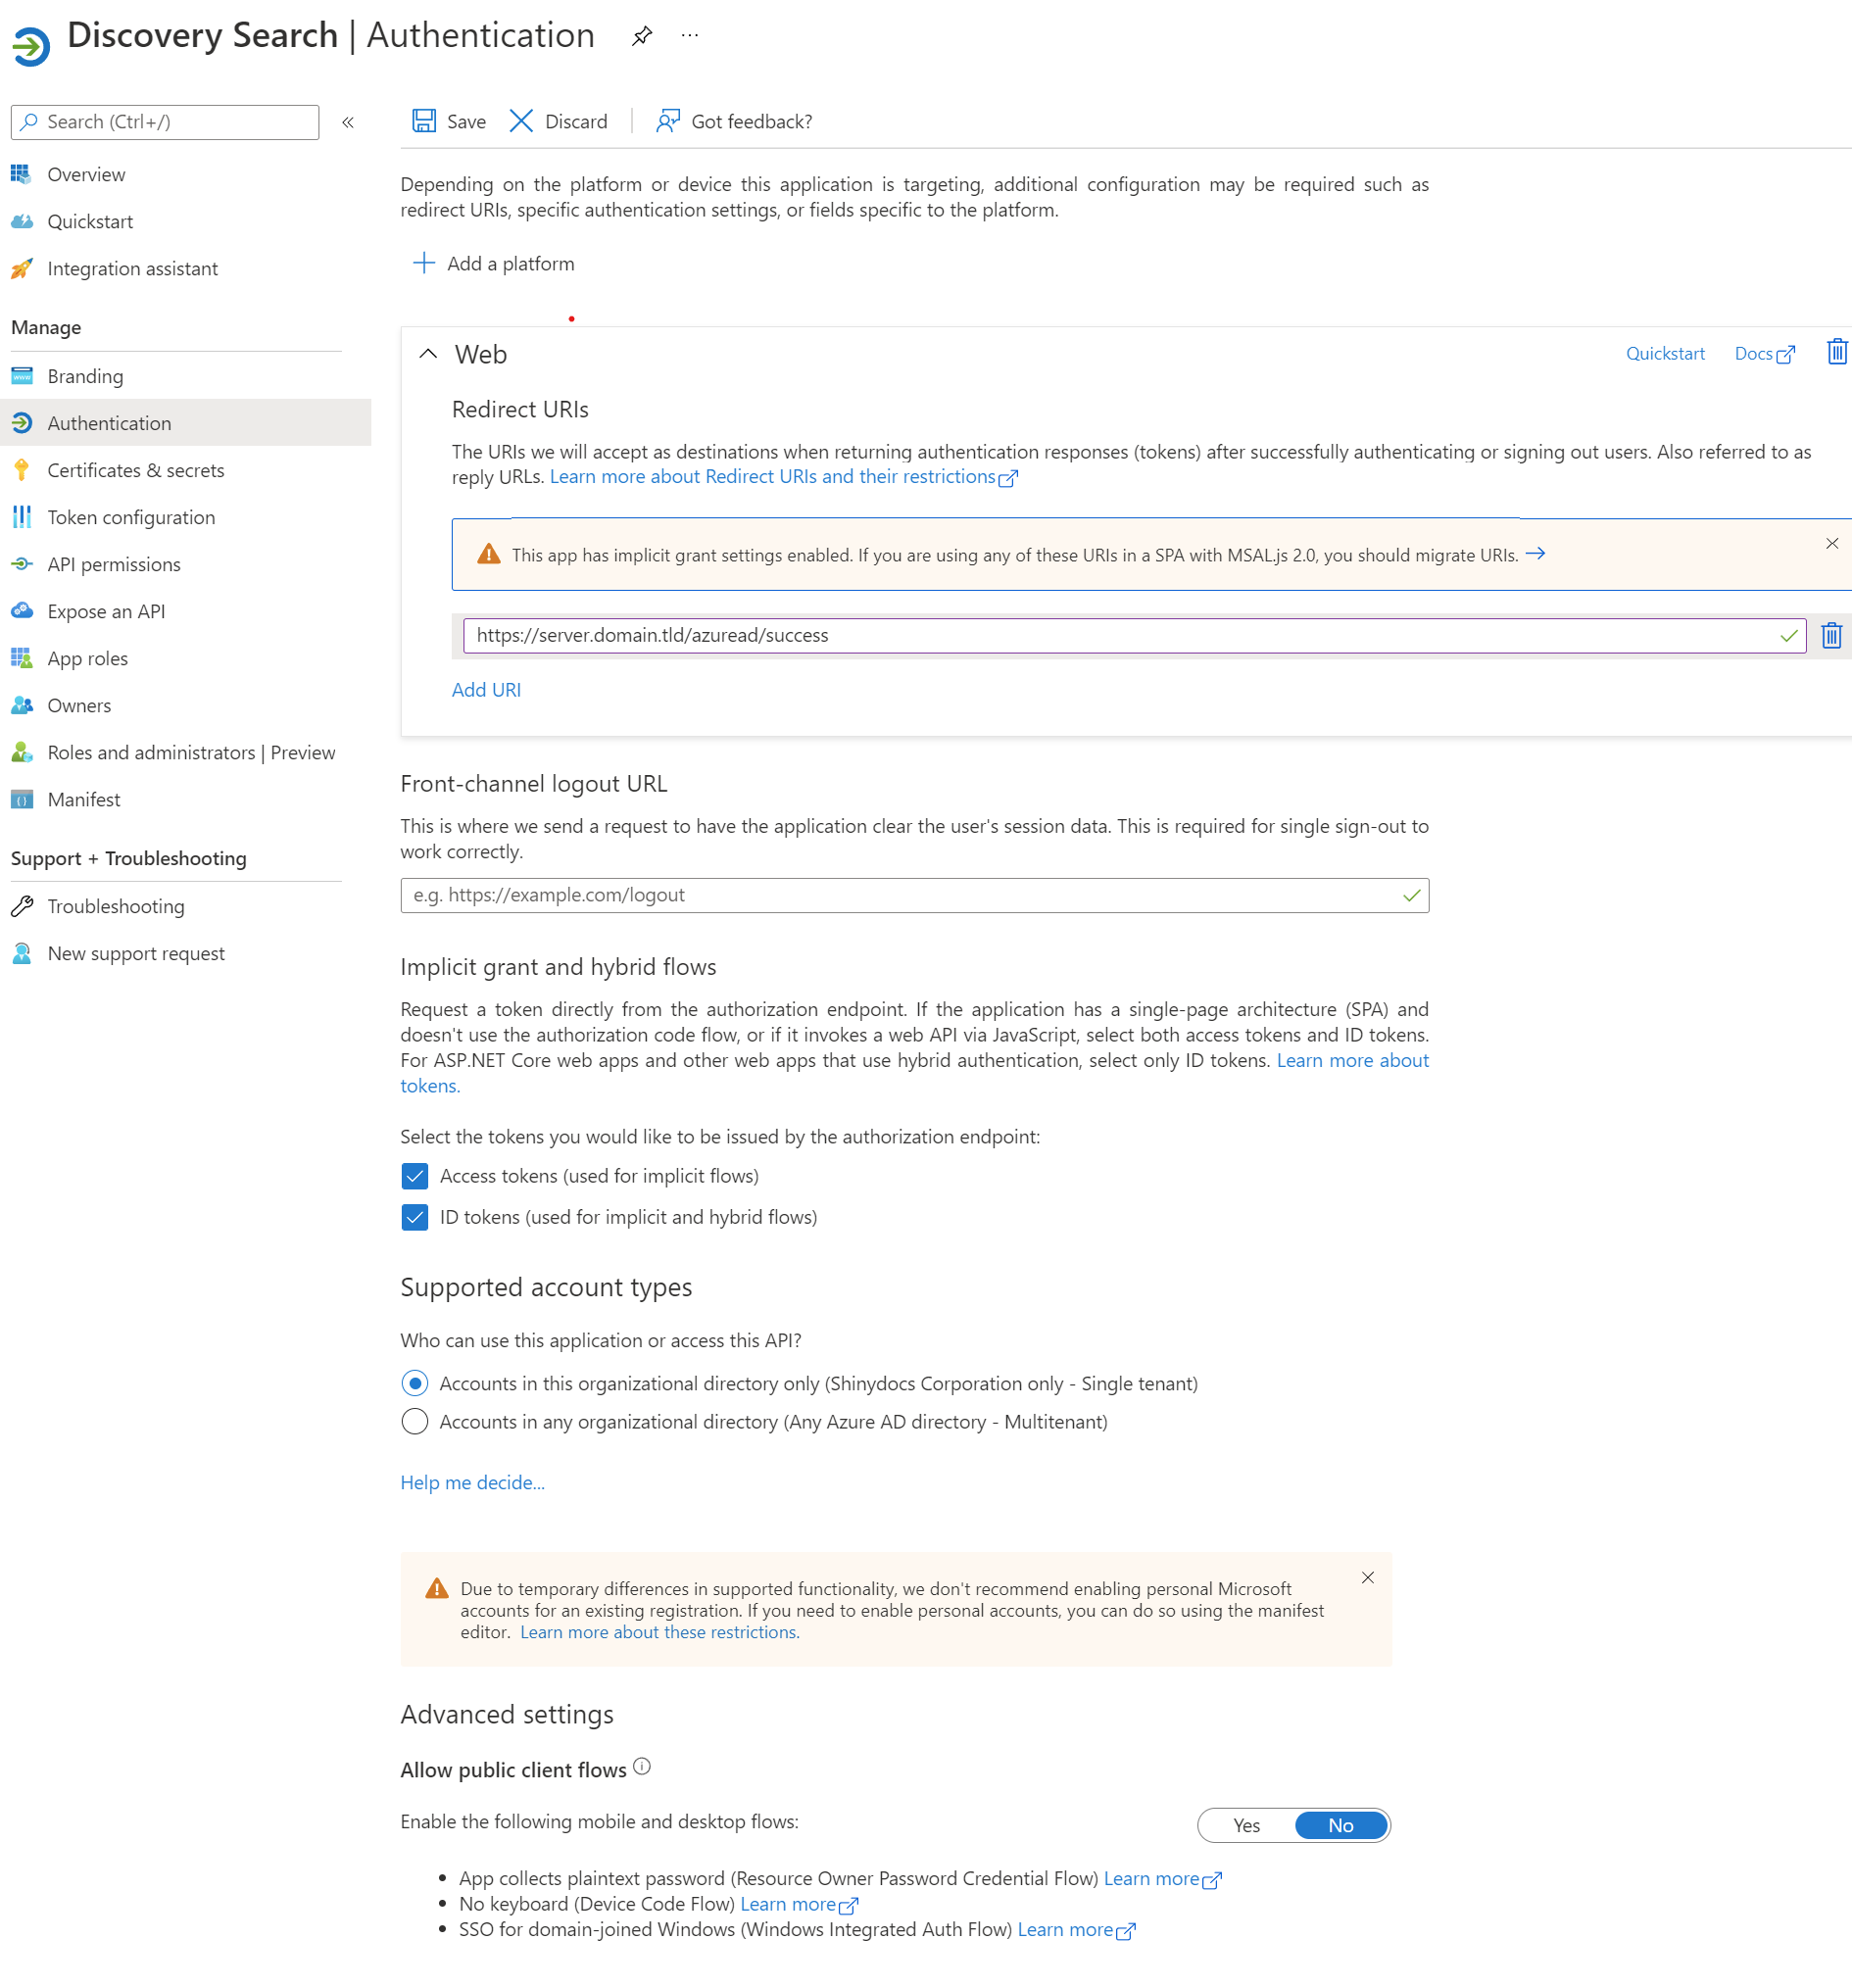
Authentication page.
Make the following changes on the Authentication page:
Redirect URIs: This should be the URI to the discover server, including the /azuread/success path (for example, https://search.domain.com/azuread/success).
Select both Access tokens and ID tokens in the Implicit Grant and Hybrid Flows section.
Front-channel logout URL: This can remain empty.
Ensure Supported account types is set to Accounts in this organizational directory only ( Single tenant).
Advanced settings - Allow public client flows: This should be set to No.
Save changes if required
Add a Client Secret
This section describes how to add a secret to the app registration.
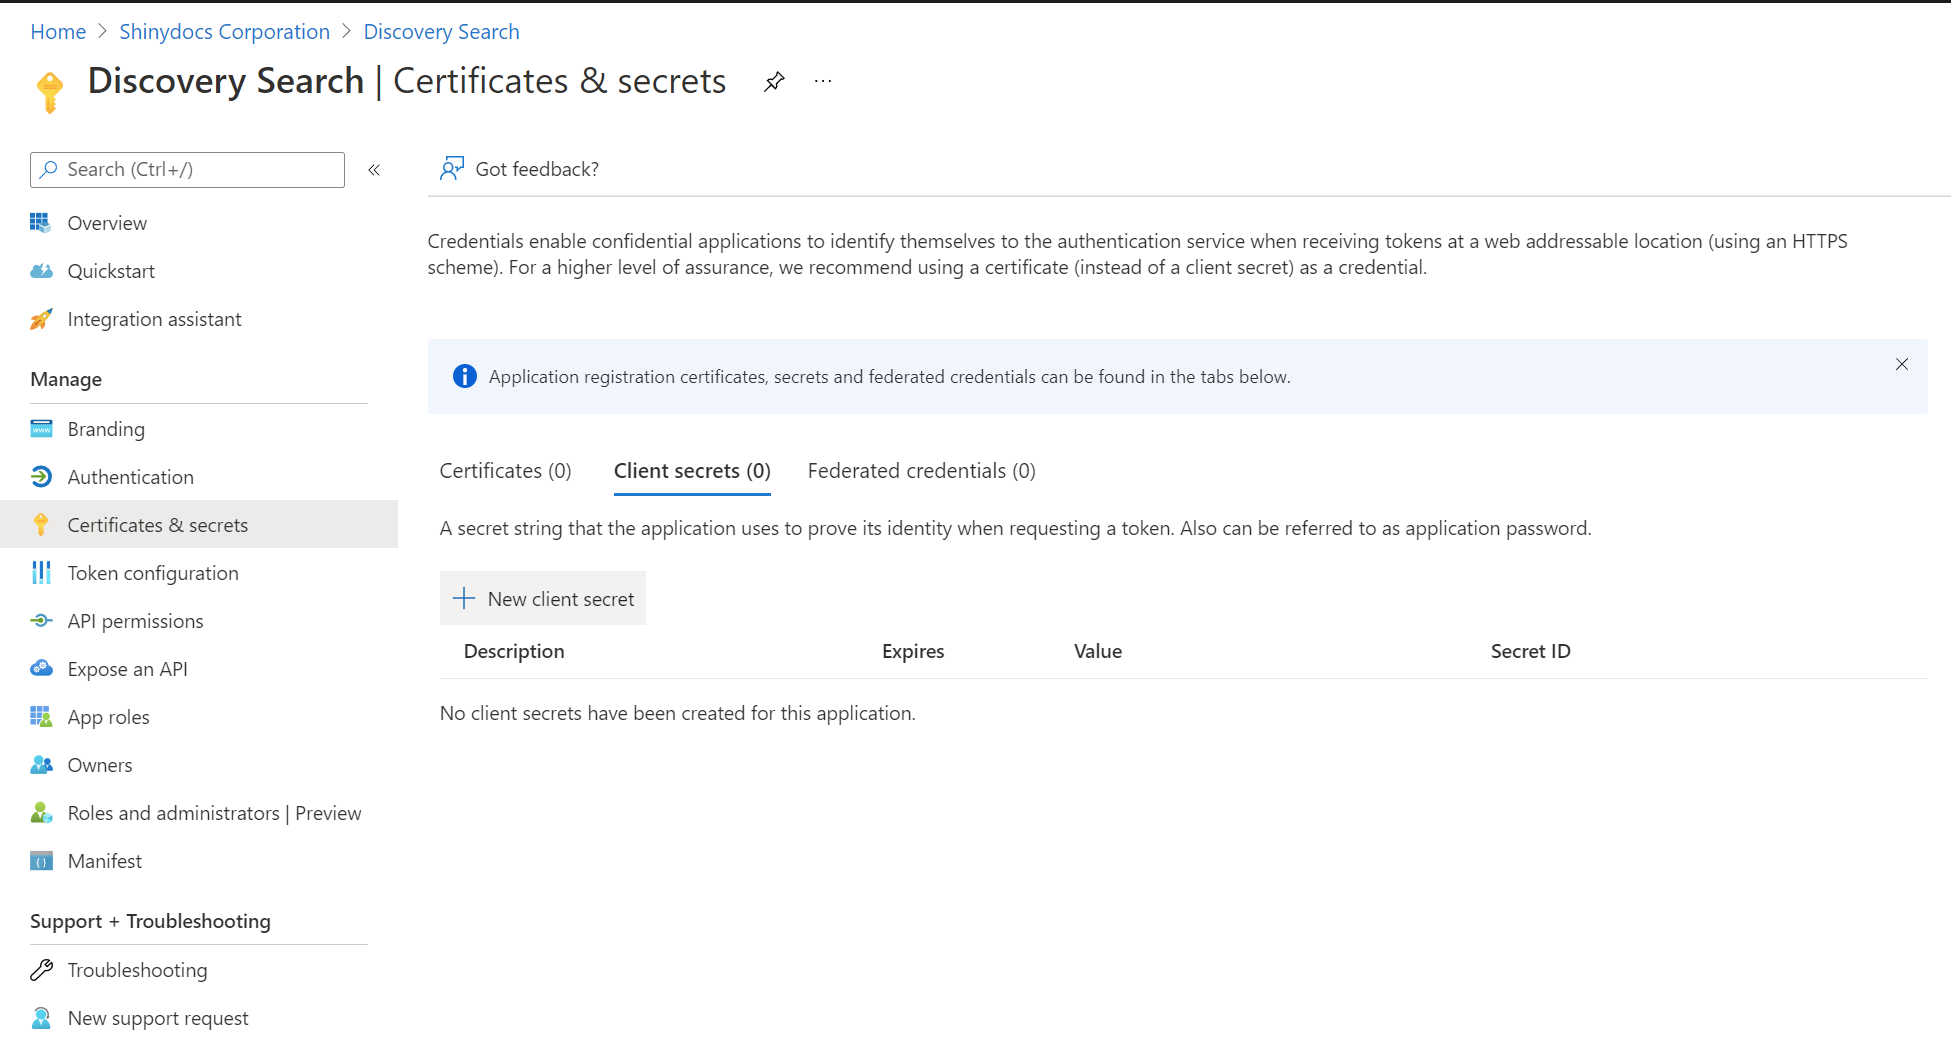
From the App page, select Certificates & secrets from the navigation sidebar
Click + New client secret on the Client secrets tab
Provide the following information on the form
Description: A descriptive name of the secret.
Expires: Provide how long the secret is valid for. Note that, when it expires, the integration with Discovery Search will stop working until a new secret is generated and updated in the Discovery Search web.config file.
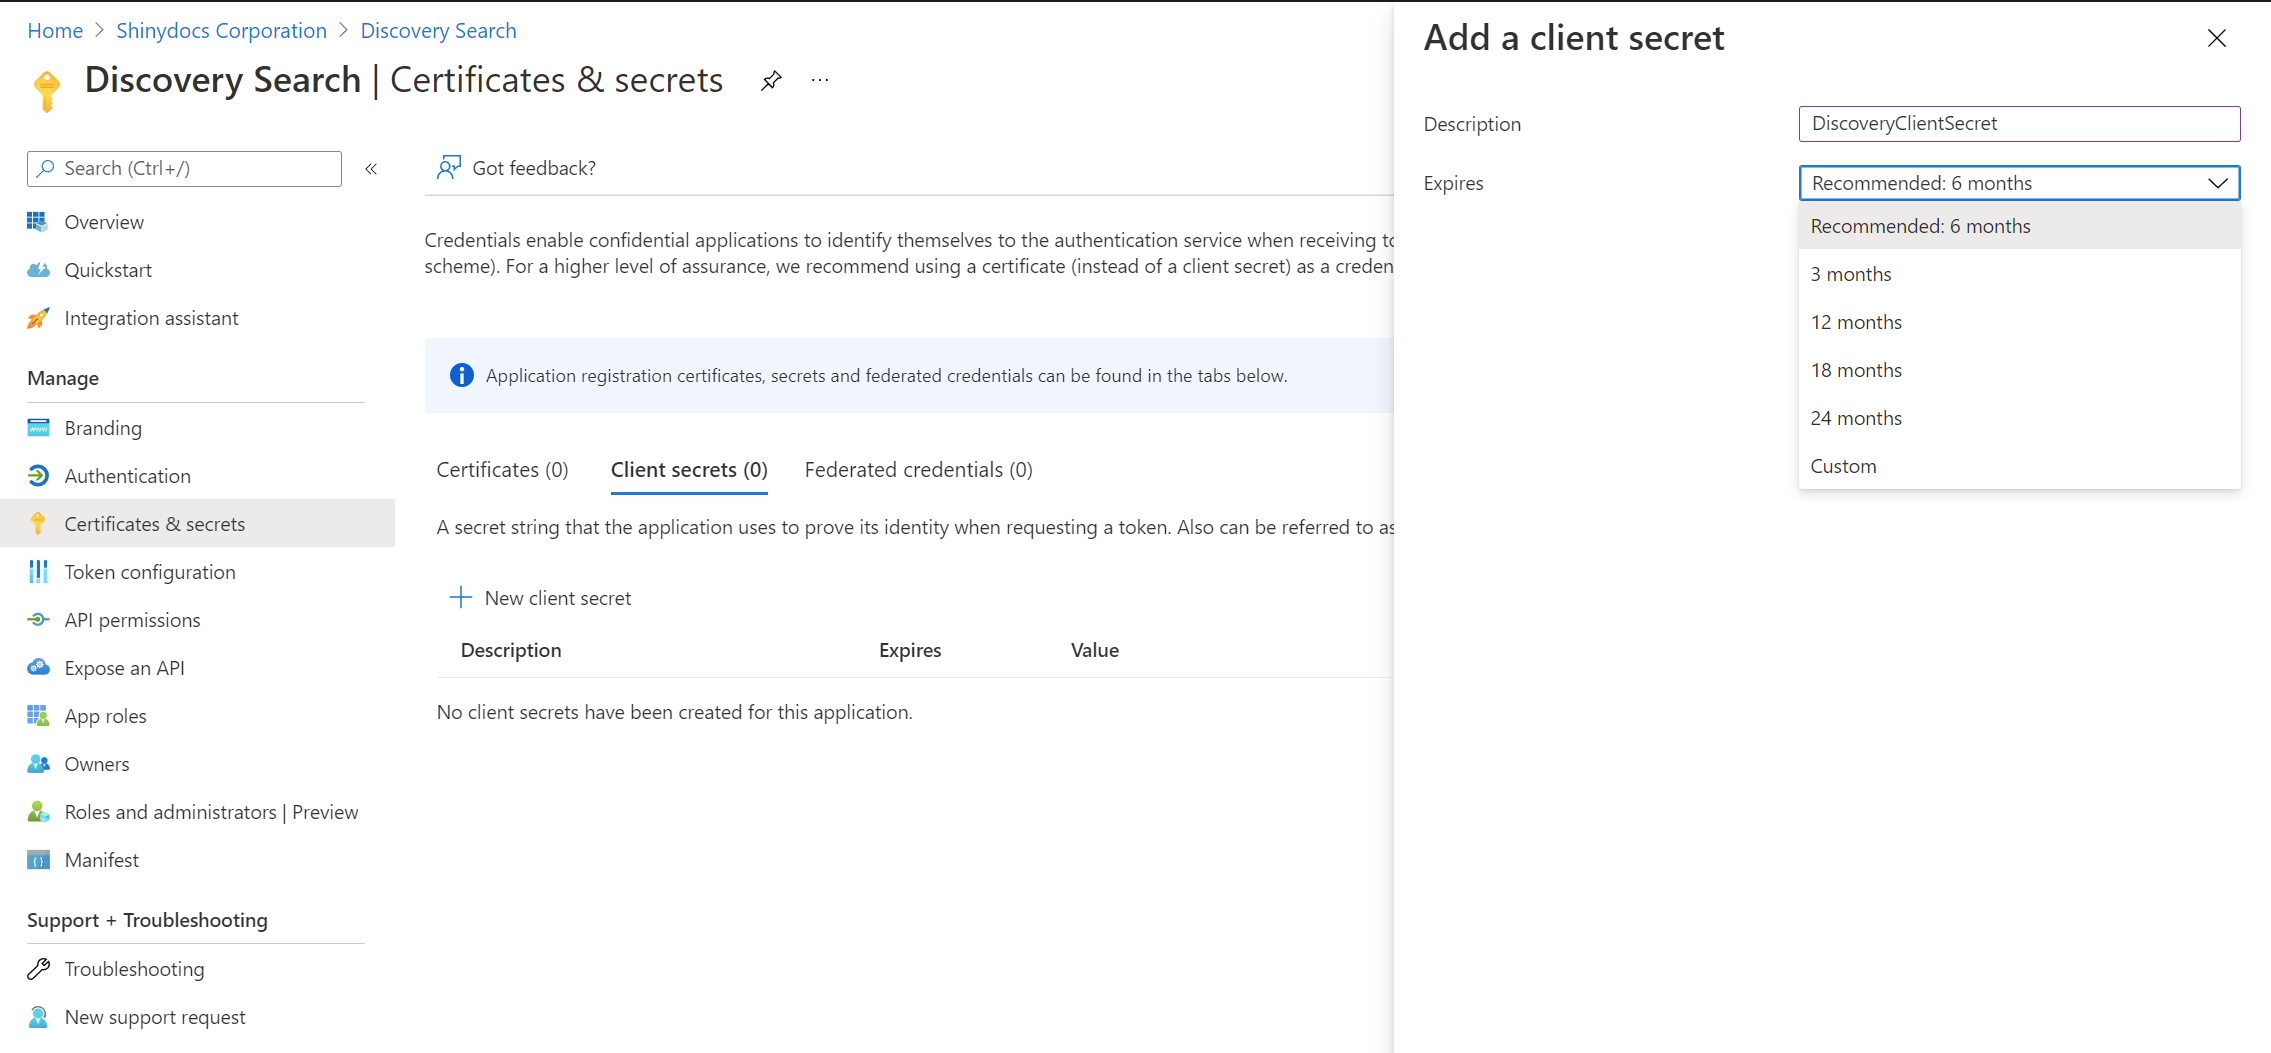
Click the Add button at the bottom of the screen
Copy the value for the secret shown on the page and keep it in a safe spot. This is the only time you will be able to see it. This will be needed as part of the configuration for Discovery Search.
Set up API Permissions
This section describes how to setup the appropriate API permissions for this application. This will allow Discovery Search to access SharePoint Online as the delegated user to do a permissions check.
Select API permissions from the App registration navigation sidebar

Click + Add a permission
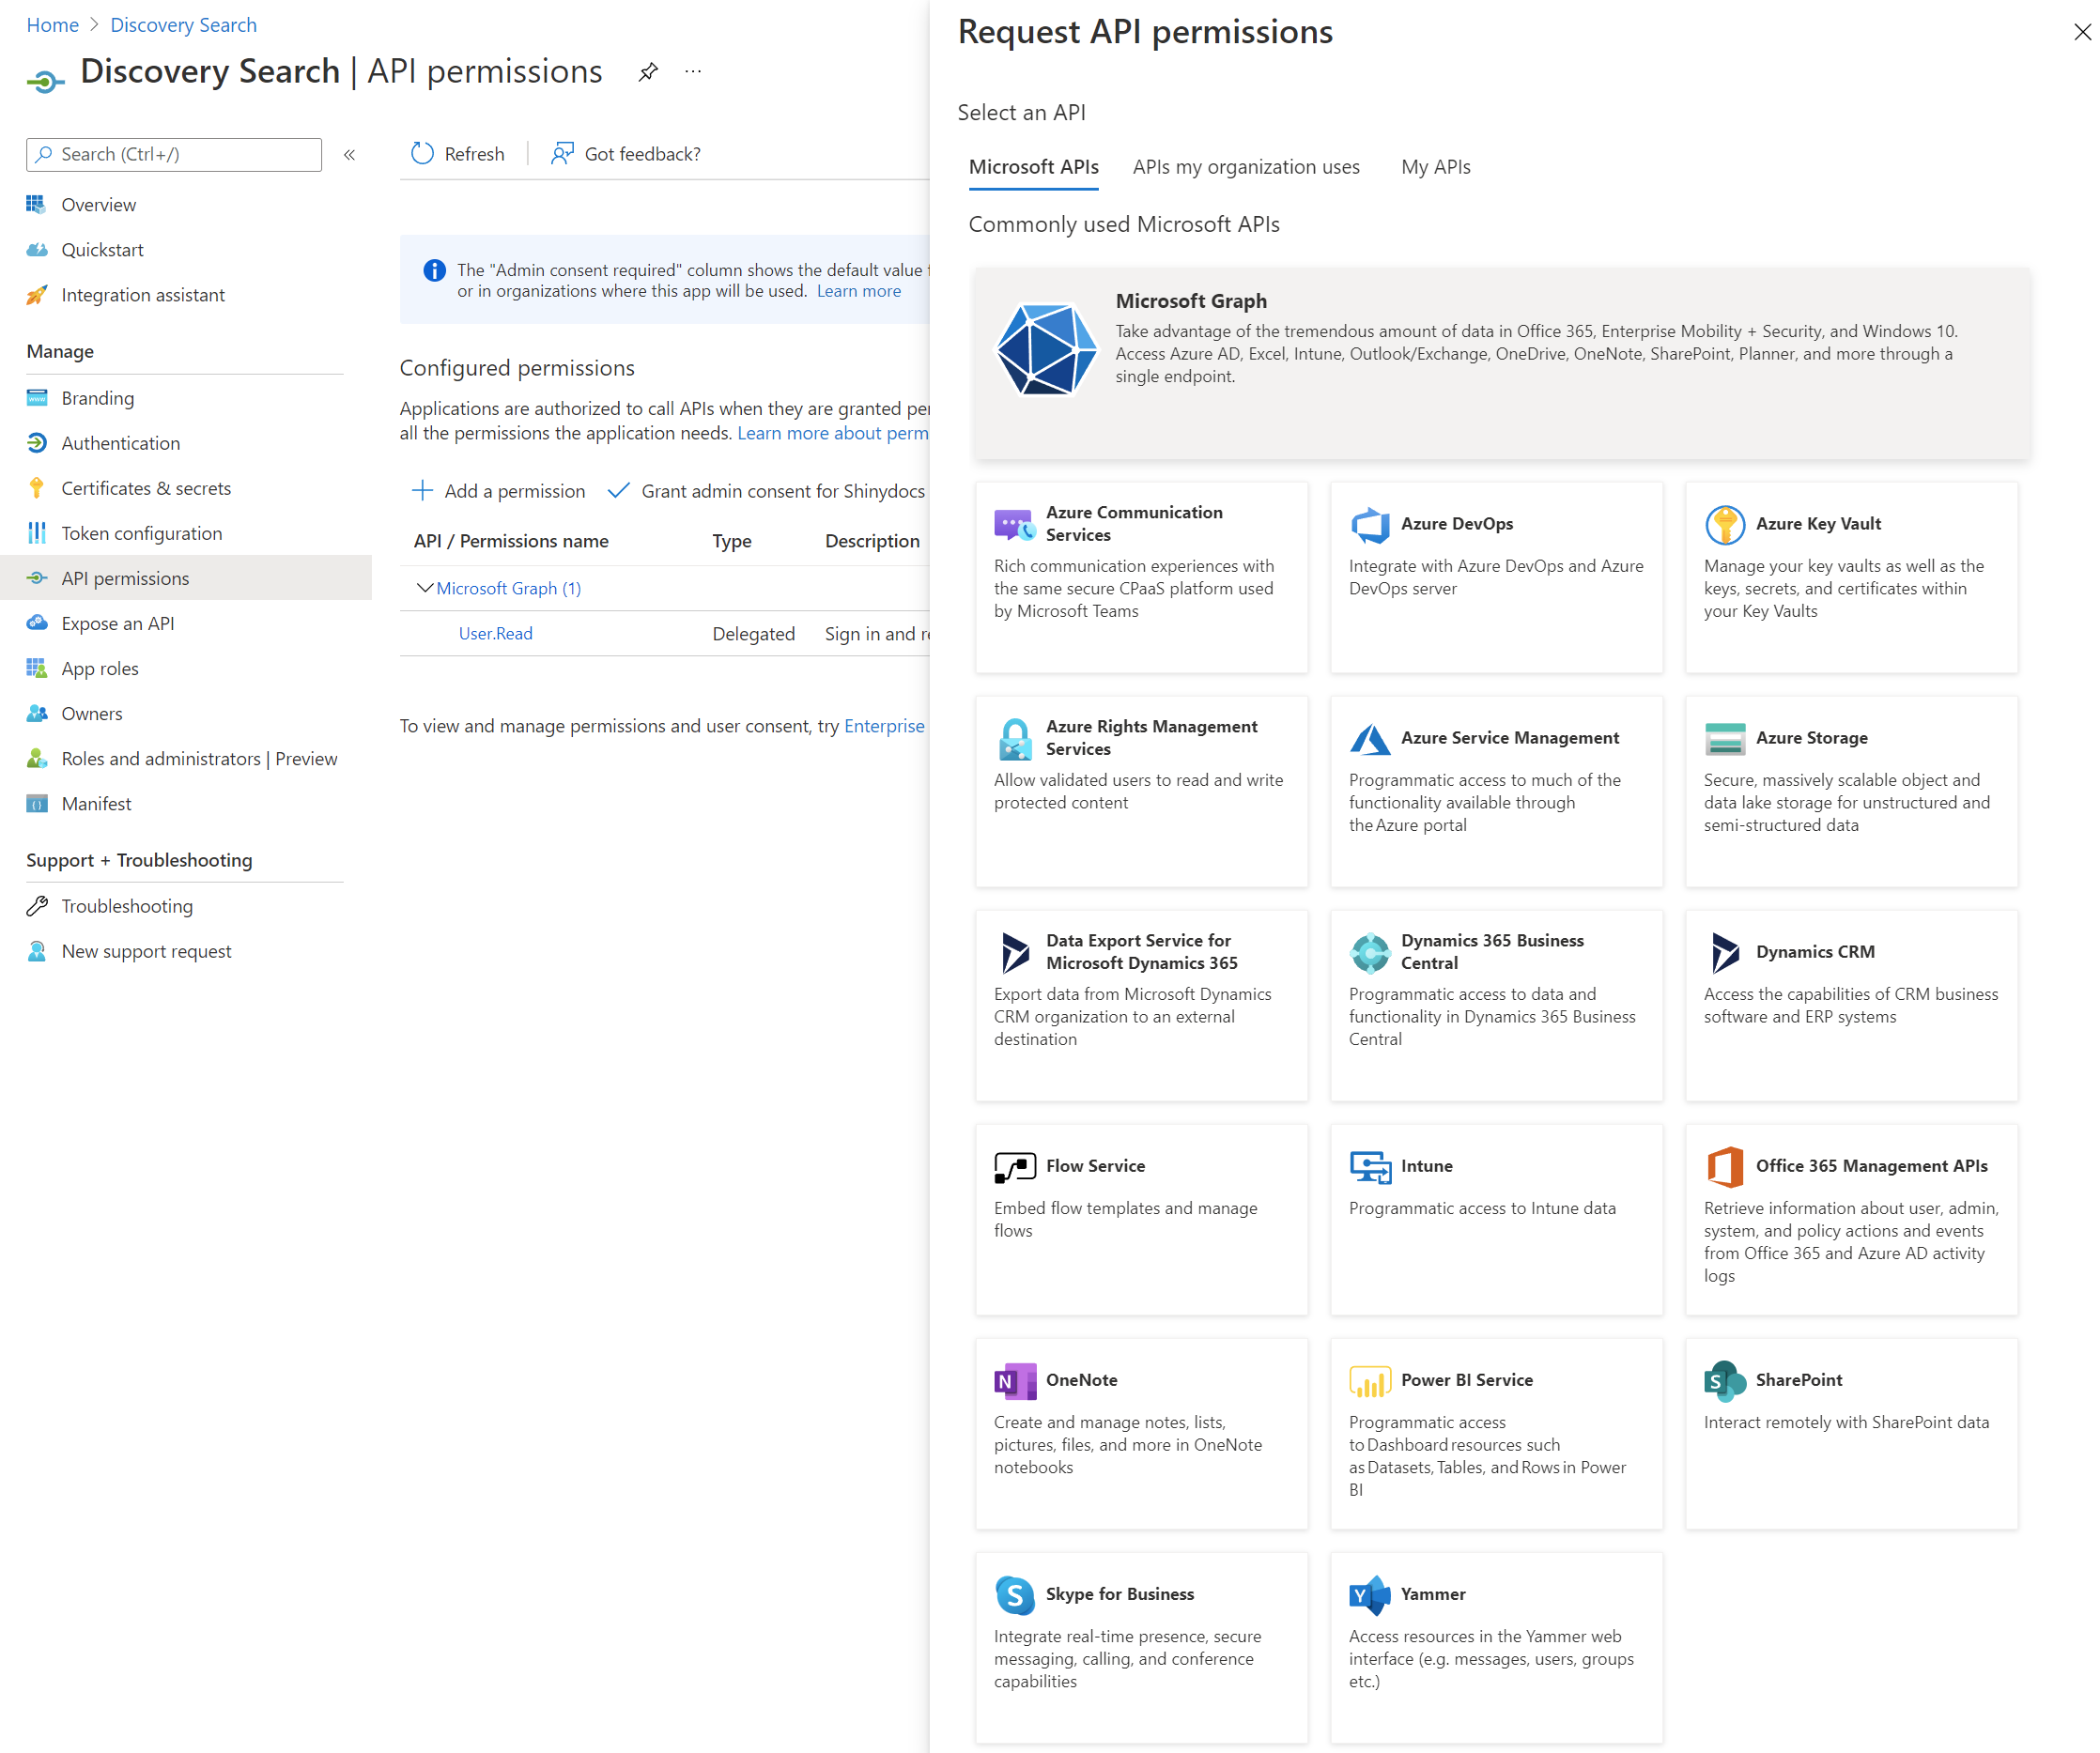
Select Microsoft Graph and select Delegated permissions (Your application needs to access the API as the signed-in user)
offline_access: This is used to generate an OAuth refresh token so that the user does not need to authenticate for each search request.
openid: Allows users to sign in to Azure AD.
profile: Allows users to sign into Azure AD.
User.Read: Allows users to sign in to Azure AD.
Click Add permissions
Click Add a permission again
Select SharePoint and select Delegated permissions (Your application needs to access the API as the signed-in user)
AllSites.Read: This allows the signed in user to view any sites and their contents to which they have access. This allows Discovery Search to execute the permissions check.
Click Add permissions
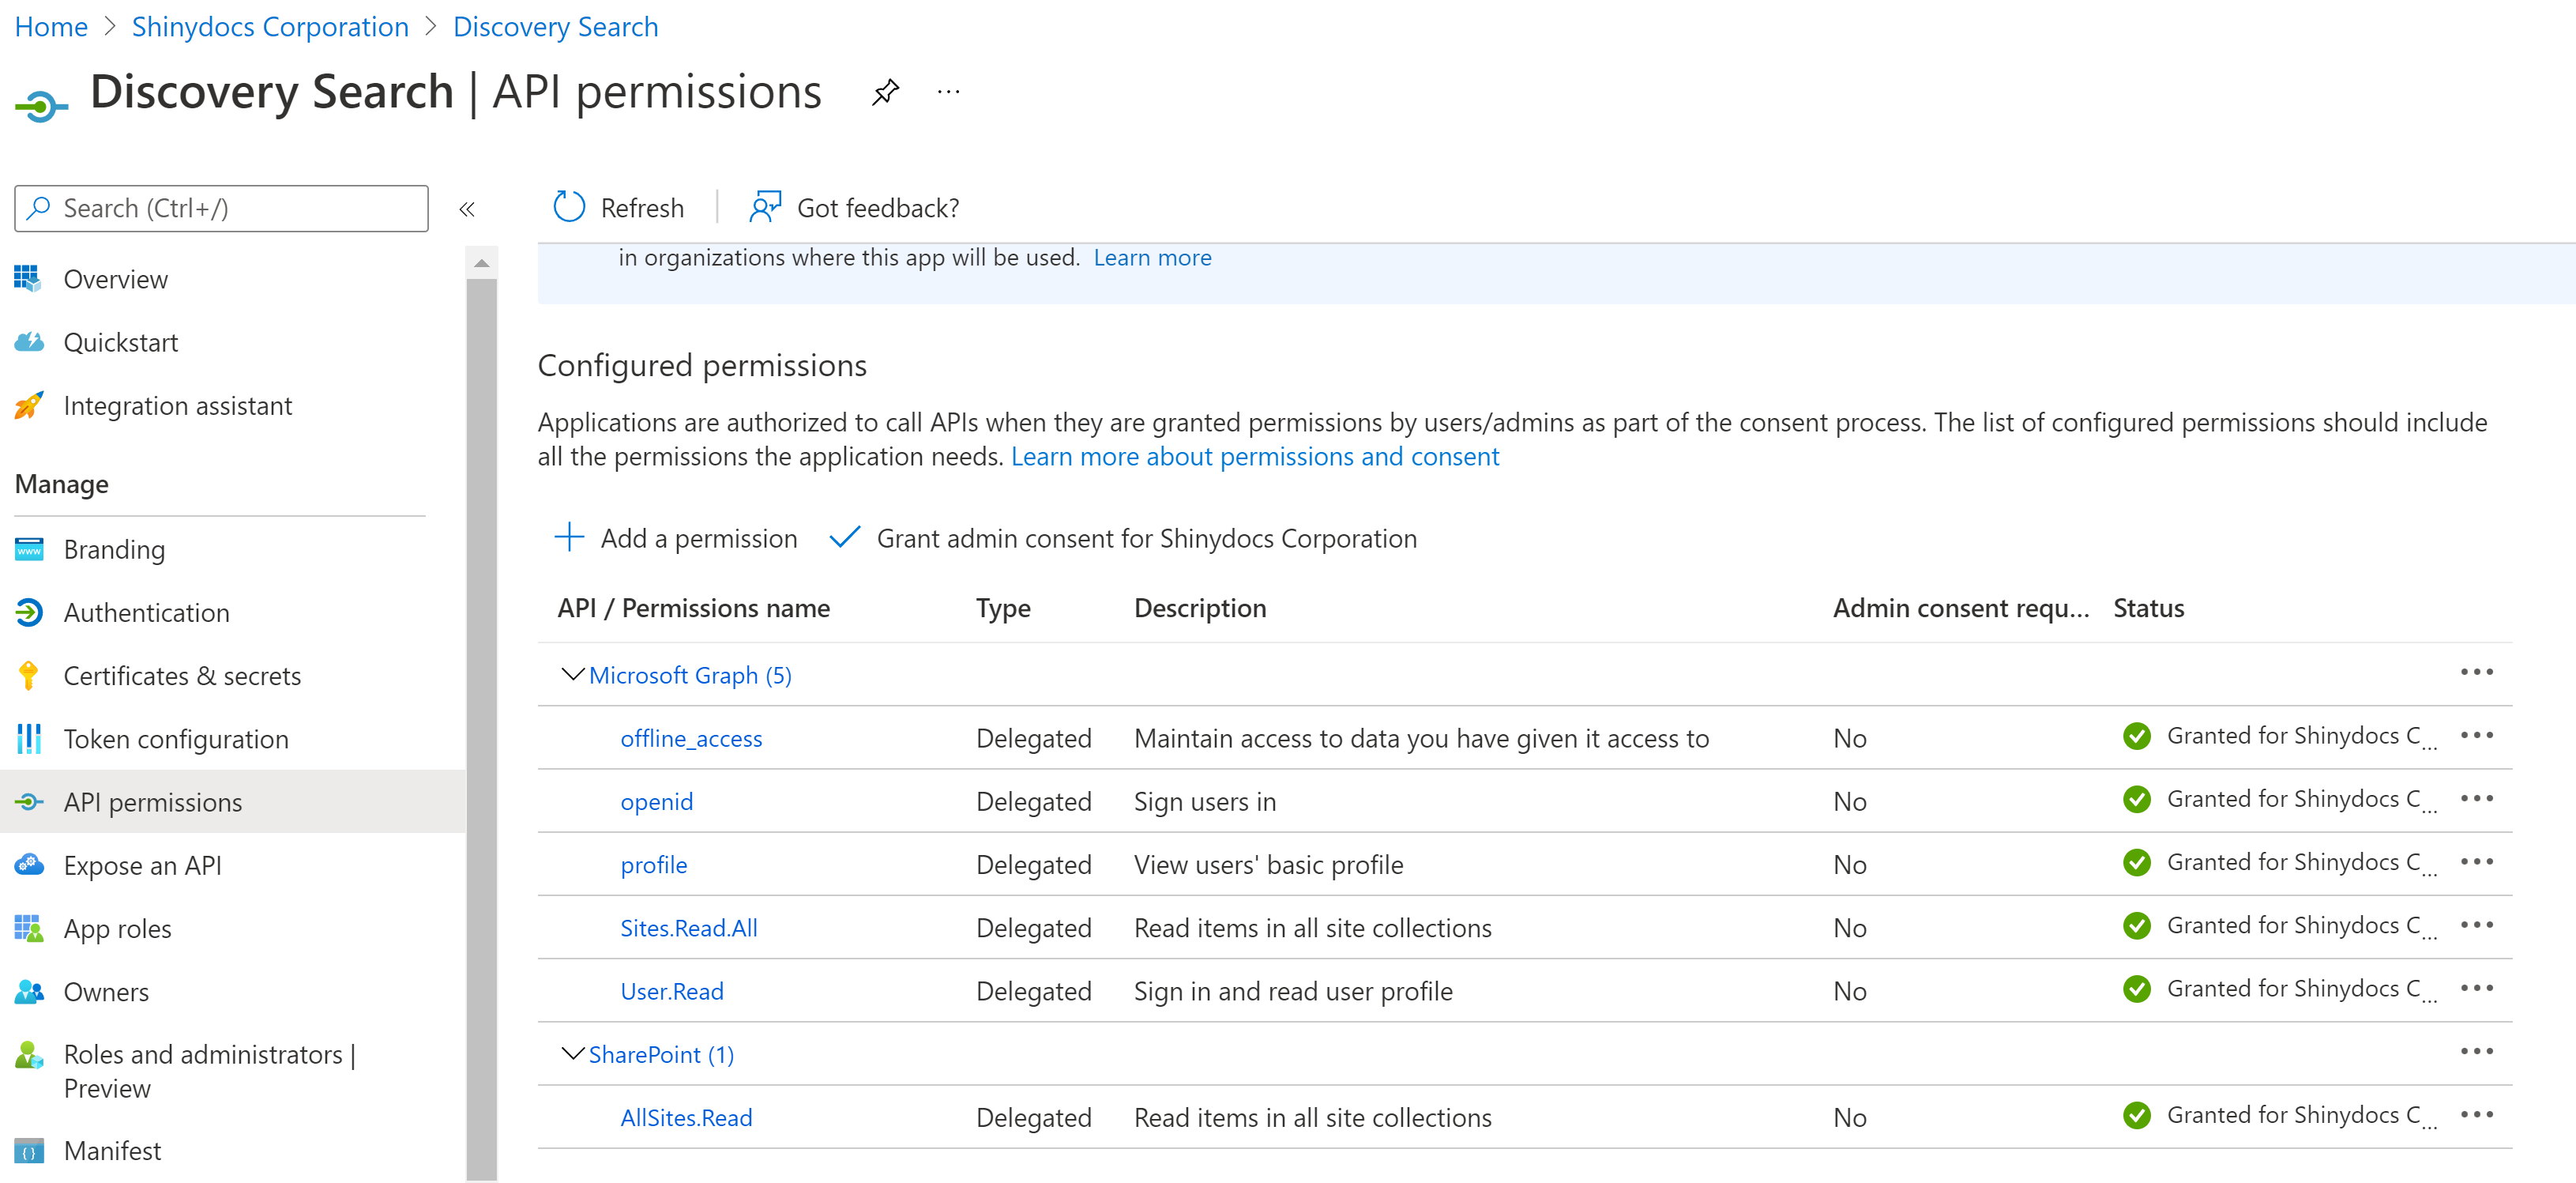
Click Grant admin consent for <Organization Name>
The final result should look like this:
Configure SharePoint
As a SharePoint Administrator, go to the following URL: https://<tenant>-admin.sharepoint.com/_layouts/15/appinv.aspx
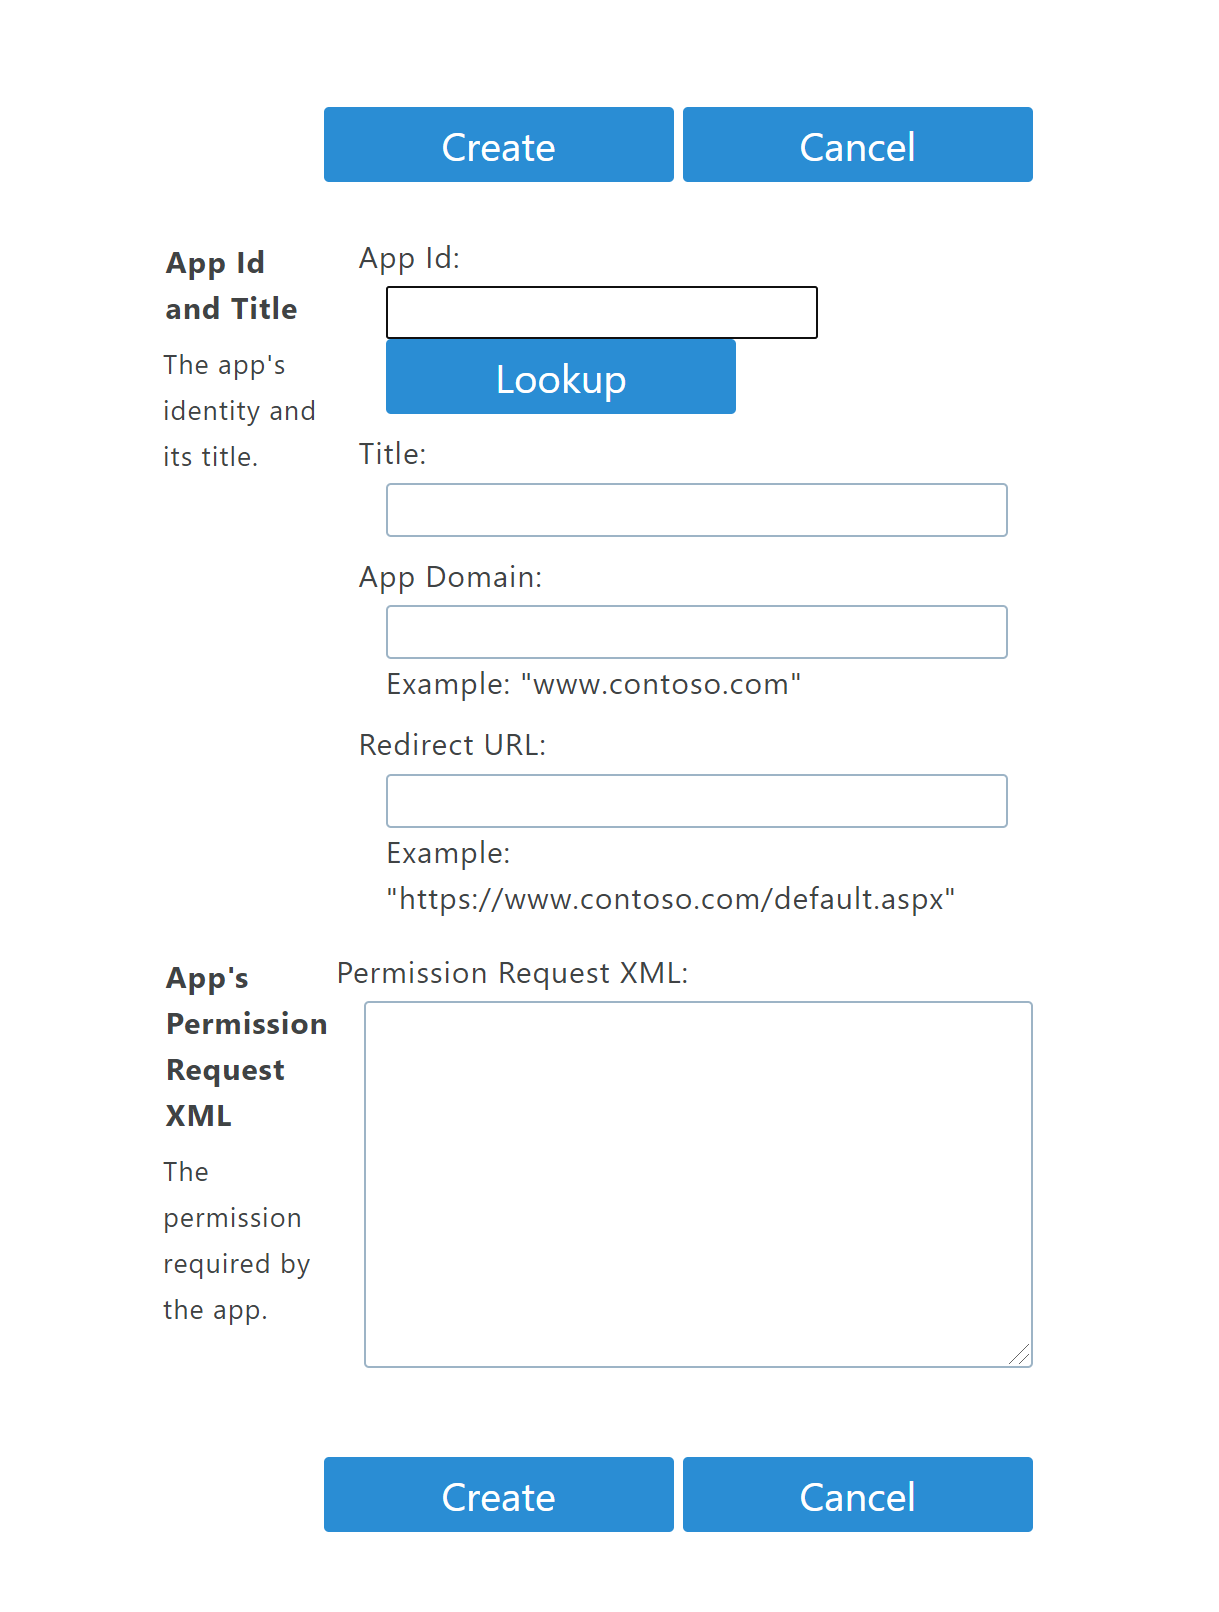
Fill in the App Id with the value from the Application (client) ID from the App registration created above
Click the Lookup button to lookup the rest of the details
Fill in the App Domain with your top level domain (for example, shinydocs.com)
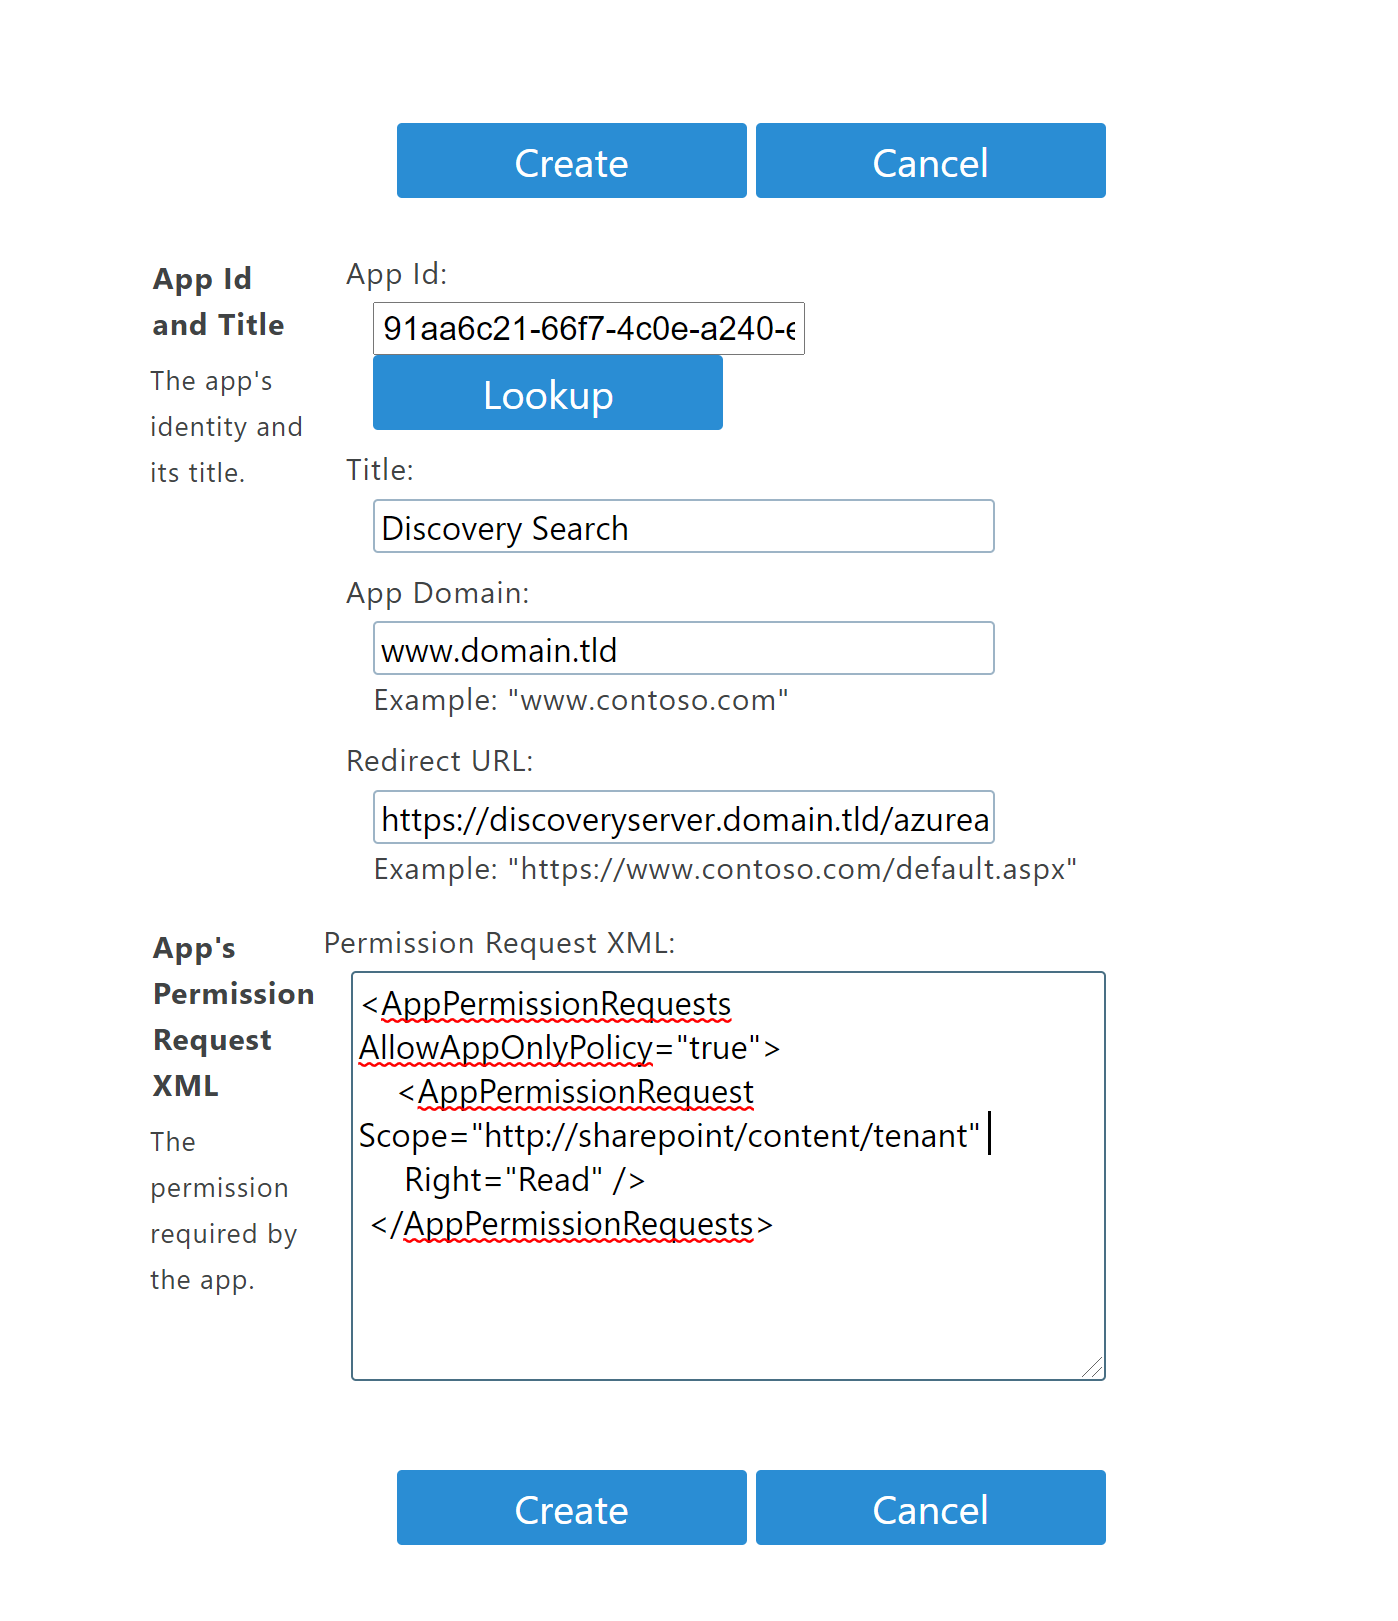
Fill in the Permission Request XML with the following code
CODE<AppPermissionRequests AllowAppOnlyPolicy="true"> <AppPermissionRequest Scope="http://sharepoint/content/tenant" Right="Read" /> </AppPermissionRequests>
The AppPermissionRequests section is granting Read access to the SharePoint site for the app registration setup. This can be pasted as is. the user’s permissions will be respected with this setting.
The final result should look like this:
Connect Discovery Search to SharePoint
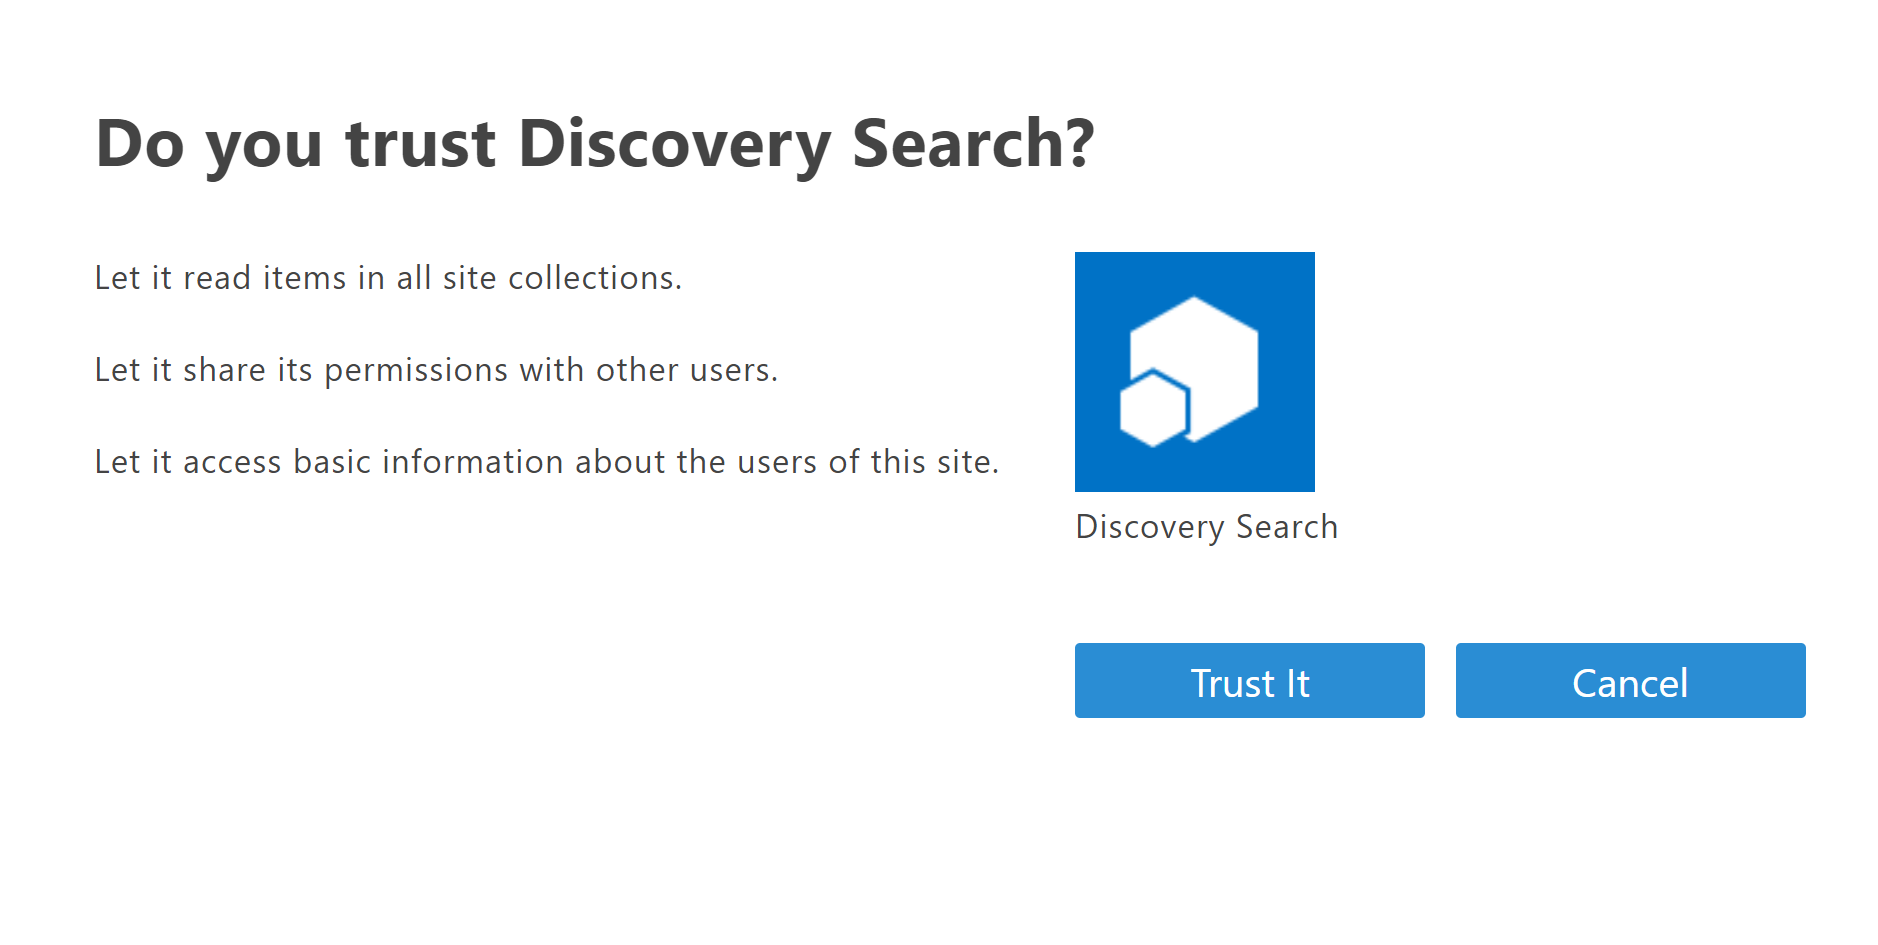
Click the Create button to create the association between SharePoint and the App registration.
You should be prompted with the following confirmation. Click Trust It to complete the registration.
Configure Discovery Search
This section describes how to configure Discovery Search to authenticate against Azure AD, enabling search of SharePoint Online.
Navigate to the admin page in Discovery Search (for example, http://server/admin)
Select Application settings at the bottom of the navigation sidebar
Select SharePoint® Online settings
Fill in the following settings
SharePoint® Online site URL: The URL to your SharePoint online instance (for example, https://tenant.sharepoint.com).
Permission chunk size: The number of index items that are permission checked upon retrieval from the index.
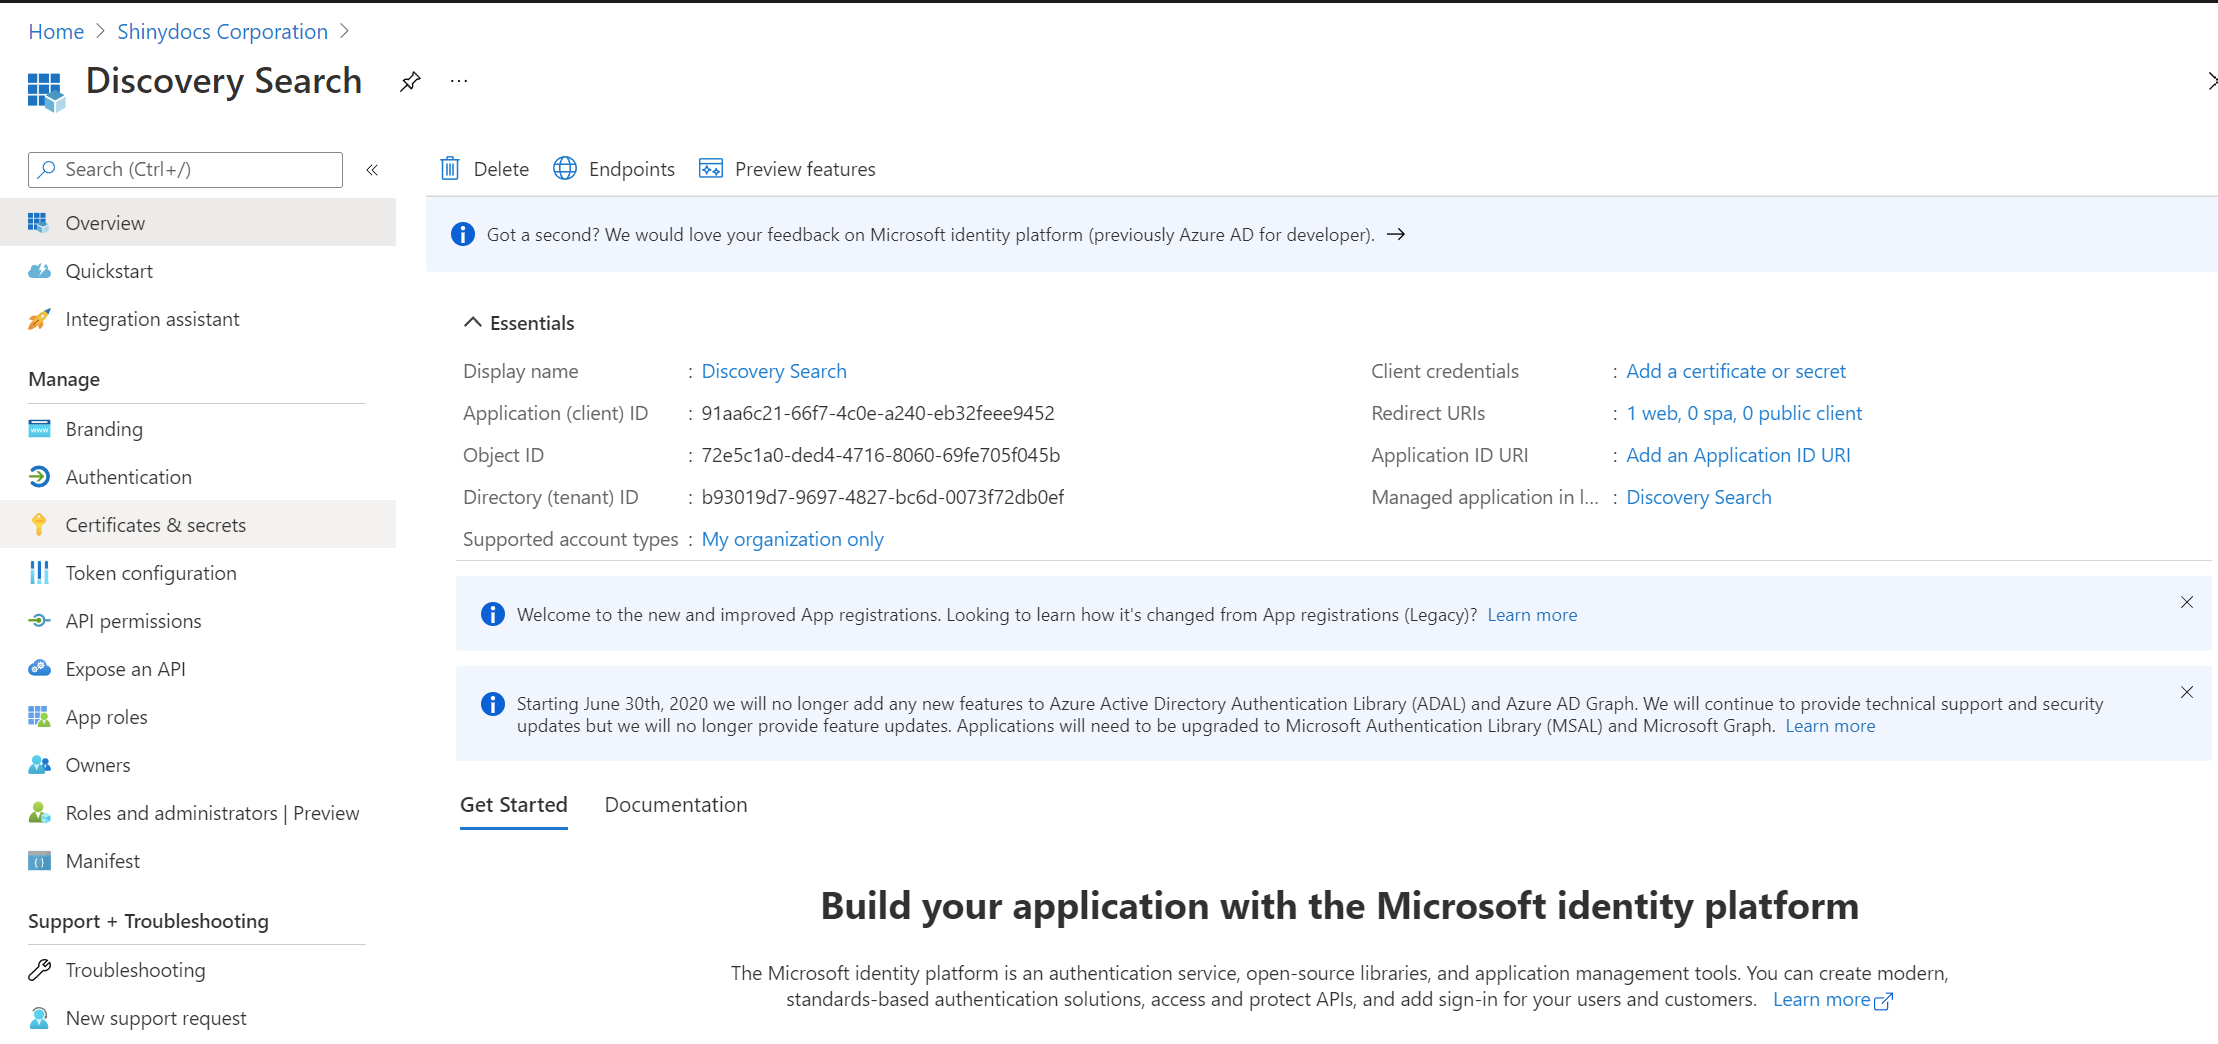
Azure AD client ID: This can be found on the overview page of the App registration in the Azure portal.
Azure AD tenant ID: This can be found on the overview page of the App registration in the Azure portal.
Azure AD secret: This is the value of the secret that was created above. If you did not copy it at the time, you will need to create a new one.
Azure AD Redirect URL: This is the URL that Azure AD will redirect to once the user is authenticated properly. This should be in the form of http://server/azuread/success. This should match the one added to the Authentication page in the Azure portal as documented above.
Save changes
Restart the Discovery Search application in IIS
Increasing the Permission chunk size value may improve performance, however it runs the risk of being throttled by SharePoint online.
Test the Configuration
This section describes how to test the integration of Discovery Search with SharePoint online.
An index of the SharePoint data must exist before Discovery Search can be used to find documents. Ensure a crawl with Shinydocs™ Cognitive Toolkit against the SharePoint instance has been completed before testing.
Navigate to the Discovery Search homepage
Click the dropdown menu in the top right corner
Click the Reconnect option under SharePoint Online
This will pop open a new window and prompt you to login
Once the user has logged in, they will be shown a success screen
Close the popup window
Execute a search from the Discovery Search bar for items that are in SharePoint online
If you are already logged into Azure AD, the login prompt in step 4 will be skipped.