Using the Review Application
Overview
Shinydocs™ Review is a web application that allows you to validate and modify automatically classified documents before starting the automated workflow.
Accessing Review
Your administrator will provide you with the URL to the Review homepage. We recommend that you bookmark this page.
Viewing Records
When you first open Review, the homepage loads all the documents that have been entered into the system and automatically recognized.
In the bottom right corner, adjust the number of records visible on the page by adjusting the number of rows per page.
Completeness Gauge
On the far right side, there is a Complete? column. This shows how many fields are prepopulated with metadata, indicating how complete the data is for a given document.
You can also filter documents based on this completeness gauge.
Duplicate Document Detection
Shinydocs Review automatically detects duplicate files that reside in the same index. If configured, the Workflow Service can detect duplicate files in Content Server, that span multiple indices. Read Configuring Duplicate File Detection in Multiple Indices to learn how to configure this feature.
Duplicates are files that contain the exact same content. Similar documents do not qualify as a duplicate. To be considered a duplicate the document must have the exact same data and content.
Duplicate detection relies on preliminary steps being completed, using Shinydocs Cognitive Toolkit, while connected to a Content Server. While connected, Cognitive Toolkit is employed to:
Run an initial crawl scan to index the Content Server data.
Run a second scan to extract text and apply a hash. In this second scan each file is assigned a hash value. Identical hash values indicate identical files, or duplicates.
Once these preliminary steps are completed, Review can report duplicates, identify documents, and predict document properties.
If a document is not flagged as a duplicate, it means that at least one element within the document is different. The difference may be minor or trivial. During Review, these documents can be rejected with any reason, including “Duplicate”, to indicate the identification for future reference.
If the Content Server is not indexed, Review can only be used as an interface through which users can manually update document properties.
If a hash scan is not completed duplicates cannot be detected.
If text is not extracted documents cannot be identified and document properties cannot be automatically populated, based on document definitions.
Viewing Duplicates
A duplication symbol is displayed to the left of the filename in the Review homepage.

When you are reviewing an individual document that is a duplicate, a Duplicate Document alert is displayed at the top of the document properties panel.
Cleaning Up Duplicates
When one or more duplicates have been detected for a single document, a View duplicates button is displayed at the top of the Document Information panel (right side panel).
Click the View duplicates button or the duplication symbol to access a list of all duplicates.
Select one or more documents deemed eligible for rejection.
Select a rejection reason in the Reason field.
Click Reject.
The selected reason will be tied to the document’s metadata.
Documents that have been put on hold by another user or that have been previously rejected will not apply to this workflow.
Filtering Records
Filtering can help you narrow down a list of records.
Click the Filters button in the top right corner
Enter filter criteria in one or more fields in the row above the list
The list is updated as you enter criteria
Selecting Records for Review
Select one or more items by clicking the checkbox to the left of each item.
Click the top-left checkbox next to File Name to select all records.
Click Review selected in the top-right corner of the page.
Reviewing Records
The left side of the review landing page contains a document preview pane.
The number of records selected to review is displayed in the upper right corner of the Review homepage. In the example below, there are 3 records being validated. Scroll through each of the 3 records using the Next button in the top right corner.
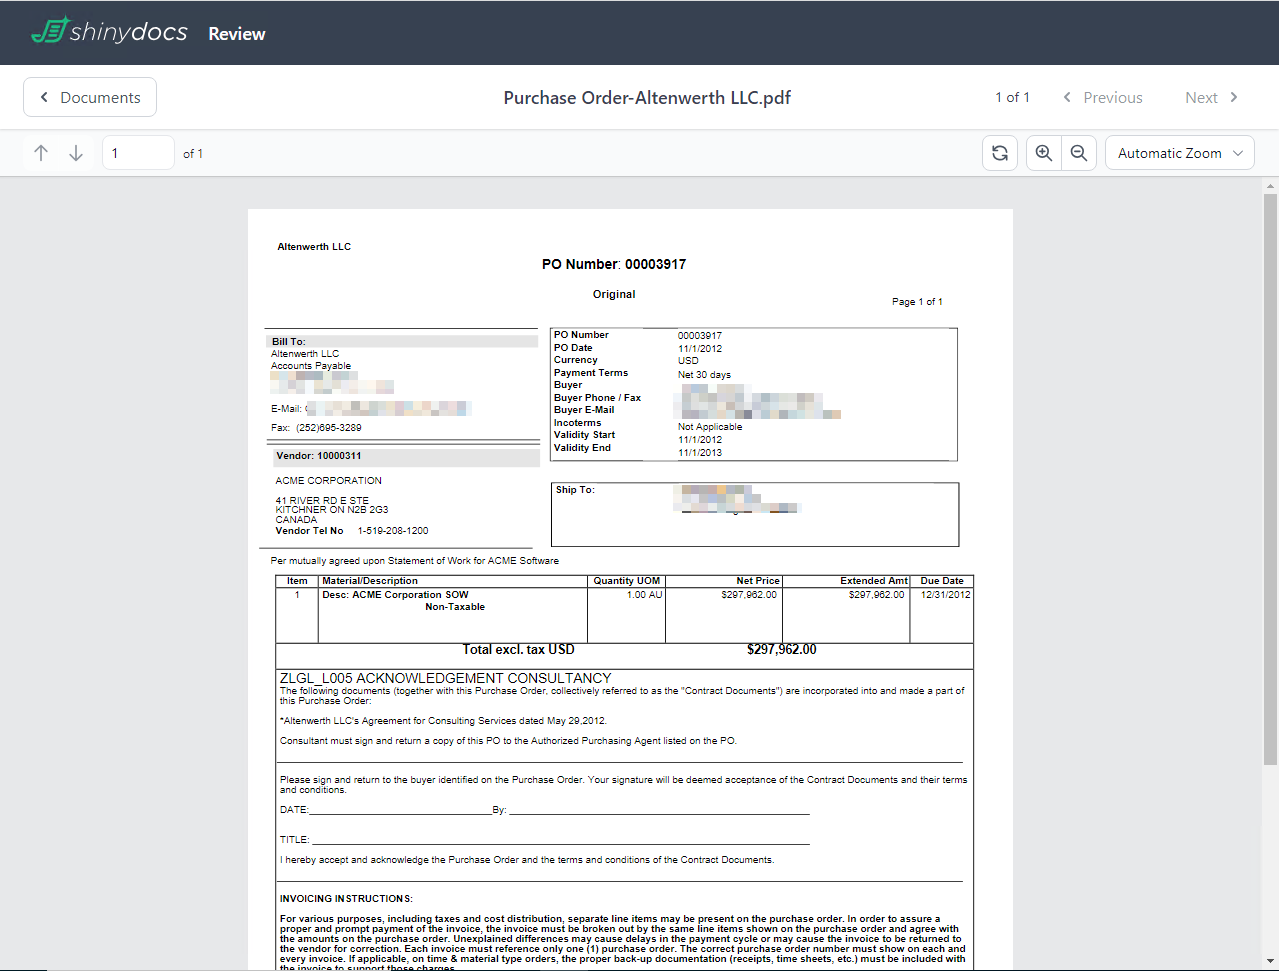
The right side of the review landing page displays document properties; key information that has been automatically identified and extracted from the full text of the item being reviewed.
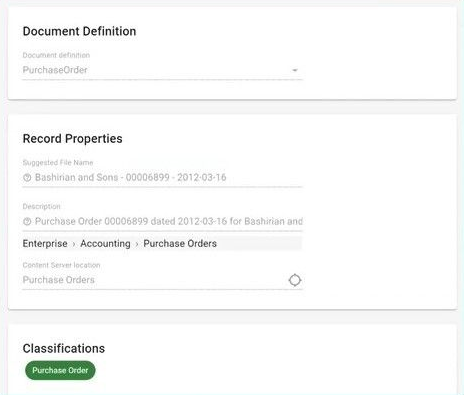
Document Definition: The item has been automatically identified to be this specific document type based on a given model.
Record Properties: The item includes a suggested file name, description, and location for storing it.
Content Server Location: Entering the Content server location prompts Review to automatically check for files with the same name within the destination folder. A Duplicate in Destination warning is displayed if a document with the same name already exists in the selected folder.
Classifications: The item has this classification assigned to it.
Categories & Attributes: The item has this metadata assigned to it.
Editing Records
To edit document properties that are displayed to the right of the preview pane, click the Check out button in the top right corner. The document properties are now in edit mode.
Review any of the document properties and update as desired.
Review Actions
Checking out a document makes 3 workflow actions available: Publish, Save draft, and Reject.
Publish
Publishing an item:
Saves any changes made during the edit mode of Review
Moves the item to the Content Server Location entered during the edit mode of Review
When should you publish an item?
This item has been validated. I’m ready to approve and move it into the ECM!
OR
I’m finished editing this item. I’m ready to approve and move it into the ECM!
To publish a record to the ECM, click Publish. A dialog box is displayed confirming that you wish to publish.
Click Publish again to move the document to the location specified in the Record Properties dialog.
Save draft
Saving a draft:
Saves any changes made during the edit mode of Review
Sets it to a reserved state, preventing it from being checked out by others
When should you save a draft?
I’m still going to work on this item. I’ll come back to it later.
OR
I’m done making my edits, but I have a coworker who also needs to review this item.
To save your changes without publishing, click Save draft.
Click the Check in button on the top-right corner of the review landing page. The document is returned to the list of documents ready for review, allowing others to check it out or you to return to work on it later.
If you save your edits without checking the document back in, the document is marked as reserved in the list of records ready for validation. Others will be able to see that you are still working on that item, but no one else will be able to work on it until it has been checked in.

Reject
Rejecting an item:
Saves the rejection reason, entered during the edit mode of Review
Moves the item to the Unknown folder
When should you reject an item?
This document type was incorrectly identified.
To reject a record, click Reject. A dialog box will appear requesting a reason for rejection.
Select a reason (Duplicate, Draft, Rescanning Required, or Other). If Other is selected, enter a custom rejection reason.
Confirm by clicking Reject.
The rejection reason will be logged in the index and available through a dashboard visualization.
Once you have finished reviewing all your selected documents, a dialog box is displayed asking if you want to publish any unpublished documents. You have an opportunity to view any unpublished documents again or to return to the Review homepage.
Destination
Log in to your ECM and navigate to the location identified in the Record Properties dialog (see Figure 4) during Review. Documents that have been validated and published are found here.
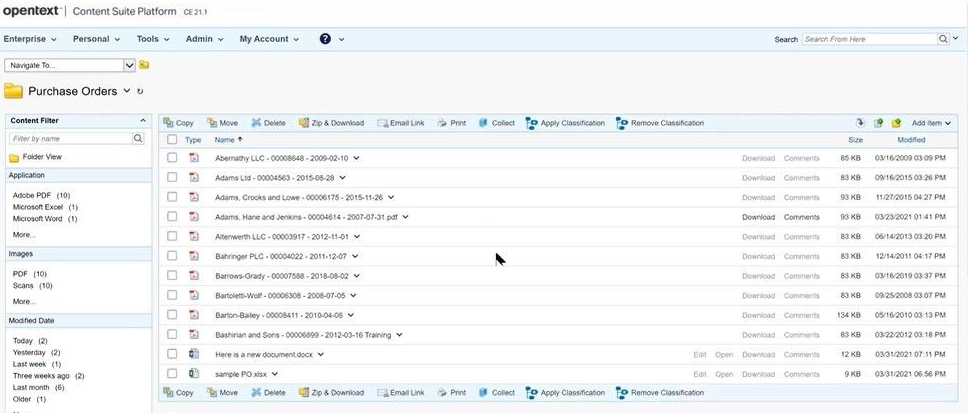
Click the down arrow next to the filename of one of the items published.
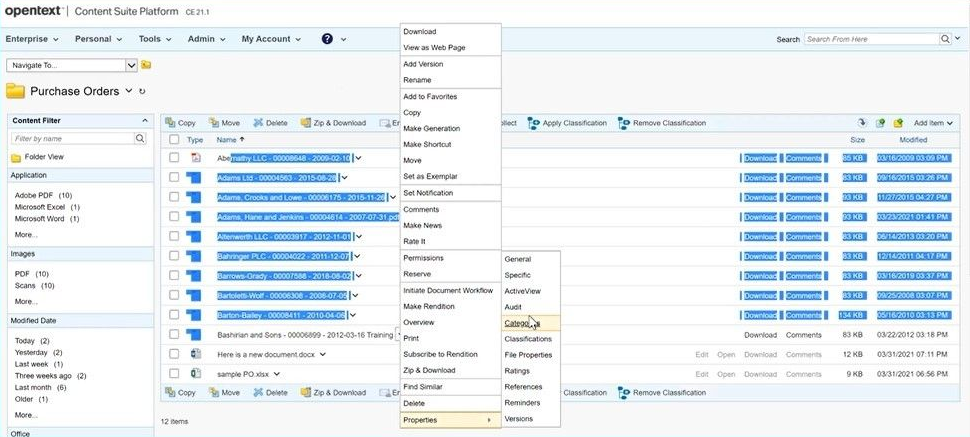
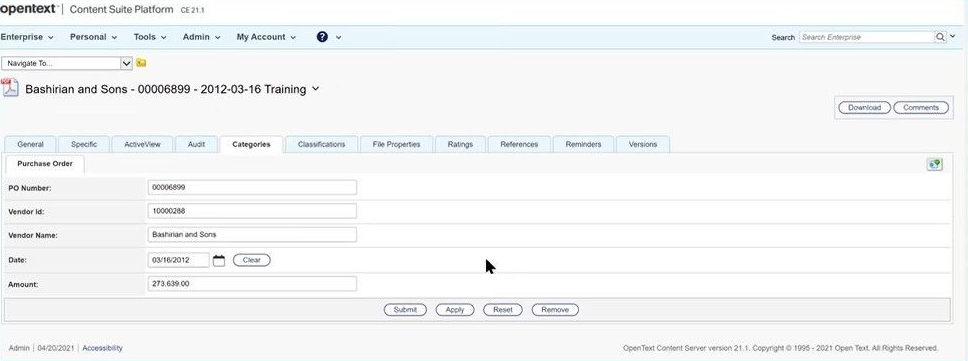
Select Properties > Categories.
In the example below, all the information reviewed is now within the Purchase Order category, with the five attributes assigned:PO Number
Vendor ID
Vendor Name
Date
Amount
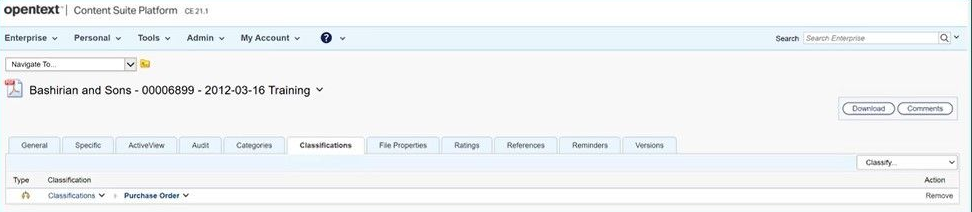
Click the Classifications tab to see that the item has been classified as a Purchase Order.
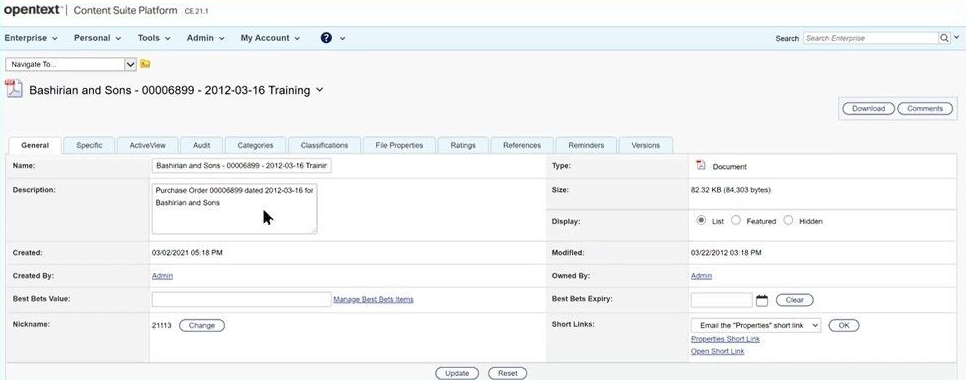
Click the General tab to see that the item name and description approved through the review are saved here.
Congratulations! You have successfully reviewed, validated and published using Review!