Search Configuration for NetDocuments
Shinydocs Streamlined Search can integrate with NetDocuments to enforce real-time permission checks on search results. In this guide, you’ll create an application in the NetDocuments Support portal and use the credentials from that registration to complete the setup in Shinydocs Control Center.
NetDocuments Streamlined Search App Registration
To register the Search application with OAuth support, you will need to add a new application to your NetDocuments Support account. NetDocuments needs to manually approve the application which can take 15-20 minutes.
Login to NetDocuments Support and go to the developed applications section (Developed Applications)
Click New Application.

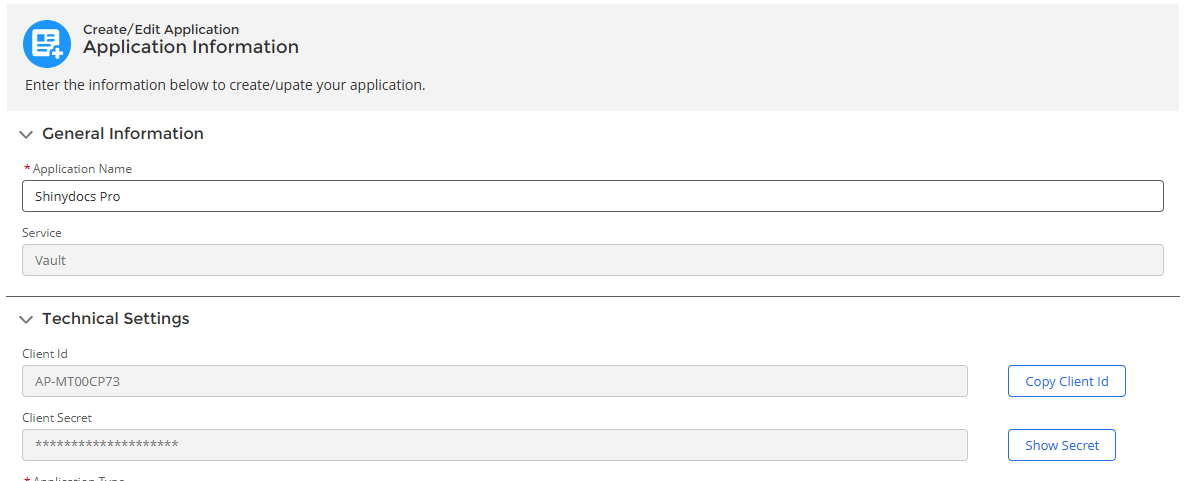
Fill out the following information in the Application Information fields:
Application Name:
Shinydocs SearchService:
VaultApplication Type:
RestClient Type:
Confidential (Supports Authorized Code Grant flow)Description:
Shinydocs Search applicationRedirect URI: Replace
<ShinydocsServerHostname>with your Shinydocs Server hostname or FQDNhttps://<ShinydocsServerHostname>:9701/oauth/netdocuments/authorizedAdditional Redirect URIs:
urn:ietf:wg:oauth:2.0:oobndoffice://OAuthCallbackhttps://oauth.pstmn.io/v1/browser-callbackhttps://localhost:9701/oauth/authorizeReplace
<ShinydocsServerHostname>with your Shinydocs Server hostname or FQDNhttps://<ShinydocsServerHostname>:9701/oauth/authorized
Click Submit for Approval.
You will need to wait for the application to be approved by NetDocuments. Once approved, you will be able retrieve the Client Id and Client Secret.

In Shinydocs Control Center
With the application registered in NetDocuments, you can now configure Shinydocs Control Center to use OAuth for real-time permission checking in Shinydocs Enterprise Search.
Either when adding a new NetDocuments source or editing and existing source:
Select Protected - OAuth2 in the Search Authentication Type field
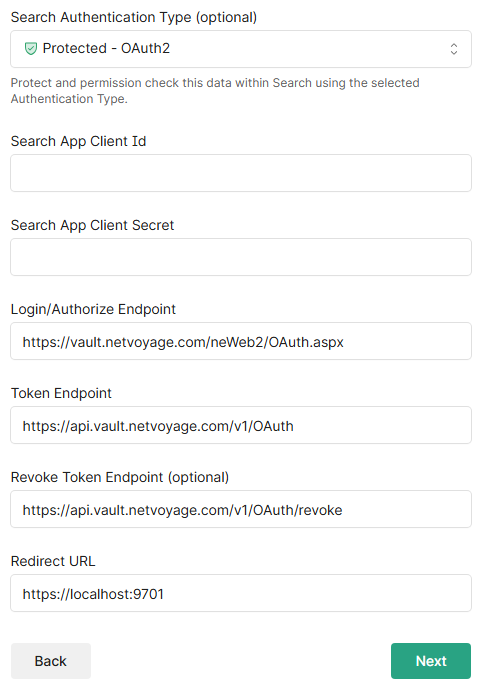
Enter the following values
Search App Client Id: <Client Id from approved app registration>
Search App Client Secret: <Client Secret from approved app registration>
Login/Authorize Endpoint: https://vault.netvoyage.com/neWeb2/OAuth.aspx
Token Endpoint: https://api.vault.netvoyage.com/v1/OAuth
Revoke Token Endpoint: https://api.vault.netvoyage.com/v1/OAuth/revoke
Redirect URL: The same Redirect Url provided to the app registration (e.g.
https://<ShinydocsServerHostname>:9701/oauth/netdocuments/authorized)
Continue with the source setup, or if this is an existing source, save your changes.