Configure Shinydocs Pro Control Center access for NetDocuments
Requirements
A NetDocuments account with administrator rights
Internet connection
Shinydocs Pro installed
Creating a Shinydocs Service Account in NetDocuments
Creating and Mapping the Service Account
NetDocuments requires an internal service account that is mapped to the Shinydocs application.
In the NetDocuments Admin Console, select Users & Groups.
Click Add User.
In the Add User popup, enter the email address for the new service account user and click OK.
In the Details tab, enter the required details and any additional details you would like to add to the account. Then, select these options near the bottom of the window:
User type: Internal
Repository admin type: Full
Other options: Non-Interactive Application Service Account
Click the Save button.
Navigate to the Service Accounts tab in Users & Groups and click the Create Service Account button.
Enter the email address you provided in Step 3, and click the Create button.
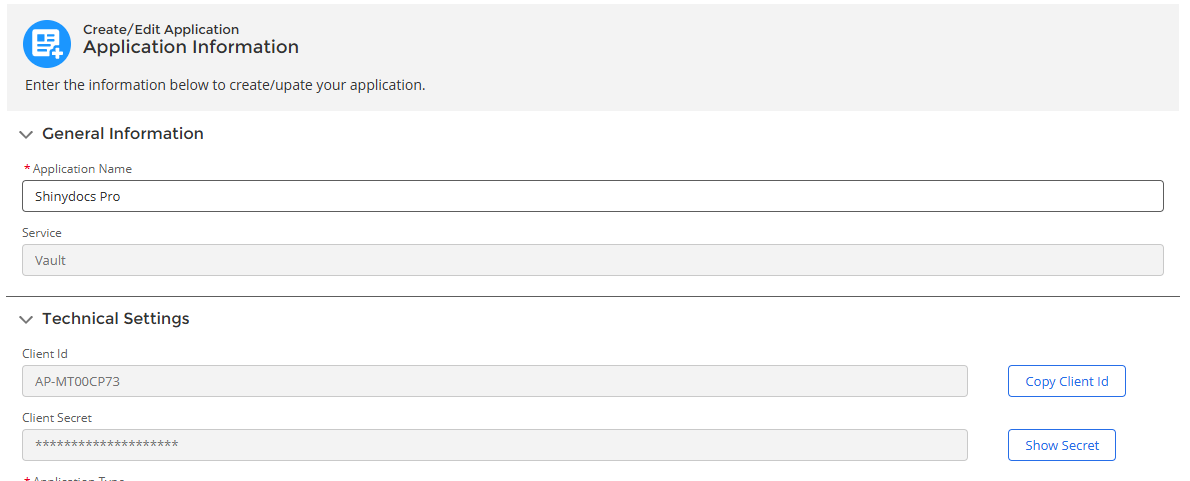
Enter the Client ID:
AP-MT00CP73and click the Create Mapping button.Click the Save button.
On the NetDocuments Cabinets page, select the cabinet to map to the service account
You will need to repeat this process for each cabinet you want to analyze
Go to the Cabinet Administrators and add the service account you created as a cabinet administrator.
Ensure the created service account has DEFAULT rights to your selected cabinet.
Gather your NetDocuments Repository ID
With the application registered and the service account created and mapped, you will need to gather your NetDocuments Repository ID. This ID will be used in the Shinydocs Pro NetDocuments configuration.
In the NetDocuments Admin Console, go to Information and Settings
In the General section, copy the ID displayed (ex. AB-CDE1FGH2), which is your NetDocuments Repository ID.
Shinydocs Pro can analyze all cabinets it has access to or you can provide specific Cabinet IDs. If you want to use Cabinet IDs, gather those now.
NetDocuments Search App Registration
To register the Search application with OAuth support, you will need to add a new application to your NetDocuments Support account. NetDocuments needs to manually approve the application which can take 15-20 minutes.
Login to NetDocuments Support and go to the developed applications section (Developed Applications)
Click New Application.
Fill out the following information in the Application Information fields:
Application Name:
Shinydocs SearchService:
VaultApplication Type:
RestClient Type:
Confidential (Supports Authorized Code Grant flow)Description:
Shinydocs Search applicationRedirect URI: Replace
<ShinydocsServerHostname>with your Shinydocs Server hostname or FQDNhttps://<ShinydocsServerHostname>:9701/oauth/netdocuments/authorizedAdditional Redirect URIs:
urn:ietf:wg:oauth:2.0:oobndoffice://OAuthCallbackhttps://oauth.pstmn.io/v1/browser-callbackhttps://localhost:9701/oauth/authorizeReplace
<ShinydocsServerHostname>with your Shinydocs Server hostname or FQDNhttps://<ShinydocsServerHostname>:9701/oauth/authorized
Click Submit for Approval.
You will need to wait for the application to be approved by NetDocuments. Once approved, you will be able retrieve the Client Id and Client Secret.

Add NetDocuments to Shinydocs Pro
Once you have created the Shinydocs Service Account in the NetDocuments Admin Console, and mapped it to the cabinets you wish to analyze, you are ready to make the connection and start analyzing your content.
In either Quick-Start or + Add Source, select NetDocuments as your source
On the next page, Shinydocs Pro will ask you for the following information
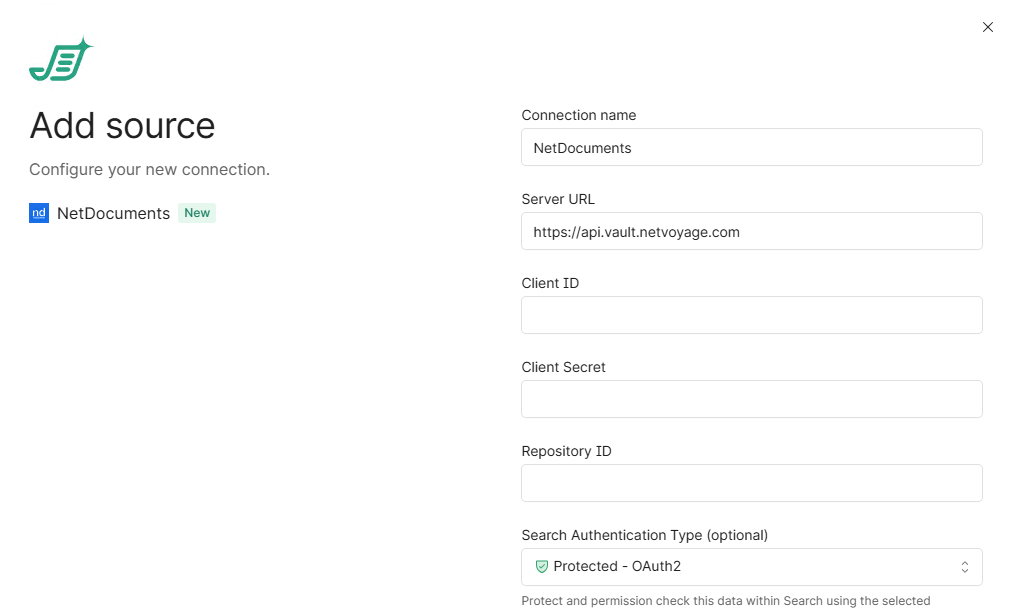
Name: Provide a name for the source, this name will be used in Shinydocs Pro to differentiate from other sources.
Server Url: Enter the URL for NetDocuments, this is typicallyhttps://api.vault.netvoyage.com
Client Id:AP-MT00CP73
Client Secret:DvMnrCCHfPCeVbyKqyrJ2MovRWy2k5Nu53mYx9aQb9p5EOOr
Repository ID:Your NetDocuments Repository ID
Example:AB-CDE1FGH2Select Protected - OAuth2 in the Search Authentication Type field
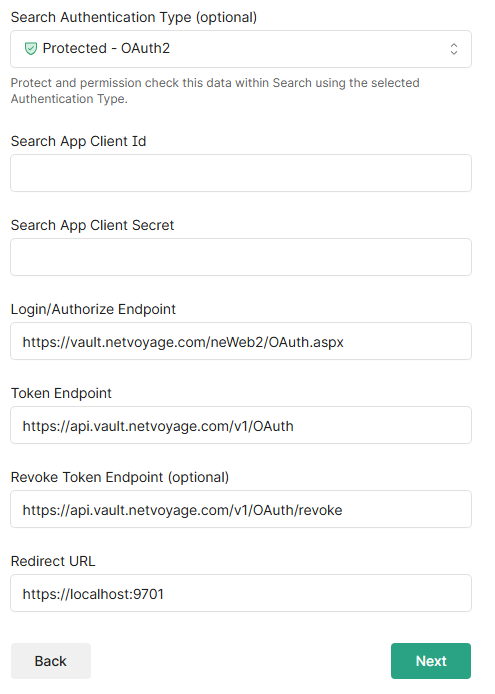
Enter the following values
Search App Client Id: <Client Id from approved app registration>
Search App Client Secret: <Client Secret from approved app registration>
Login/Authorize Endpoint: https://vault.netvoyage.com/neWeb2/OAuth.aspx
Token Endpoint: https://api.vault.netvoyage.com/v1/OAuth
Revoke Token Endpoint: https://api.vault.netvoyage.com/v1/OAuth/revoke
Redirect URL: The same Redirect Url provided to the app registration (e.g.
https://<ShinydocsServerHostname>:9701/oauth/netdocuments/authorized)
Click Next
Optionally, enter the Cabinet ID of the NetDocuments cabinet you wish to crawl. If you do not enter an ID, all cabinets will be crawled where permissions are granted to Shinydocs.
Click Start Analysis to begin the crawl.
Congratulations, you have connected Shinydocs Pro to your NetDocuments repository! Your crawl will be added to the queue or will start crawling immediately