Configure Shinydocs Pro Control Center access for File System/File Shares
What you are setting up
In this guide, you will be setting up a file system source in Shinydocs Pro (e.g. your file share) for analysis and setting up the connection for permission checking of Search results for your source.
Once complete:
Your file system source will be analyzed by Shinydocs Pro
Files are immediately searchable via Search, enforcing file system permissions on all search results.
Requirements
Service account with at least read access to the file shares to be analyzed.
The service account must be a local administrator on the server Shinydocs Pro Control Center is installed on.
Access to a domain controller OR the ability to run
Get-ADComputer(Active Directory PowerShell module).To install the AD PowerShell module, run (as administrator)
CODEGet-WindowsCapability -Name RSAT.ActiveDirectory* -Online | Add-WindowsCapability -Online
The server Shinydocs Pro is installed on is part of the same domain as the source file system/file shares
UNC path(s) of the file share(s) you want to analyze (\\server\share).
The service account requires interactive logon enabled (Group Policy dependent)
Steps
Getting things ready
Set Shinydocs Control Center service to start as the service account
In Windows, open Services
Right-click on the Shinydocs Control Center service > Properties > Log On
Select This account. Then browse for the Shinydocs service account and enter the password
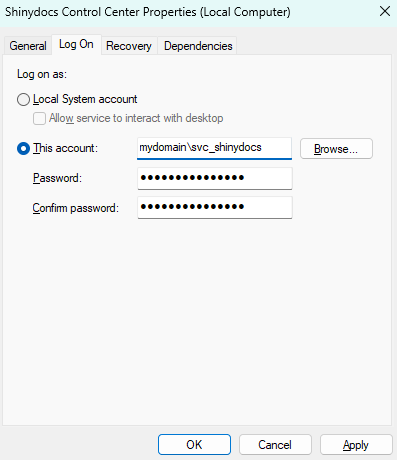
Click OK when complete
Give the service account local permissions to the default certificate that comes with Shinydocs Pro
On the Shinydocs Pro server, open certlm.msc.
In the left panel, expand Certificates (Local Computer).
Navigate to Personal > Certificates.
Right-click the certificate named localhost.localdomain.
Choose All Tasks > Manage Private Keys.
In the dialog, select Add.
Find and select your service account.
Under the Allow column, check Read.
Click Apply, then OK to save.
Register SPNs to allow permission checking
Open CMD as administrator
Run the following command
Replace<hostname>with your server’s hostname.
Replace<domain>\<serviceAccount>with your domain and the name of the Shinydocs service account.CODEsetspn -S HTTP/<hostname> <domain>\<serviceAccount>Verify that the SPNs were set correctly by running the command
CODEsetspn -l <domain>\<serviceAccount>
Authorize your file share(s) for Kerberos double-hop. On one of your domain controllers or a computer with
Get-ADComputerPowerShell module installed (included in Active Directory installation). If you have multiple file shares, this will need to be configured for each:On the computer with
Get-ADComputer, open PowerShellCheck if there are existing authorizations:
CODEGet-ADComputer <FileShareServerName> -Properties PrincipalsAllowedToDelegateToAccountIf there are existing entries in the
PrincipalsAllowedToDelegateToAccountkey, copy the hostnames for the next step.
Run the following command:
CODE$Server1 = Get-ADComputer -Identity <ShinydocsSearchServerName OR valid FQDN>IF there were existing authorizations with
Get-ADComputer, add them separately and one at a time like this, run each on its own:CODE$Server2 = Get-ADComputer -Identity <ExistingAuthorizationHostName1>CODE$Server3 = Get-ADComputer -Identity <ExistingAuthorizationHostName2>IF Shinydocs Search is load balanced on additional machines, you will need to also add the other Shinydocs Search hostnames or FQDNs:
CODE$Server4 = Get-ADComputer -Identity <<ShinydocsSearchServer2Name OR valid FQDN>>
Now you’re ready to submit the request to set the
PrincipalsAllowedToDelegateToAccounton all of the above machines via PowerShell. Note that the$Server1variable you set previously is used in the command:Scenario 1:
1 Shinydocs Search instance, no existing authorizationsCODESet-ADComputer <FileShareHostName or FQDN> -PrincipalsAllowedToDelegateToAccount $Server1Scenario 2:
Multiple Shinydocs Search instances (load balanced) and/or existing authorizations
Note: You need to change the list of$Servervariables in this command to match how many you have set up in the previous stepsCODESet-ADComputer FILESHARE-01 -PrincipalsAllowedToDelegateToAccount @($Server1, $Server2, $Server3, $Server4)
Verify it was set by running the following in PowerShell:
CODEGet-ADComputer <FileShareServerName> -Properties PrincipalsAllowedToDelegateToAccountYou will see the Shinydocs servers listed in
principalsAllowedToDelegateToAccount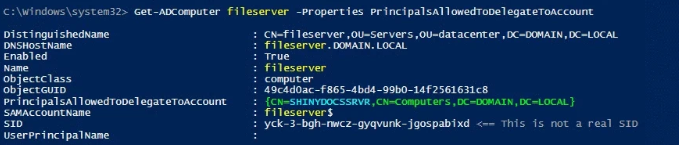
The Set-ADComputer example commands above overwrite the current PrincipalsAllowedToDelegateToAccount values on a FileShareServerName. To remove a PrincipalsAllowedToDelegateToAccount value from a FileShareServerName, you can re-run one of the above commands and exclude the value you wish to remove.
Alternatively; to remove all values from PrincipalsAllowedToDelegateToAccount from a FileShareServerName, you can run the below command (replacingFileShareServerName with the actual fileshare hostname):
Set-ADComputer FileShareServerName -PrincipalsAllowedToDelegateToAccount $null
Adding your source
In Shinydocs Control Center (either in quick-start or + Add source)
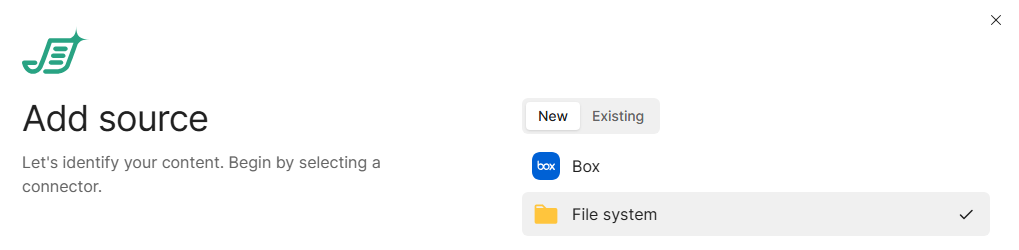
Under Add new source, select the File system option and click Next.
You can give your source a specific name if you wish, otherwise, enter the details for the account you want to use to analyze your file system.
This account is typically a service account that has read access to everything you want to analyze.
If no username or password is given, Shinydocs Pro will attempt to analyze the given paths if it has permission to access them.
Under Search Authentication Type, select Protected - Negotiate/Kerberos
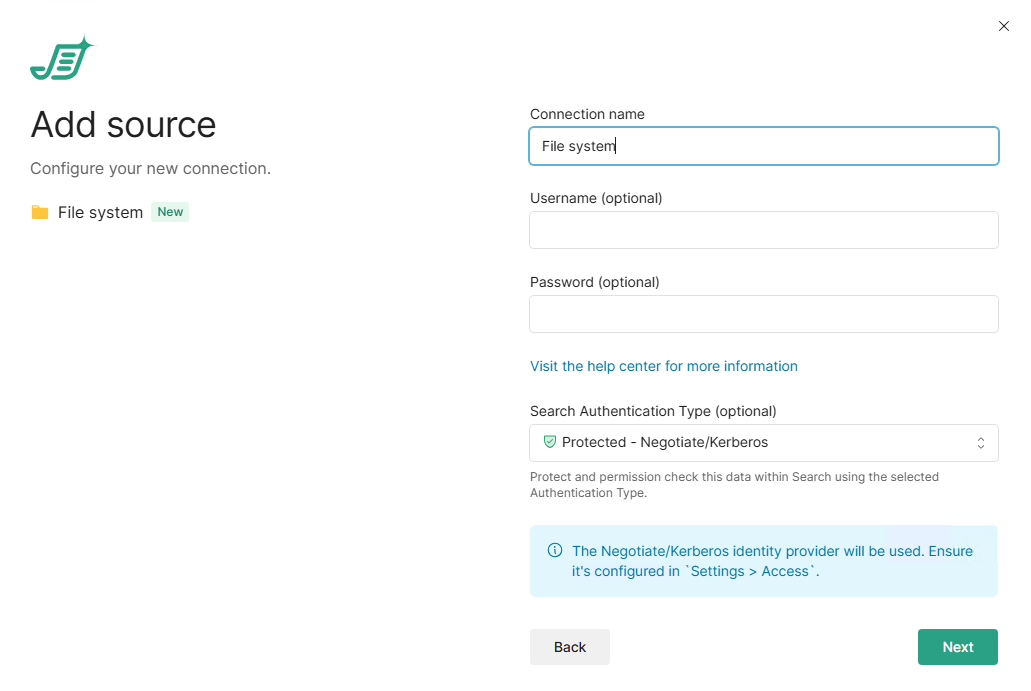
Click Next
Enter the path (UNC (\\server\share) preferred) you want to analyze. If you want to add multiple paths, you can click + Add to add an additional path or + Add multiple to add multiple paths at a time.
We recommend starting with a small file share and expanding from there once you get a feel for how Shinydocs Pro works.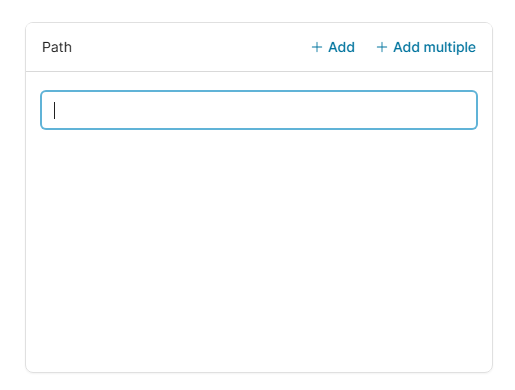
Click Start analysis to being analyzing your filesystem content!
Helpful tips
To remove an SPN, you can run the below commands (replacing each of the placeholder values similar to the above examples):
setspn -d HTTP/<hostname> <domain>\<serviceAccount>setspn -d HTTP/<fqdn> <domain>\<serviceAccount>
Kerberos logging can be enabled by editing the following registry key:HKEY_LOCAL_MACHINE\SYSTEM\CurrentControlSet\Control\Lsa\Kerberos\Parameters
Registry Value: LogLevel
Value Type: REG_DWORD
Value Data: 0x1
If the Parameters subkey does not exist, create it.
Further details at:https://docs.microsoft.com/en-us/troubleshoot/windows-server/identity/enable-kerberos-event-logging
The logging events will show in the System event log, in the Windows event viewer.
Ensure the SPNs have been replicated through the domain.