Setting up Shinydocs Control Center for Intranet Access
Setup
Configure Control Center to allow connections outside of localhost
By default, Shinydocs Control Center is only accessible on localhost. To make it available to others on your network, you’ll need to configure the Server settings in the UI.
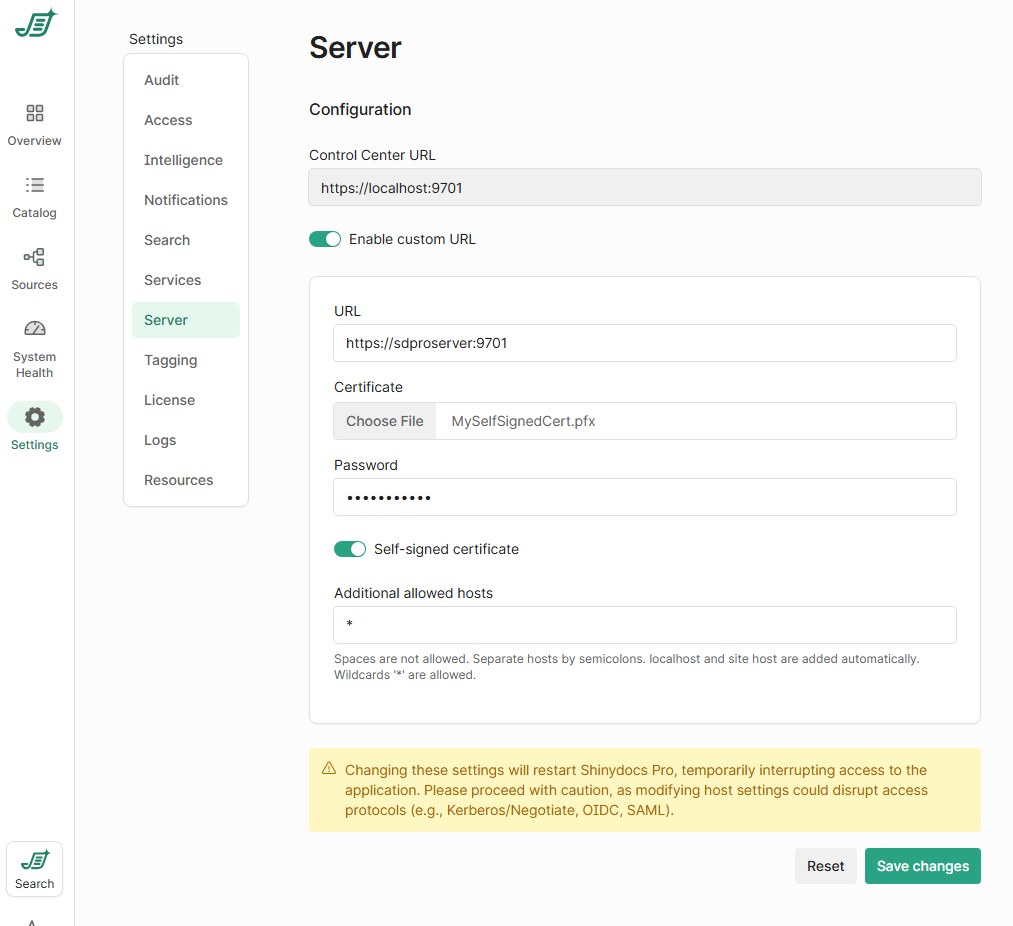
In Control Center, go to Settings > Server.
You'll see the current Control Center URL (e.g.
https://localhost:9701).Toggle Enable custom URL.
In the URL field, enter the full address you want to use, such as:
https://hostname:9701
You must use an https connection.
If you’re using a certificate you created yourself (recommended for production):
Upload the certificate file (
.pfxor.p12).Enter the password if your certificate is password-protected.
If the certificate is self-signed, enable the Self-signed certificate option.
To allow connections from other machines, you must list the hostnames that users will use to access Control Center in Additional allowed hosts:
To allow all hosts, enter a wildcard:
*If you'd rather be specific, list individual hosts like this:
servername.local;192.168.1.100;cc.yourcompany.com
Click Save changes. Shinydocs Control Center will restart automatically.
If you wish to use a different address for the site, you are free to set that up yourself, e.g. using DNS.
Your browser may show a warning that the site is not safe. This is because the Control Center site uses a self-signed certificate, and the certificate will not be trusted by your computer or browser by default.