You can use Shinydocs Pro Control Center to dispose of content that meets your filter criteria. This action permanently removes the files from their original locations, so it's important to be sure before proceeding.
Step 1: Use Filters to Choose What You Want to Dispose
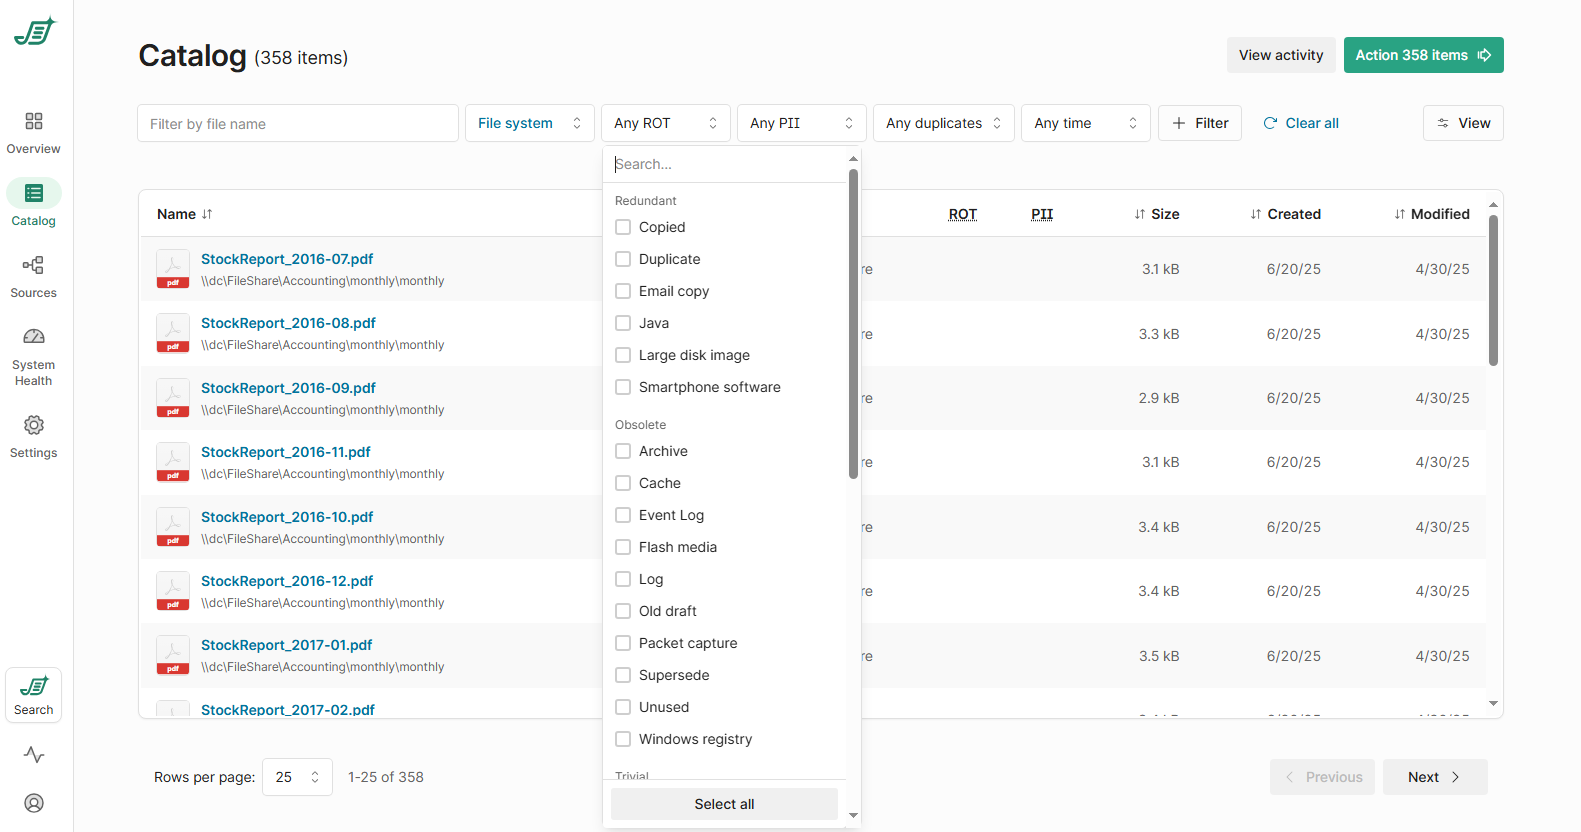
Go to the Catalog page and use the filter bar to narrow down the results. Only the items currently in view will be included in the disposal. You might want to filter by ROT, duplicates, size, or time last modified to target content that’s safe to remove.
Tip: If you’re unsure, run a report first instead of disposing right away.
Step 2: Start the Disposal Process
Click the green Action button ![]()
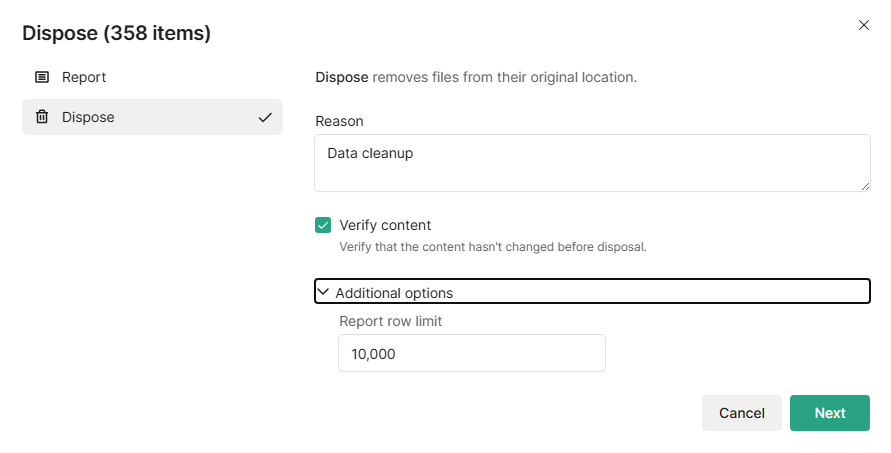
If you check Verify content, the system will compare the current hash of each file with the hash captured during the last analysis. If the content has changed, the file will be skipped to prevent accidental removal of updated data.
Step 3: Review Summary and Confirm
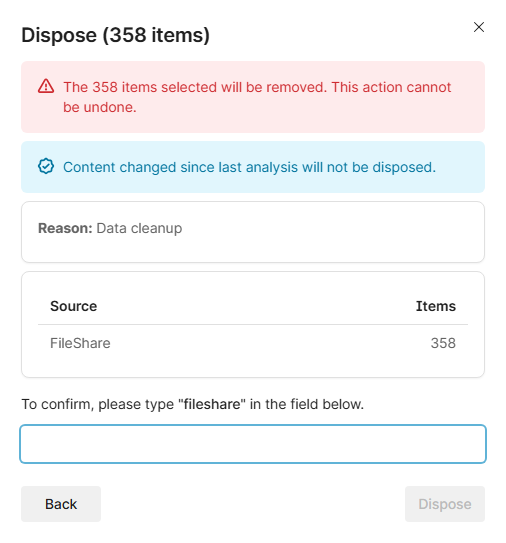
You’ll be shown a confirmation screen listing how many items will be disposed and from which sources. Note: the disposal will use the account configured for each source in Shinydocs Pro. Make sure those accounts have delete permissions.
To continue, you’ll need to type the exact confirmation string to proceed.
Step 4: Check the Disposal Report
After completion, a report will be generated showing the result for each item. Look for the dispose column:
-
true means the item was successfully deleted
-
false could mean a permissions issue or that the file no longer exists
Be sure to review the report to confirm everything went as expected.