Advanced disposal - approval workflow
This guide walks you through the steps to perform advanced disposals in Shinydocs Pro, incorporating an approval workflow for better control and accountability.
Step 1: Exporting the Catalog Data
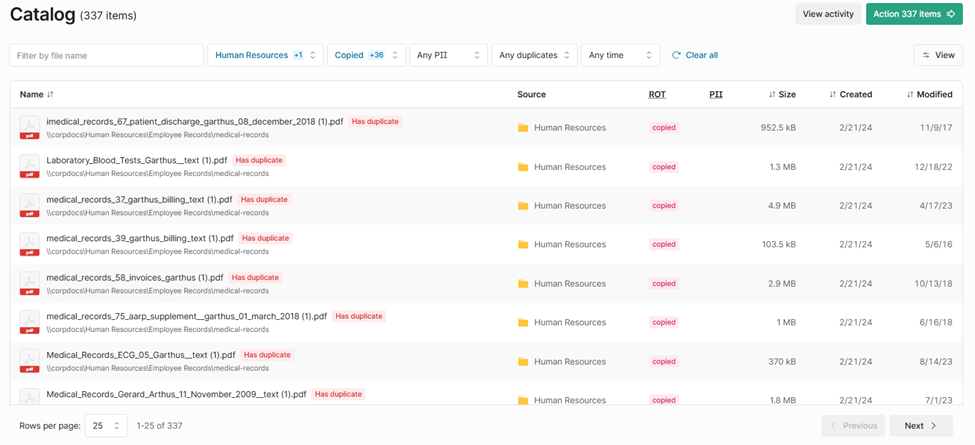
Navigate to the Catalog page in Shinydocs Pro Control Center.
Apply any filters (e.g., ROT, PII, Duplicates) you want to report on.
Click the "Action # items" button in the top-right corner.
Select the option to export the catalog data as a CSV file.
Want to see a real-world example? Check out this CSV report from my Shinydocs Control Center
Step 2: Preparing the CSV File
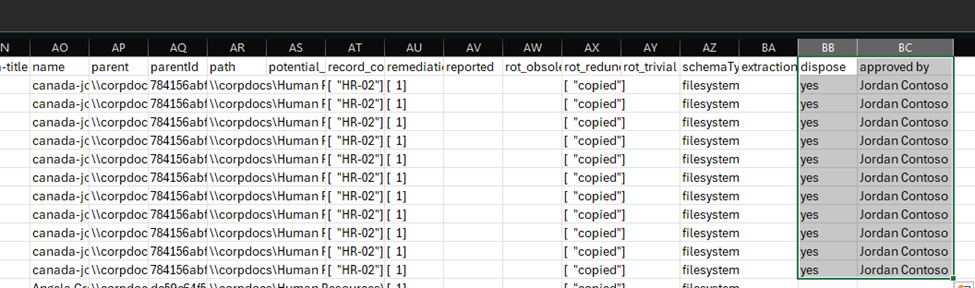
You can modify the exported CSV to include custom columns for additional metadata. For example, you might add:
A column named "dispose" with the value
yesfor files approved for disposal.A column named "approved by" with the name of the person who approved the disposal.
Example
id | dispose | approved by |
|---|---|---|
123456789 | yes | Jordan Contoso |
Always keep the id column, as it represents the file in the index, making it quick and easy to apply the tag(s).
Check out this CSV file to see the additonal columns added to my report
data-report-2024-12-11 16.28 - approved.csv
Step 3: Applying the CSV Data to the Index
Using the Cognitive Toolkit, a CLI application that underpins Shinydocs Pro, and the BulkDocumentEnricher auxiliary script, you can apply your CSV data to the files in the index.
Contact Shinydocs Support to obtain BulkDocumentEnricher.cs!
Example:
CognitiveToolkit.exe Runscript -p "BulkDocumentEnricher.cs" -u http://localhost:9200 -i "legal,human_resources" -q "BDE_query.json" --csv "data-report-2024-12-11 16.28 - approved.csv" --column-names "dispose,approved by"The BDE_query.json file uses a special query:
{
	"bool": {
		"must": [
			{
				"match_phrase": {
					"id": "{id}"
				}
			}
		]
	}
}
The BulkDocumentEnricher replaces
{id}with the value in the "id" column from your CSV file.Specify the column names in the command to map the CSV data to the index fields.
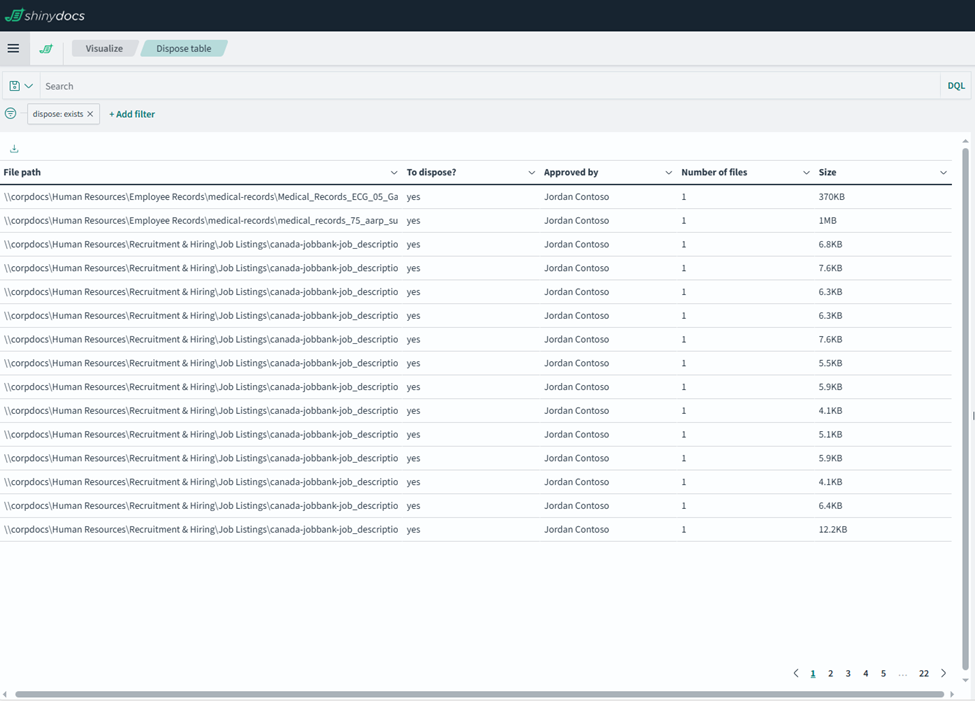
Step 4: Verifying the Updates
Go back to the Catalog page in Shinydocs Pro Control Center.
Click the View button and enable the fields you added (e.g., "dispose" and "approved by").
Optionally, visualizations can be created in Shinydocs Dashboards to review the updated data.

Step 5: Executing the Disposal
For more granular control over the disposal process, use the Cognitive Toolkit to perform a specialized disposal.
Example Disposal Command:
CognitiveToolkit.exe Dispose -i http://localhost:9200 -u "legal,human_resources" --verify-hash --hash-algorithm md5 -q "dispose_approved_items.json" --forceDisposal Query:
{
	"bool": {
		"must": [
			{
				"match_phrase": {
					"dispose": "yes"
				}
			}
		]
	}
}
Step 6: Automating and Auditing
Automate the disposal process by creating a batch file and scheduling it to run on demand or at regular intervals.
We can also create an audit index to capture metadata about disposed files, including the date and time of disposal.
Additional Notes
Ensure your service account or application registration has the necessary permissions to delete files in their respective systems.
Provide stakeholders with the audit index to confirm compliance and accountability.