Configure Shinydocs Pro Control Center access for OpenText Content Server (OTCS)
Requirements
The server Shinydocs Pro is installed has network (local or over the internet) connectivity to the OpenText Content Server you are going to connect to
A user account in Content Server with adequate permissions to perform the analysis.
Keep your organization's password policy in mind when creating the account. This is effectively a service account, and when the password expires, you will need to update your password in Shinydocs Pro as well.
Analysis type | Required Content Server Permissions |
|---|---|
Analyze only |
|
Analyze and action (includes disposal) |
|
Download and install the OTCS Shinydocs Module onto your on-prem or cloud-based OpenText Content Server
The module is included in the Shinydocs Pro installation, see below
Step 1: Download and install the Shinydocs Pro Content Server module (ShinydocsService)
To get started, you will need to download and install the ShinydocsService module in your OpenText Content Server. This essential module enables Shinydocs Pro to analyze and process your Content Server data effectively.
It is very important, and the advice of Open Text, that modules are installed on all nodes in the Content Server instance. Shinydocs Pro can be connected to either a single dedicated node so as not to compete with users or through a load-balancer without issue.
Download the module files from Shinydocs Pro
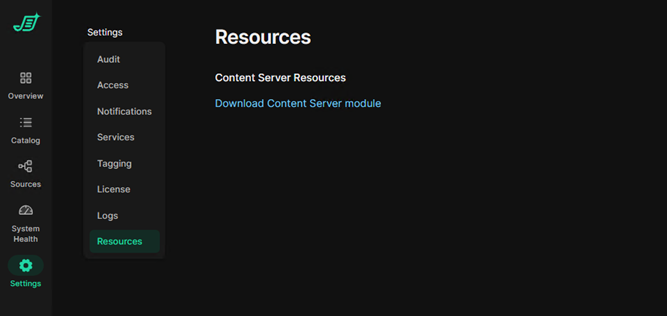
In Shinydocs Control Center click Settings then Resources
Click the link to download the Content Server Module (content-server-modules.zip)
Extract the downloaded zip file, both Windows and Linux versions of the module for Content Server are included.
Linux
ShinydocsService_1.6.21_CS16.2_CS20.x-1.6.21.gzWindows
ShinydocsService_1.6.21_CS16.2_CS20.x-1.6.21.zip
Extract the ShinydocsService_x.x.x module for your respective operating system
Install ShinydocsService module in OpenText Content Server
The ShinydocsService module can be installed like other Content Server modules:
Extract the contents of the ShinydocsService zip file into the OpenText Content Server staging folder
Log into Content Server
Navigate to Admin > Content Server Administration
Navigate to Module Configuration
Select Install Modules
Select and install the ShinydocsService module for Content Server
Restart Content Server
Step 2: Set Up Content Server Source in Shinydocs Pro Control Center
Now that the ShinydocsService module is installed on your Content Server and you have the account with appropriate permissions assigned, you’re ready to start your analysis.
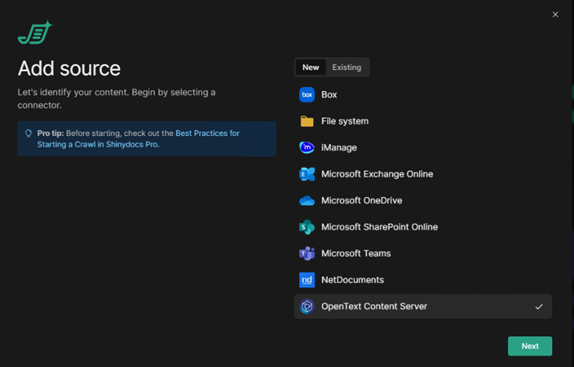
In Shinydocs Control Center, click + Add source
Select OpenText Content Server, click Next
Enter the Content Server URL you wish to connect to along with the Username and password you set up in the previous section.
Hint: Your content server Url will look like http(s)://acme/otcs/cs.exe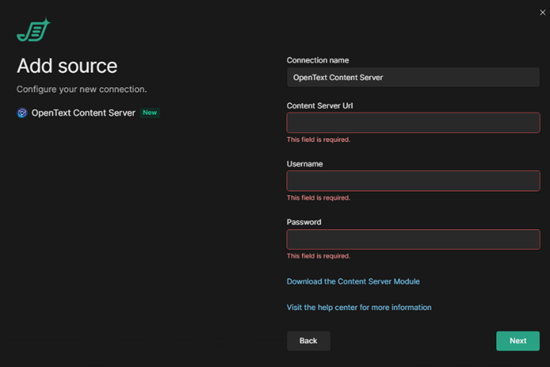
Click Next
On this page, you will configure what you want to analyze with Shinydocs Pro. We recommend reviewing https://help.shinydocs.com/shinydocs-pro?contextKey=introduction-to-crawling&version=latest before starting your crawl.
You have a few options for analyzing your OpenText Content Server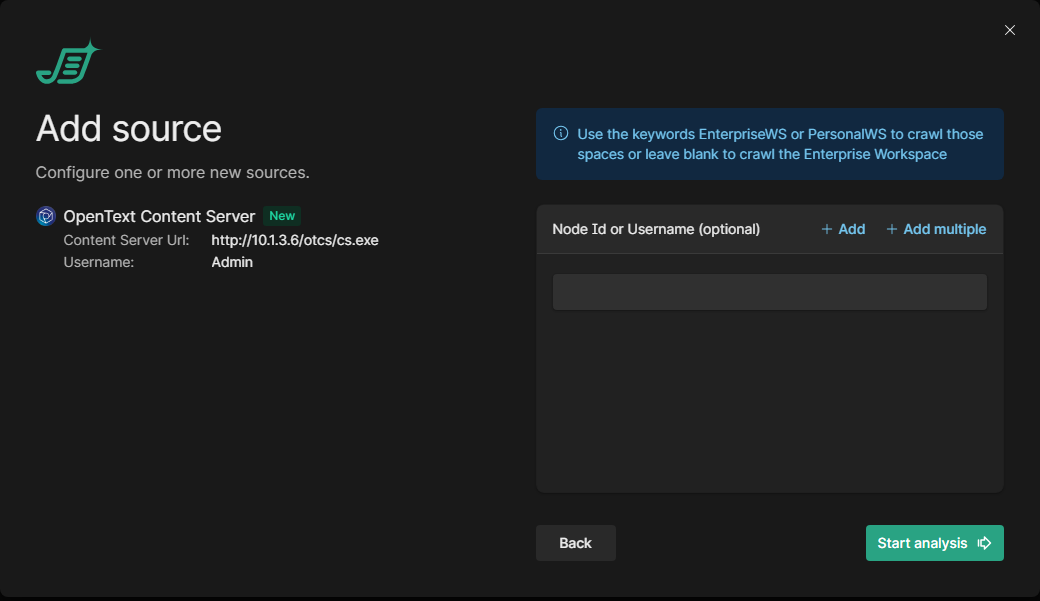
Blank - Analyze all of the Enterprise Workspace
Use the keywords EnterpriseWS or PersonalWS to initiate a crawl of all content within their respective workspaces.
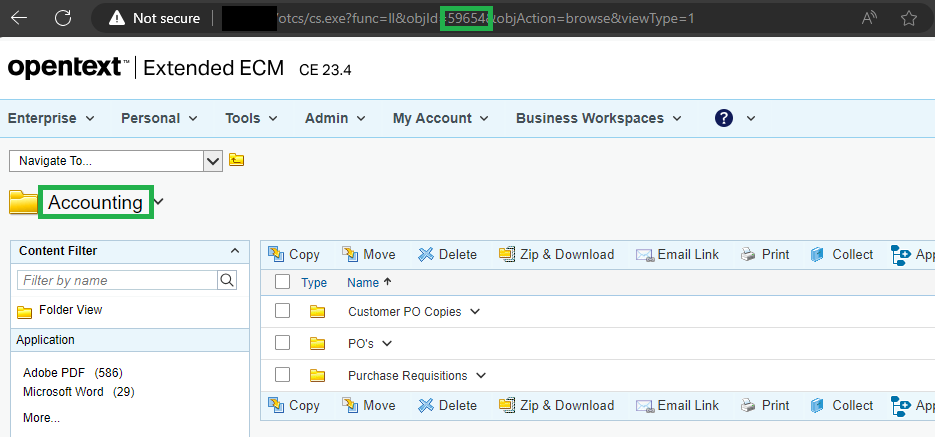
Node Id - A specific folder or workspace id
This ID can be found in the URL when browsing the folder in your web browser
Username - A specific user’s personal workspace
Click Start Analysis to begin your crawl, congratulations!