In Shinydocs Pro 26.1+ we introduced an official Azure Files connector. This guide has been updated to reflect the new configuration.
What you are setting up
In this guide, you will be setting up an Azure Files source in Shinydocs Pro for analysis and setting up the connection for permission checking of Search results for your source.
Once complete:
-
Your Azure Files source will be analyzed by Shinydocs Pro
-
Files are immediately searchable via Search, enforcing Azure Files permissions on all search results.
Requirements
-
Shinydocs Pro is installed and running.
-
Internet access to reach Microsoft Online
-
If the server cannot have direct internet access, ensure firewall rules are setup to allow HTTPS traffic on port 443
-
-
Azure/Entra permission to:
-
Create application registrations
-
Grant admin consent
-
Permission to see and modify your storage account
-
-
A certificate used to authenticate (Azure requires the .cer and Shinydocs Pro requires the .pfx)
Create the self signed certificate for Azure
If you already have a process internally for creating these certificates, please follow your organizations best practices. If not, you can use the script below.
Step 1 - Register Shinydocs Software with Azure
The first step of the process is to register your Shinydocs software with Azure, so that it can access Azure Files data.
You only need to register one application for Shinydocs software. Permissions to supported repositories can be configured the one registration.
-
Open Microsoft Azure.
-
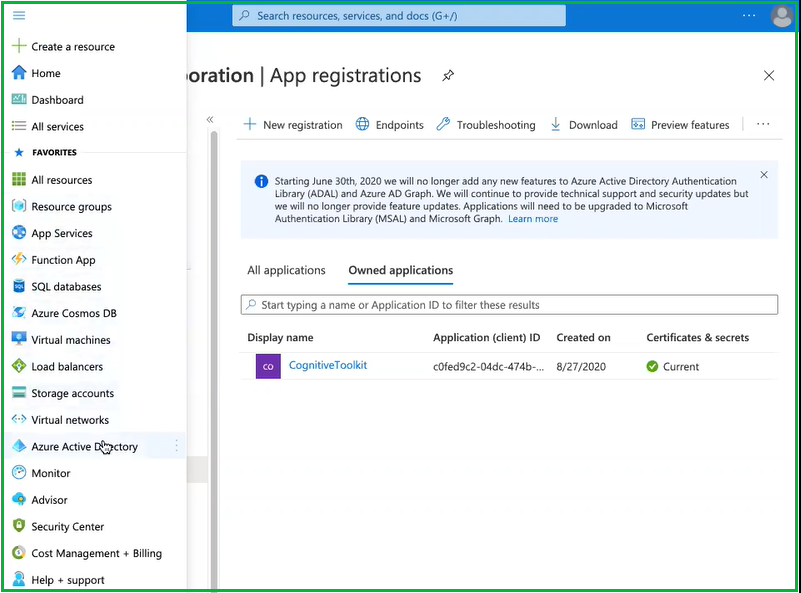
In the upper left corner dropdown menu, navigate to Azure Active Directory.
-
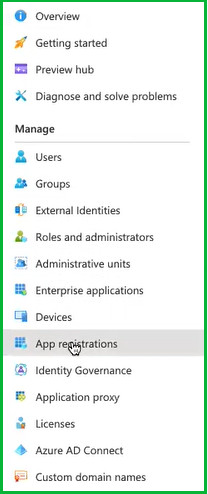
From the sidebar menu, select App registrations
-
Select + New registration

-
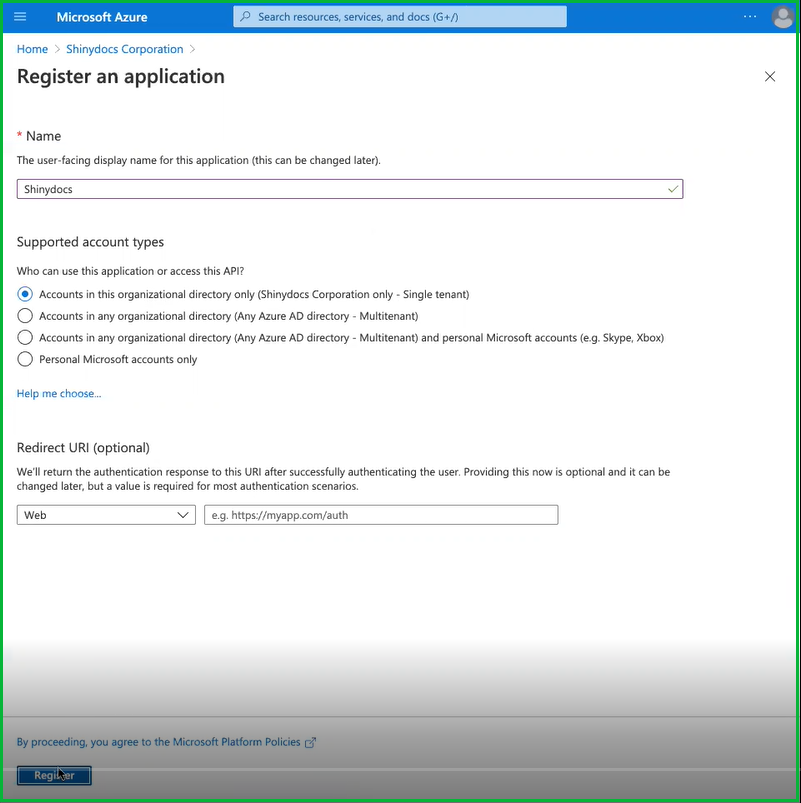
Enter a name for the application. In this case, we used “Shinydocs Pro” as the application name.
-
Select who, within your organization, can use or access the application. In most cases, the first option (Single tenant) will be selected (see below).
-
The optional Redirect URl is not needed in this case.
-
Select Register to continue.
Upload Authentication Certificate to Azure
These steps require a .cer file.
-
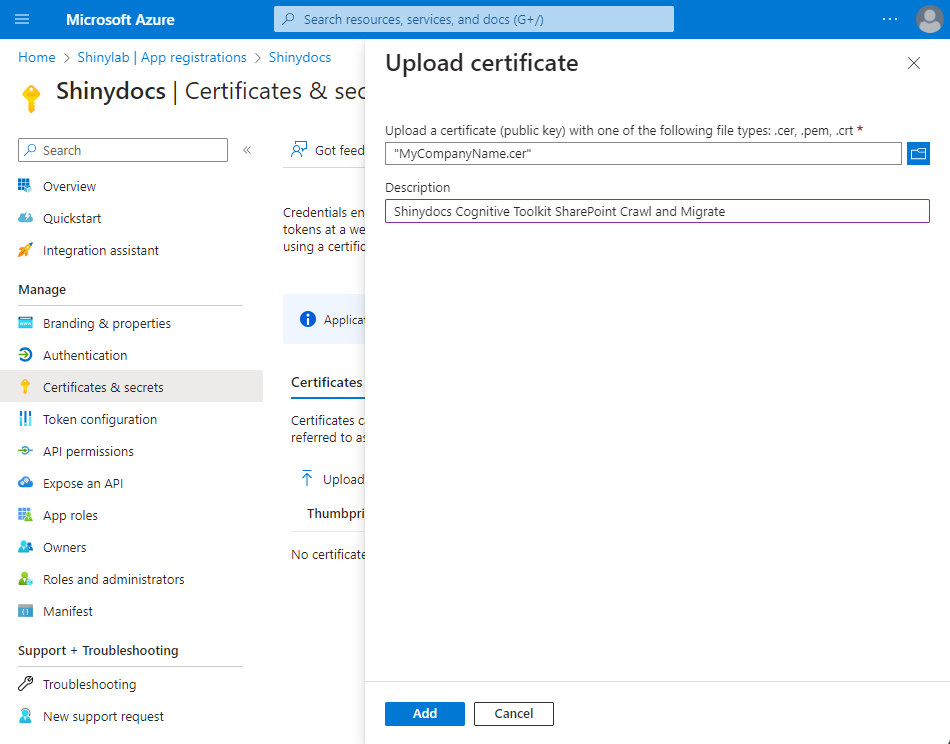
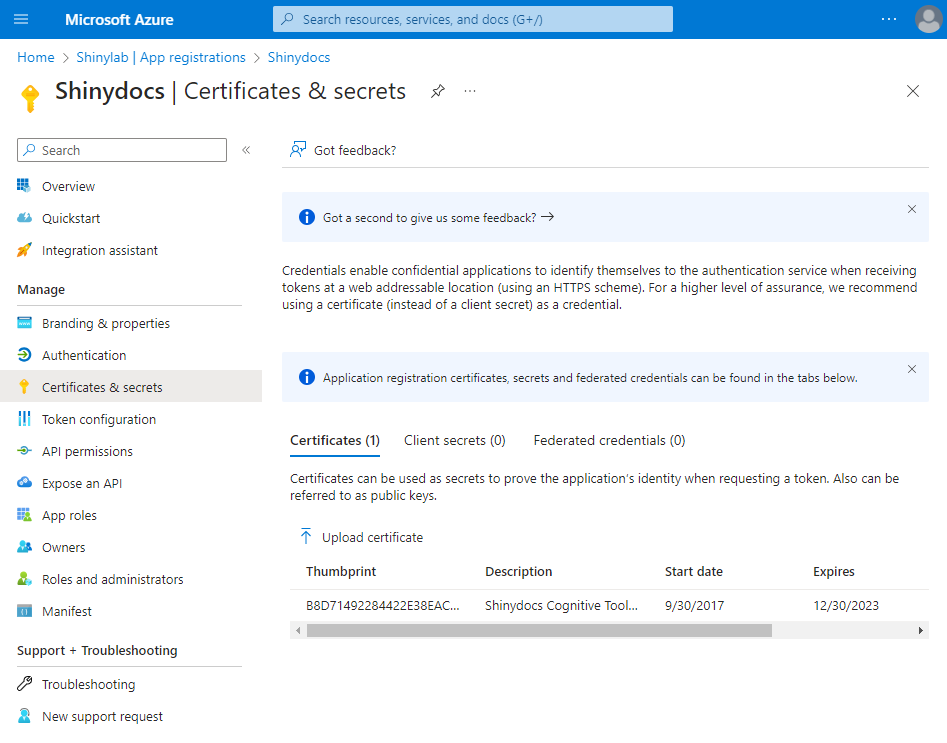
From the sidebar menu, select Certificates & secrets
-
Select Certificates
-
Select Upload certificate

-
Select the folder icon to browse for your certificate (.cer). Optionally, add a description to let other administrators know what this certificate is used for.
-
Select Add
-
Verify that the certificate was uploaded successfully by confirming the certificate is shown Certificates
-
Still in Certificates & secrets, click the Client secrets tab.
-
Click + New client secret
-
In the Add a client secret panel, add a description of your choice
-
Set it to expire in 12 months or longer.
This is a good time to schedule a reminder for the expiry, as Shinydocs Pro will also need the new secret key when this one expires. -
Click Add.
-
Copy the secret key to a safe location, as you will not be able to retrieve it later.
-
-
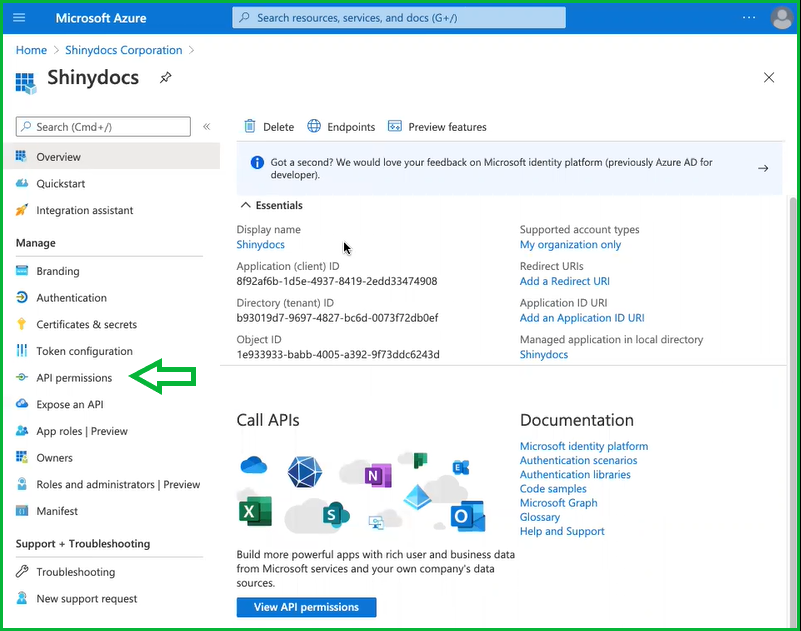
In the left-hand menu, open Overview
-
Note/save the following information for configuring Shinydocs Pro in later steps.
- Application (client) ID: ___________________________________________________
- Directory (tenant) ID: ___________________________________________________
- Secret key: ___________________________________________________
Authentication
Still in the Azure portal Shinydocs application registration, now you will set up the redirect URIs for authentication.
-
Navigate to the Authentication tab in the application registration
-
Web > Redirect URIs
-
This set up will be for the server running Shinydocs Pro Search using it’s hostname. You can update these settings later when/if you set up your fully qualified domain name in your DNS.
-
Click Add URI, and add the following
-
https://<shinydocs pro server host name>/azuread/success-
e.g.
https://shinyvm/azuread/success
-
-
https://<shinydocs pro server host name>/api/v1/oidc/signin-callback-
e.g.
https://shinyvm/api/v1/oidc/signin-callback
-
-
https://localhost/azuread/success -
https://localhost/api/v1/oidc/signin-callback
-
-
Step 2 - Assign the Roles to the Service Principal
When an application registration is performed in Azure, a Service Principal is automatically created for it. In this step, you will be assigning the appropriate roles for it to access Azure Files.
-
In the Azure portal, navigate to the Storage account section in your tenant
-
Select Access Control (IAM) from the sidebar.

-
Click Add, then select Add role assignment.
-
Search for and select one or both depending on what you want Shinydocs Pro to be able to do:

-
Storage File Data Privileged Contributor
You want to analyze your content and action it (i.e. disposal) -
Storage File Data Privileged Reader
You only want to analyze data and not action it (i.e. disposal)
-
-
Under Members, select User, group, or service principal.
-
Search for and select your Shinydocs App Registration by name.
-
Click Review + assign.
Step 3 - Azure API Permissions Configuration (for Search functionality)
Now that the Shinydocs Application has been registered with Azure, it’s time to apply permissions to access content within Azure Files.
-
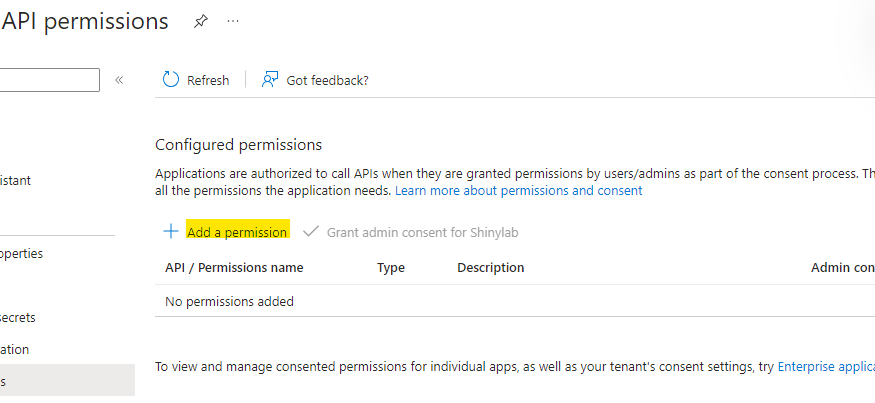
From the sidebar menu, select API permissions
-
Select + Add a permission
-
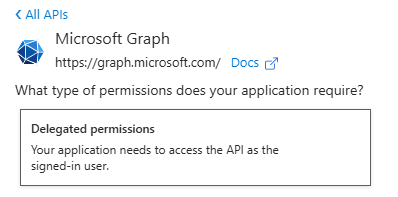
Select Microsoft Graph:

-
Then, select Delegated permissions
-
Add the following delegated permissions
-
User.Read
Type:Delegated -
offline_acccess
Type:Delegated -
openid
Type:Delegated -
profile
Type:Delegated
-
-
Click Add permissions
Step 4 - Add your Azure Files source in Shinydocs Pro Control Center
These steps can be followed once Shinydocs Pro has been installed.
You will need the .pfx file from your certificate.
Moving the .pfx after setting the Certificate file location will cause any related tasks to fail.
If the .pfx file is moved, you will need to update the Certificate file location to the new path.
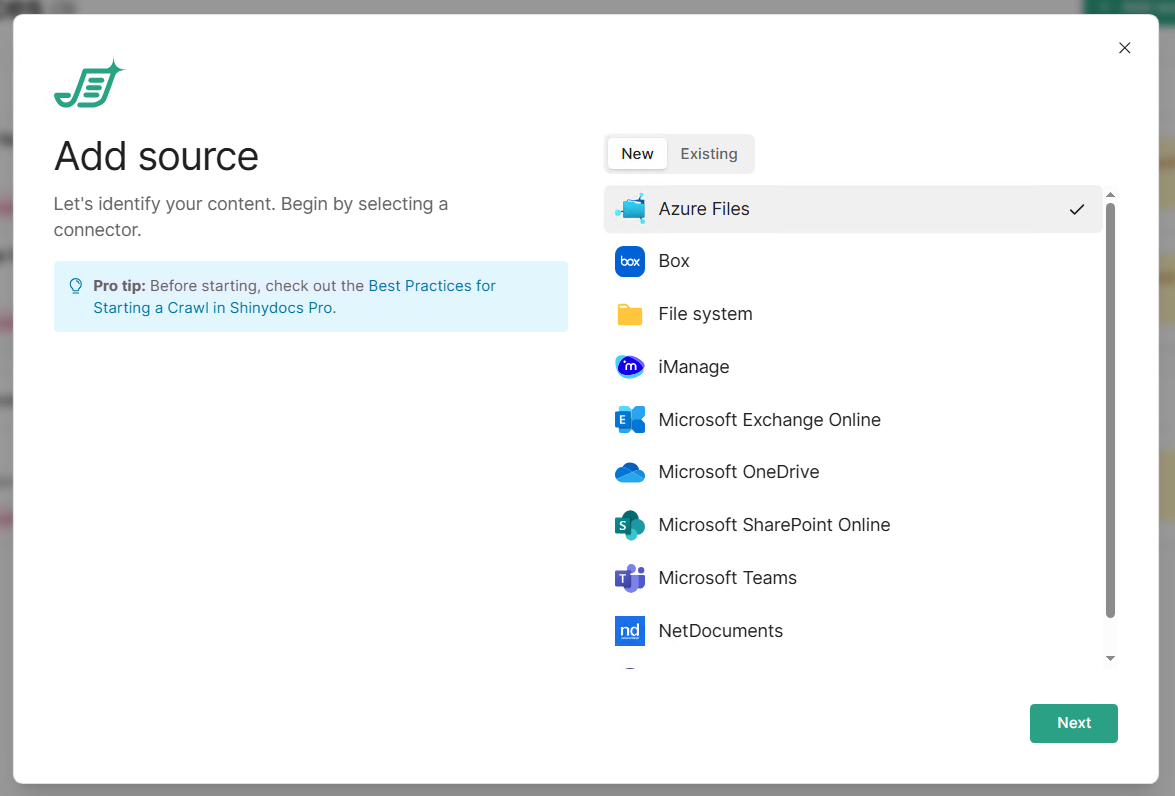
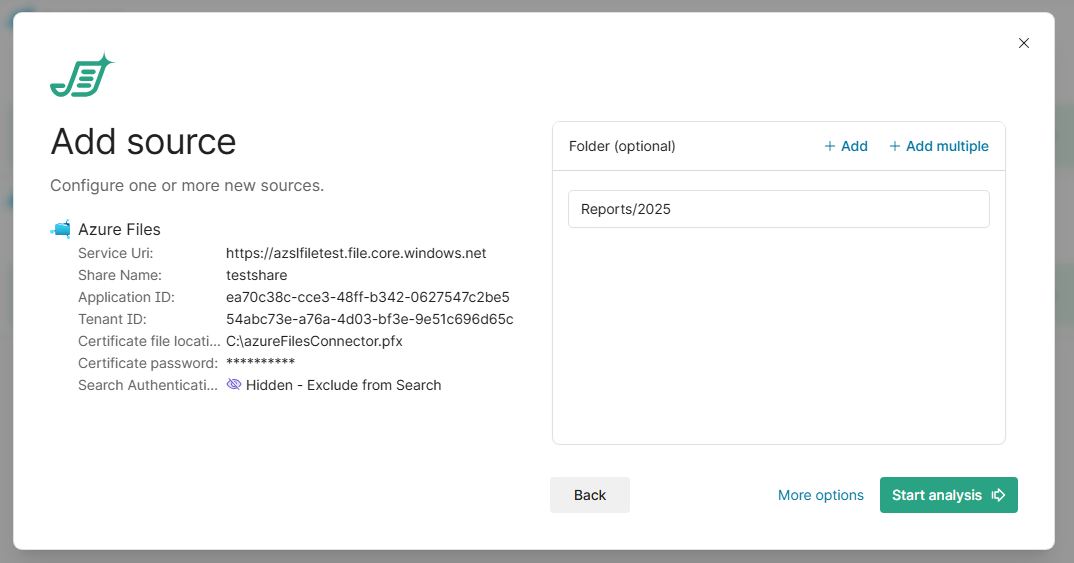
In Shinydocs Control Center (either in quick-start or + Add source):
-
Select Azure Files as your new or existing source and click Next
-
Fill out the form with the details from your app regirstation
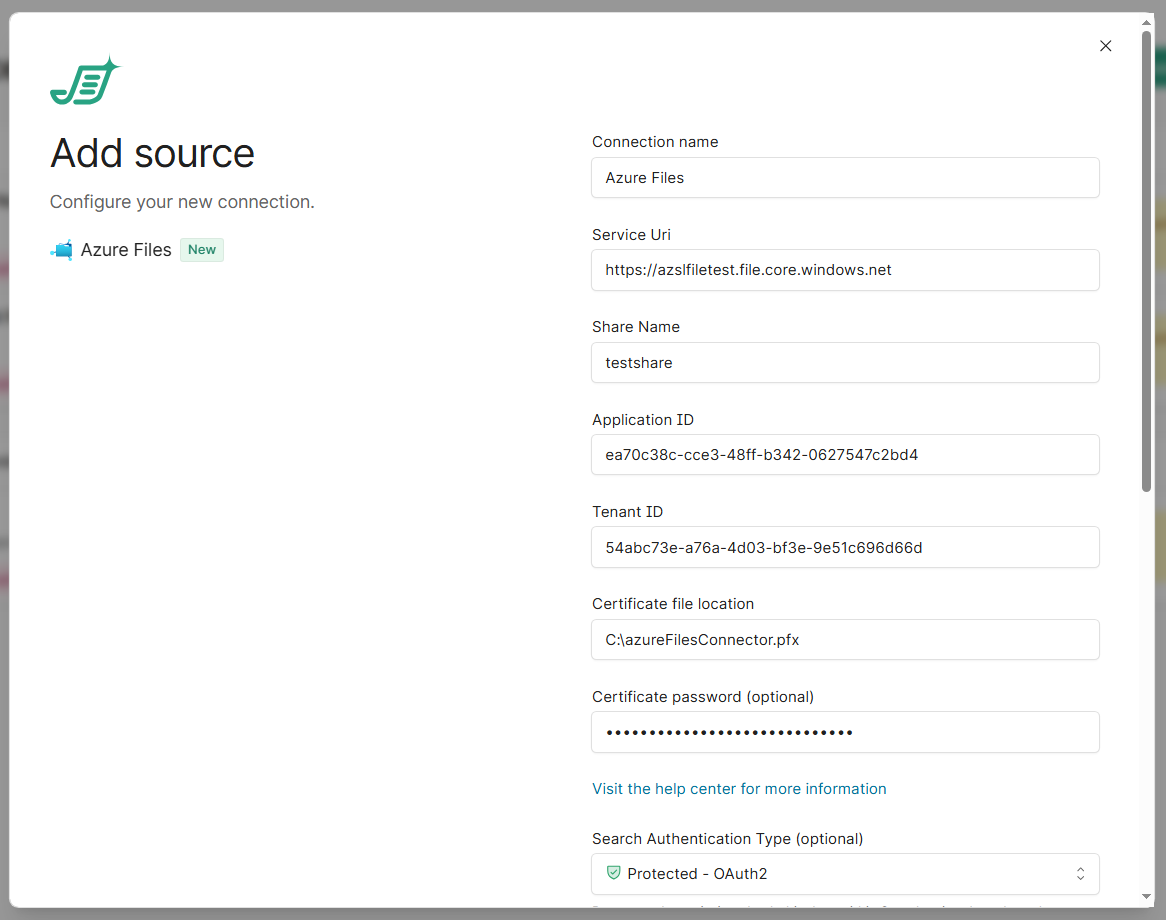
In this case, the storage account is called ‘azslfiletest’
-
Service Uri: Replace
storageAccountNamewith the name of your Azure Storage Account. (e.g.azslfiletest) -
Share Name: The name of the Azure file share you want to analyze
-
Application ID: enter the Application (client) ID previously noted
-
Tenant ID: enter the Directory (tenant) ID previously noted
-
Certificate file location: enter the path of the .pfx file
-
Do not use double quotes around the path
-
-
Certificate password: enter the password for the .pfx file. If your .pfx file does not have a password, leave this field blank
-
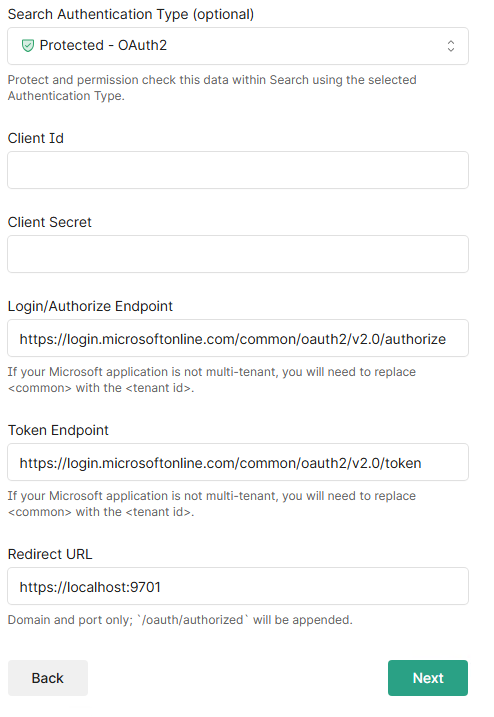
Search Authentication Type: select Protected - OAuth2
-
Client ID: Enter the Client ID from your application registration
-
Client Secret (key): Enter the secret from your application registration
-
Login/Authorize Endpoint: replace “common” with your Tenant ID
-
e.g.
https://login.microsoftonline.com/42abc123-a76a-4j03-bf1e-4e51c696d65d/oauth2/v2.0/authorize
-
-
Token Endpoint: replace “common” with your Tenant ID
-
e.g.
https://login.microsoftonline.com/42abc123-a76a-4j03-bf1e-4e51c696d65d/oauth2/v2.0/token
-
-
Redirect URL: For the Redirect URL,
https://localhost:9701works for initial testing when you're accessing Search directly on the server. Once Search is deployed and being accessed by end users through a proper hostname or load balancer, this needs to be updated to match the actual URL users will hit, for example:https://search.contoso.com:9701or whatever the production hostname and port end up being. The format is always just the domain and port, since
/oauth/authorizedgets appended automatically.Important: the Redirect URL here and the Redirect URI configured on the App Registration in Azure Entra ID must match exactly. If you update one, you need to update the other, or the OAuth flow will fail with a redirect mismatch error.
-
-
-
Click Next. A validation check is performed to make sure the information entered is correct. If an error occurs, the error should indicate the issue at hand.
-
You can now choose the scope of the analysis:
-
Enter the folder path exactly as it appears in your file share, relative to the share root. Use a forward slash (
/) to separate nested folders.
Do not include the share name, use the example below for the accepted format, remember it is relative to the root of the Azure file share.Examples:
-
|
What you want to crawl |
What to enter |
|---|---|
|
A top-level folder |
|
|
A nested folder |
|
|
The entire share |
(leave blank) |
Note: Paths are case-sensitive.
Reportsandreportsare treated as different folders. If the path is not found, you will see a validation error before the crawl begins.
Crawling multiple folders
Click + Add to add another folder entry. Each path is crawled independently as its own root, so you can mix folders from different locations in the share:
Finance/Invoices
HR/Contracts
Shared/Templates
Only the contents of the specified folders (and their subfolders) will be indexed.
Tips
-
Do not include a leading slash (use
Reports, not/Reports). -
If two folders share the same name in different locations, use the full path to specify the correct one (e.g.,
SubFolder1/ABCvsSubFolder2/ABC). -
Use + Add multiple to paste a list of paths at once.
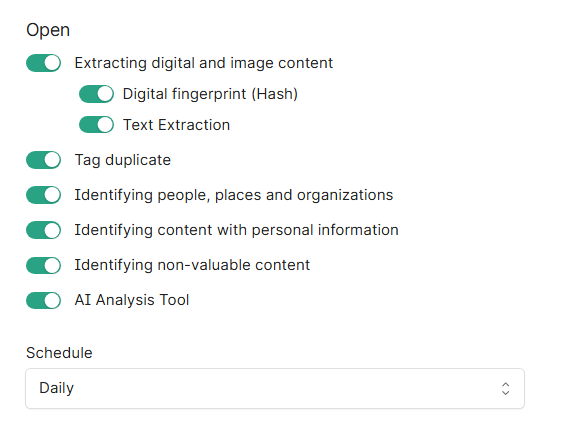
More options
In Shinydocs Pro 26.1+, administrators can now by default select which analysis tools will run on the source.
-
Extracting digital and image content reads file contents, including images, for analysis.
-
Digital fingerprint (Hash): creates a unique identifier for each file to detect exact duplicates.
-
Text Extraction: extracts readable text from documents for searching and analysis (includes OCR).
-
-
Tag duplicate: marks files as duplicates based on their digital fingerprint across all Shinydocs Pro sources.
-
Identifying people, places and organizations: detects mentions of people, locations, and organizations within document content.
-
Identifying content with personal information: scans for personally identifiable information like names, addresses, and social insurance/security numbers (PII).
-
Identifying non-valuable content: flags redundant, obsolete, or trivial (ROT) content to identify cleanup candidates.
-
AI Analysis Tool (license dependent, requires setup before use): employs AI for deeper content classification beyond rules.
-
Schedule: controls how often analysis tasks run. "Daily" runs them once per day.
Click Start Analysis when you are ready to begin.
Congratulations! You should now be crawling your organization’s Azure Files content.