This article refers to the Shinydrive V2 Server
Add folders to your Personal and Enterprise Workspace as drives.
Prerequisites
-
Content Server has been added as a "Source" before doing this.
-
Know the Root ID of the folder, you want to MAP as a drive. To obtain this please follow the steps below:
-
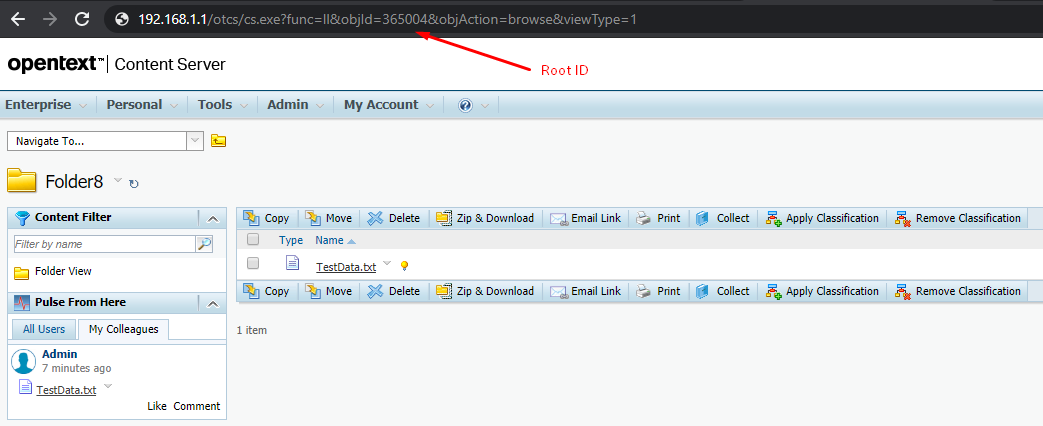
Within Content Server navigate to the folder of which you want to MAP as a drive
-
Copy the Root ID that is within the address bar
-
Mapping the folder as a drive
-
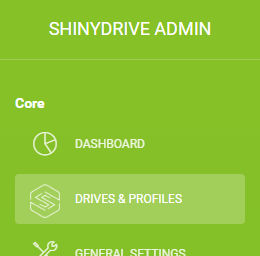
Log in to the Shinydrive Server Admin Panel.
-
Navigate to DRIVES & PROFILES from the panel's sidebar.
-
Click "+ Add Drive".
-
Enter your desired details for Drive Name, Drive Letter, and select Content Server as the Source.
Your configuration should look something like this:
-
In the "Root ID" field, enter the Root ID that you copied as the pre-requisite and select Save.
-
Now you will need to assign the drive you just created to a profile and select Save.
-
If you already have ShinyDrive running. Restart ShinyDrive or disconnect and reconnect to ShinyDrive.
-
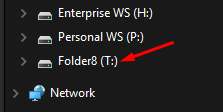
Your new mapped folder should now be available in Windows Explorer.