In this article, we will identify and set the drive that mounts the content source to Windows file explorer.
Before mapping a drive, ensure a Content Source has been added.
-
Log into Shinydrive Admin
-
Select DRIVES & PROFILES from the left side menu
-
In the DRIVES section, press +Add Drive
-
Enter a Drive Name, excluding Windows restricted characters (for example, /, . , or \)
-
Select a drive letter value
-
Select a value from the Source dropdown
-
Enter a value in the Root ID field (refer to Root ID table below for values)
-
Review Advanced Settings and make any appropriate changes
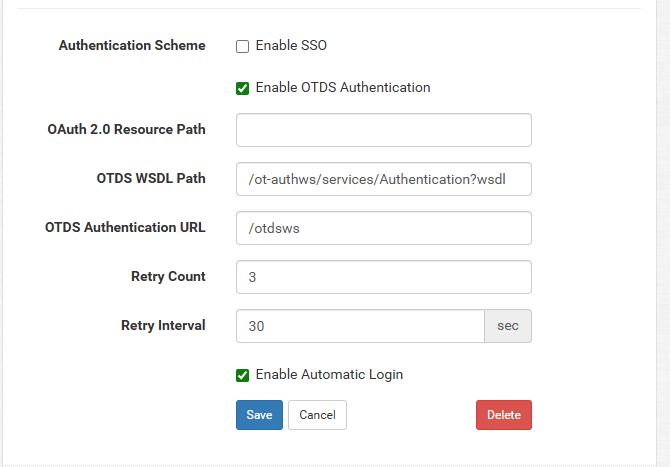
If your organization uses OIDC as the sole method to authenticate to OpenText Content Server, configure OTDS authentication for the drive.
NOTE: The Shinydrive web app does not support OTDS authentication. When enabled, only Shinydrive clients authenticate correctly.-
In Advanced Settings for the drive, check the box beside Enable OTDS Authentication
-
Fill out these fields with the respective values:
-
OTDS WSDL Path:
/ot-authws/services/Authentication?wsdl -
OTDS Authentication URL:
/otdsws
-
-
Uncheck to disable: Enable SSO
-
Check to enable: Enable Automatic Login
-
-
Save
It is not necessary to add a different Personal Workspace for each user. Shinydrive will employ users' credentials to bring up their Personal Workspace.
Root ID Values
|
Source Type |
Workspace |
Root ID Value |
|---|---|---|
|
Content Server |
Enterprise |
EnterpriseWS |
|
Content Server |
Personal |
PersonalWS |
After adding a Drive, assign the drive to a Profile.