This document explains how to add custom PII (Personally Identifiable Information) and ROT (Redundant, Obsolete, and Trivial) rules to Shinydocs Pro Control Center. More information on PII and ROT can be found in the below links:
Table of Contents
Location of PII / ROT rules (JSON files)
Each rule is configured as an individual JSON file, which are placed in one of the below folders:
Examples of the existing default rules can also be found the in the above folders.
Structure of a PII / ROT rule (JSON file)
The structure of PII and ROT rules (JSON files) are very similar to each other but there are a few differences. See a breakdown of the layout below for PII and ROT:
Enabling custom PII / ROT rules in Control Center
Once the custom rules (JSON files) have been placed in their respective folders, you can enable them in Control Center.
Rules should display in Control Center automatically, without having to restart any Shinydocs services. To enable custom rules, follow the steps below.
-
Open a web browser and go to Control Center
By default, this will be https://localhost:9701/ if you are accessing the site from the local machine
-
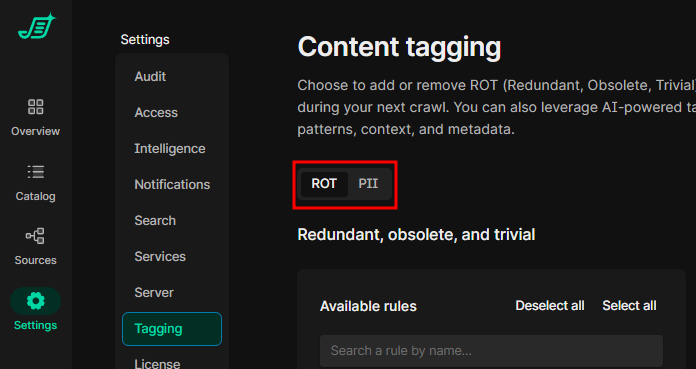
Select “Settings” > “Tagging”
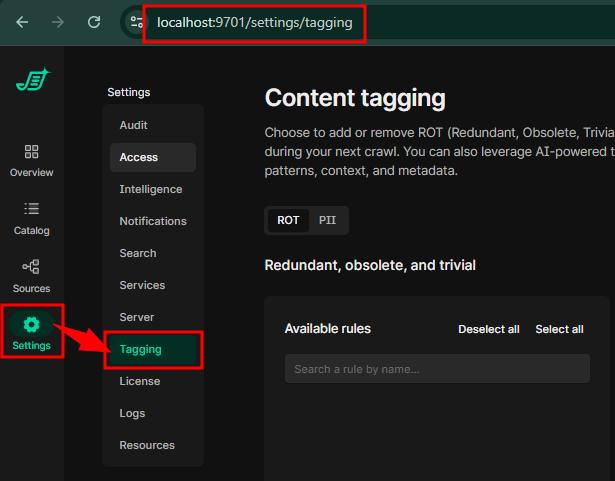
Alternatively, you can go directly to https://localhost:9701/settings/tagging
-
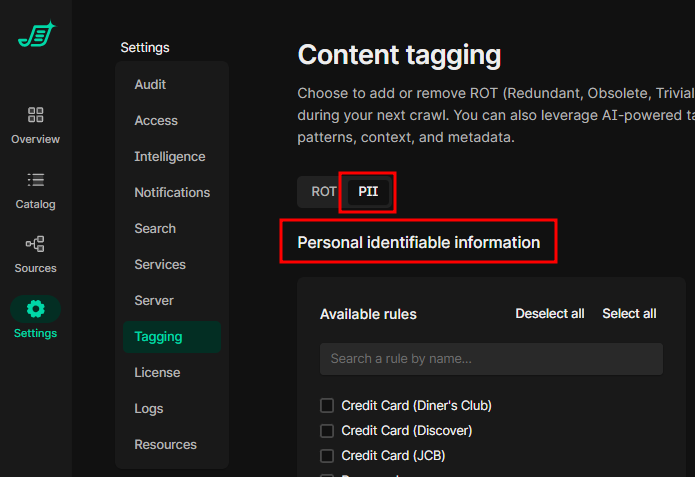
Select the “ROT” or “PII” tab select to rules you would like to enable
ROT: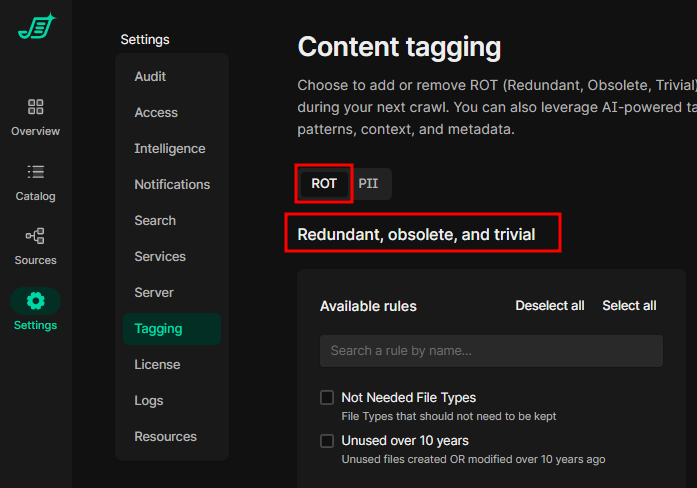
PII:
-
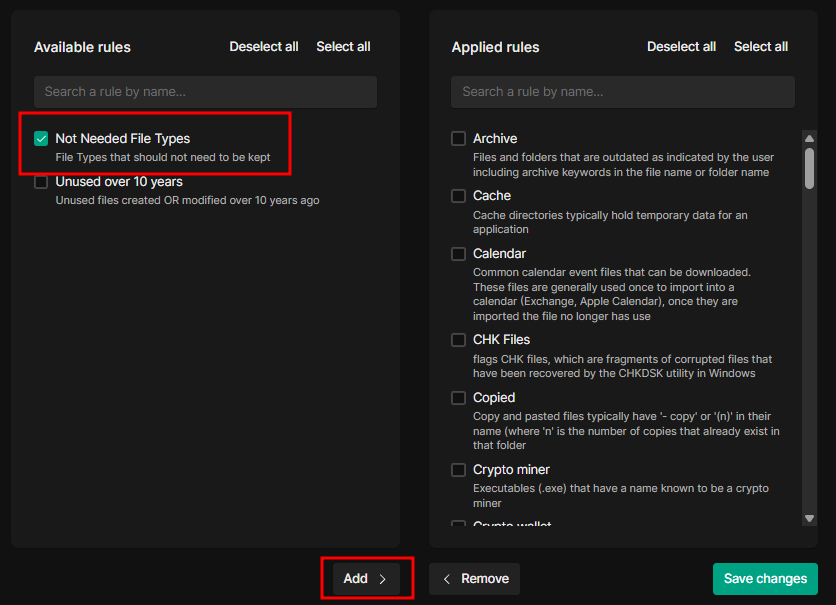
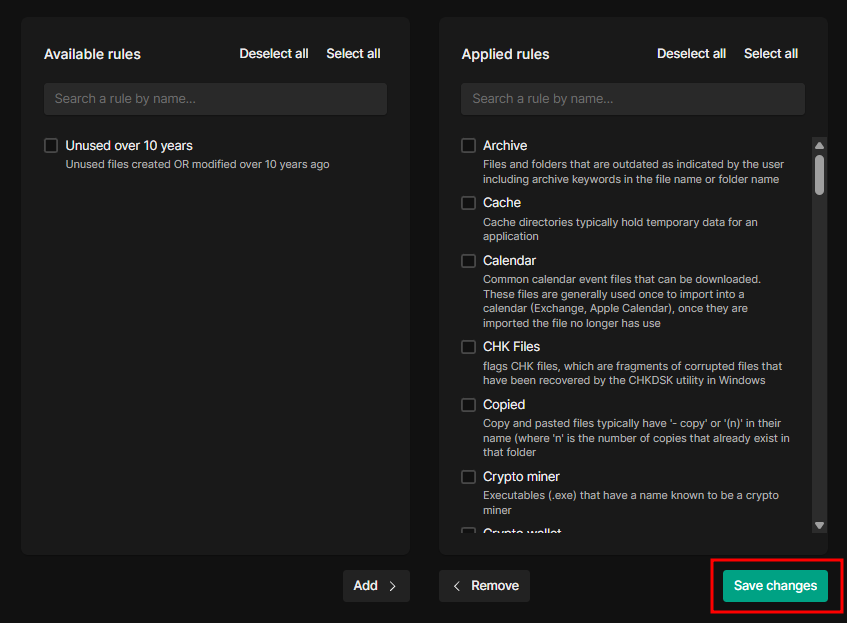
Select (checkmark) one or more of the rules from the “Available Rules” (left) column that you would like to enable, then select “Add”
-
Select “Save Changes”
-
You will get a prompt to confirm your changes. If correct, select “Save Changes”.
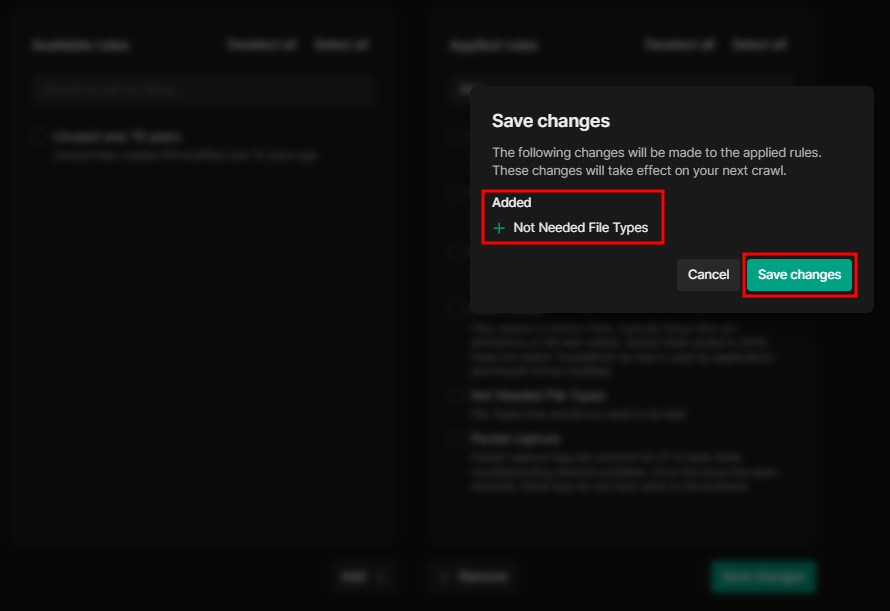
Note that if you want to apply both PII and ROT rules, these changes will need to be selected and saved separately for each tab (“PII”/”ROT”)
Applying PII / ROT rules to data sources
After enabling a rule as described in the “Enabling custom PII / ROT rules in Control Center” section, you need to run the job (scheduled or on-demand) for each data source that you want to apply the tagging to.
If a job is already on a schedule, you can wait for it to complete the scheduled run. Otherwise, you can run the job manually (on-demand). Follow the below steps to run the job manually.
-
In Control Center, go to “Sources”
-
Select “Run”, next to one or more of the data sources you the tagging applied to manually
If the job is already queued or scheduled, it will process eventually
-
Select the ‘data source name’ to view the “Analysis Tools” page of that data source
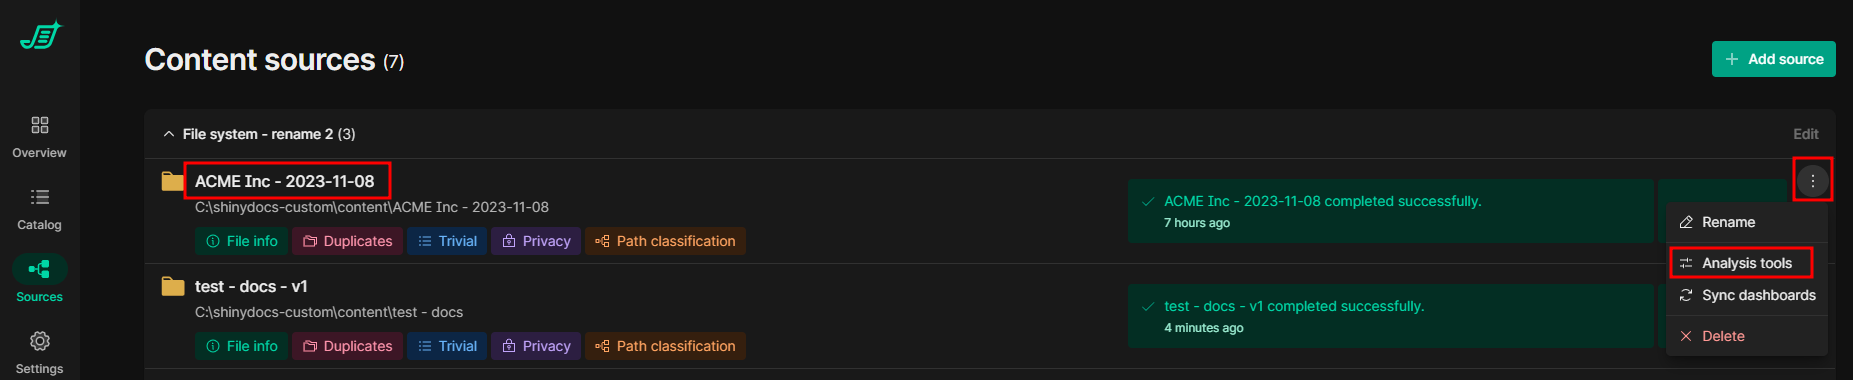
Alternatively, you can select the Kebab icon (“⋮”) on that data source, then “Analysis Tools”
-
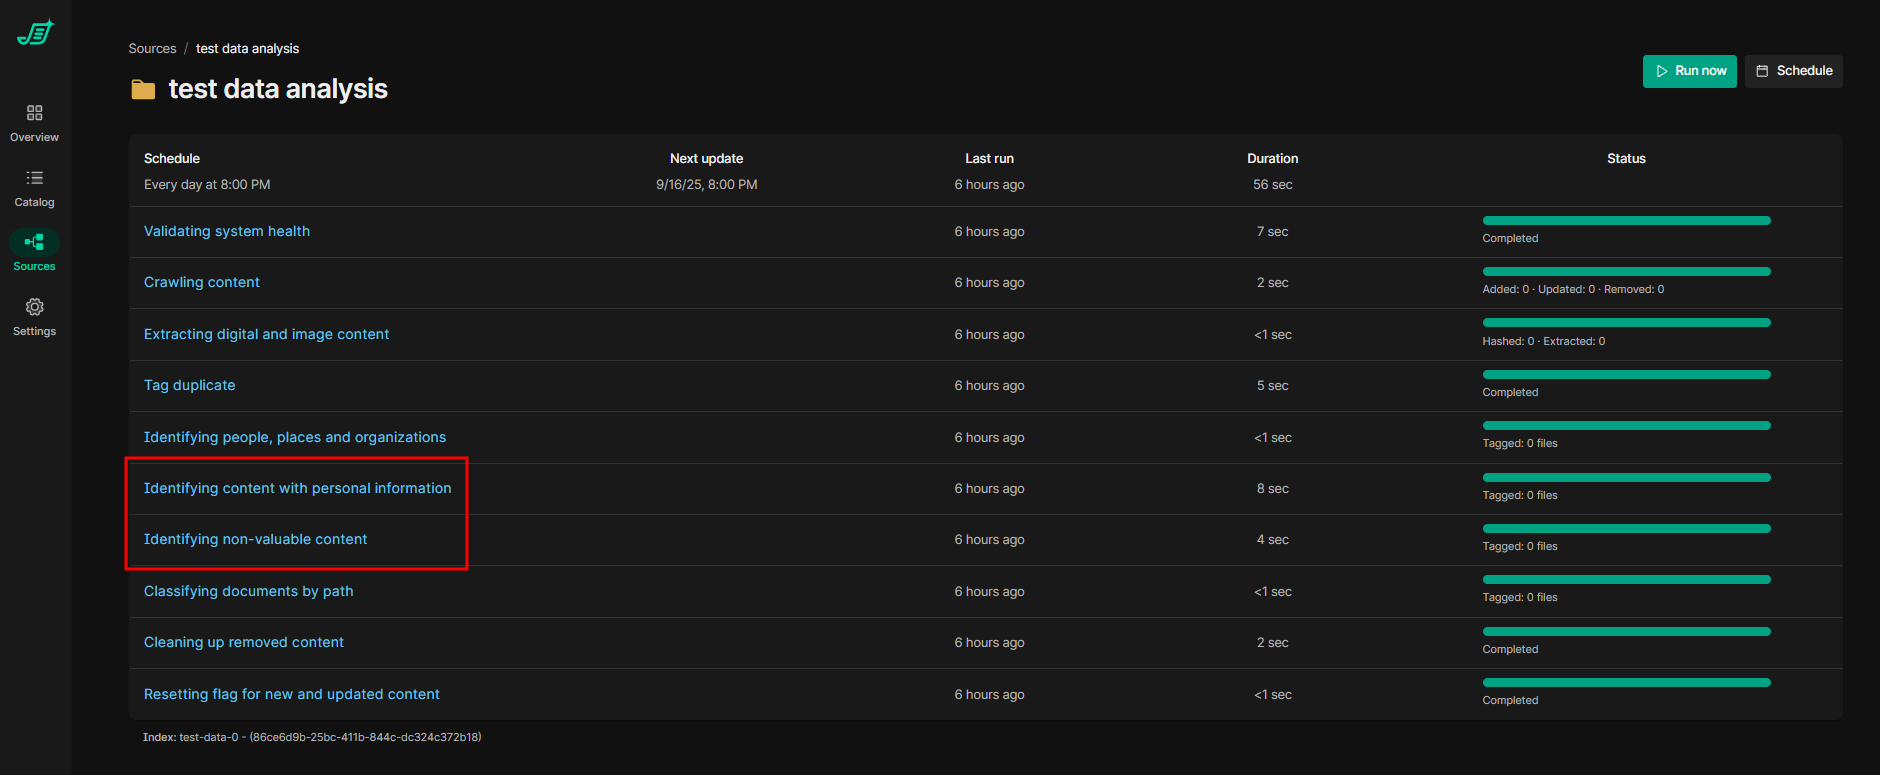
From the “Analysis Tools” page, you can view the progress of the job. Once all the steps are complete, the new rule tagging should be implemented.
-
The “Identifying content with personal information” step is referring to PII
-
The “Identifying non-valuable content” step is referring to ROT
-
As an alternative to step #2, you can select “Run Now” from this page (instead of “Run” from the “Sources” page)
Reviewing results of custom PII / ROT rule tagging
There are two pages in Control Center where you can review the results of your PII / ROT rule tagging.
Overview
ROT
The individual results of the ROT rules cannot be viewed from this page but these metrics will include anything tagged as a result of the new rules.
To review the results of the individual rules, you will have to go to the “Catalog” section (see “Catalog” section further down).
-
From the Control Center “Overview” page, the ROT widget will show the percentage of ROT for each data source
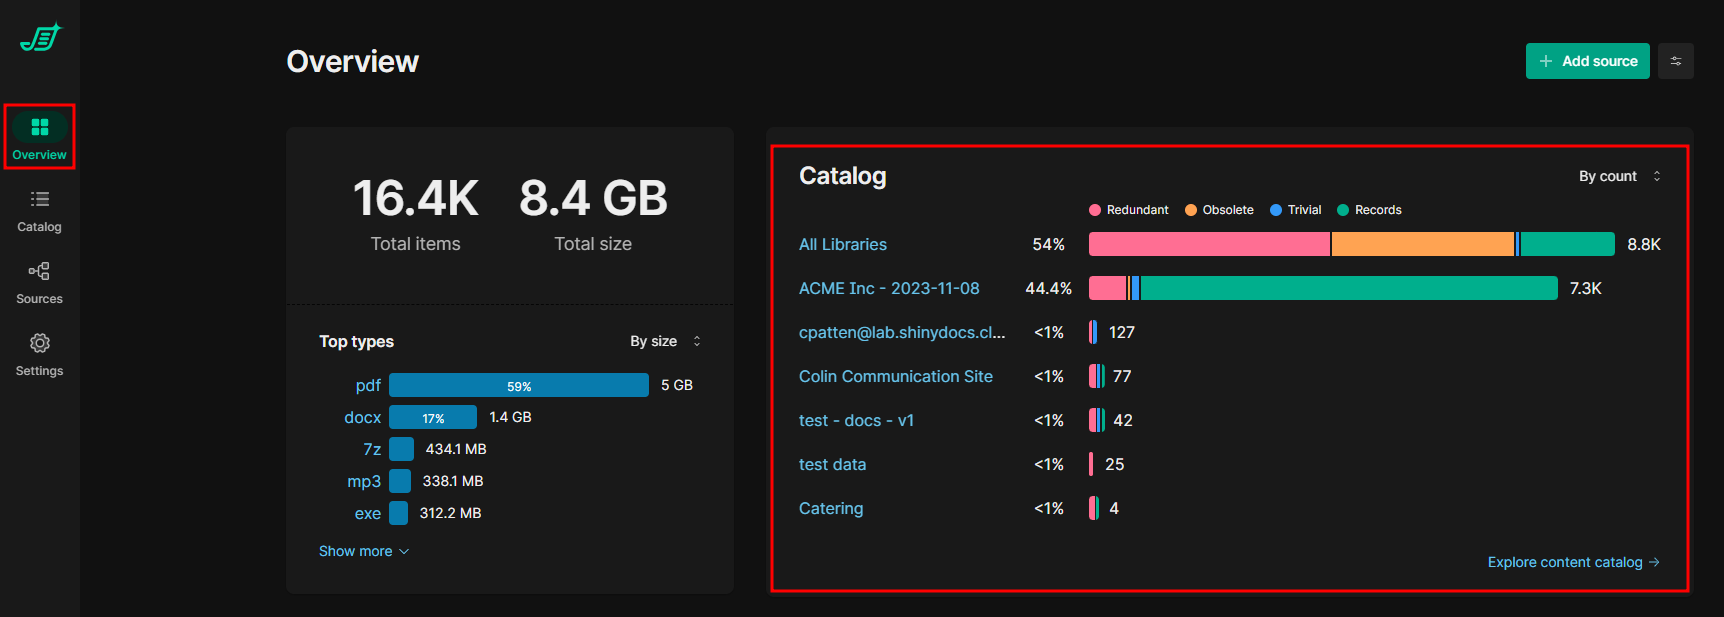
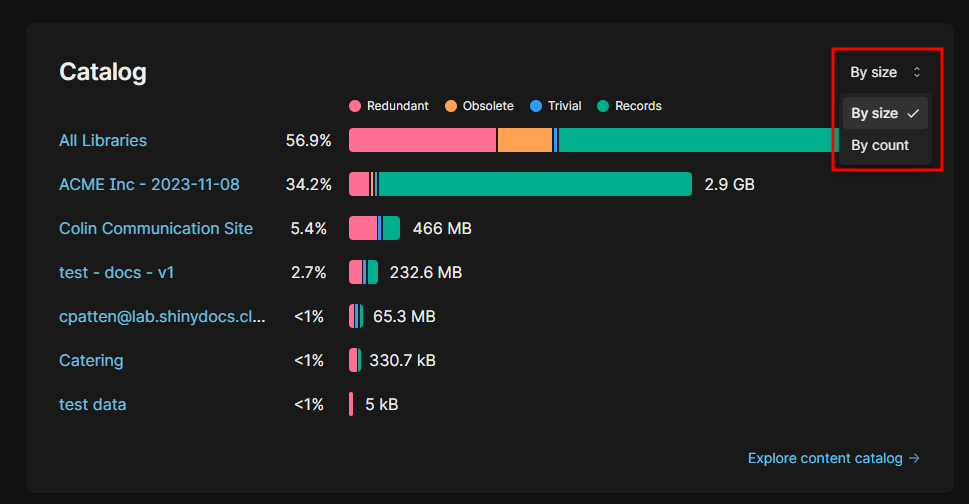
-
You can switch between “By size” and “By count”
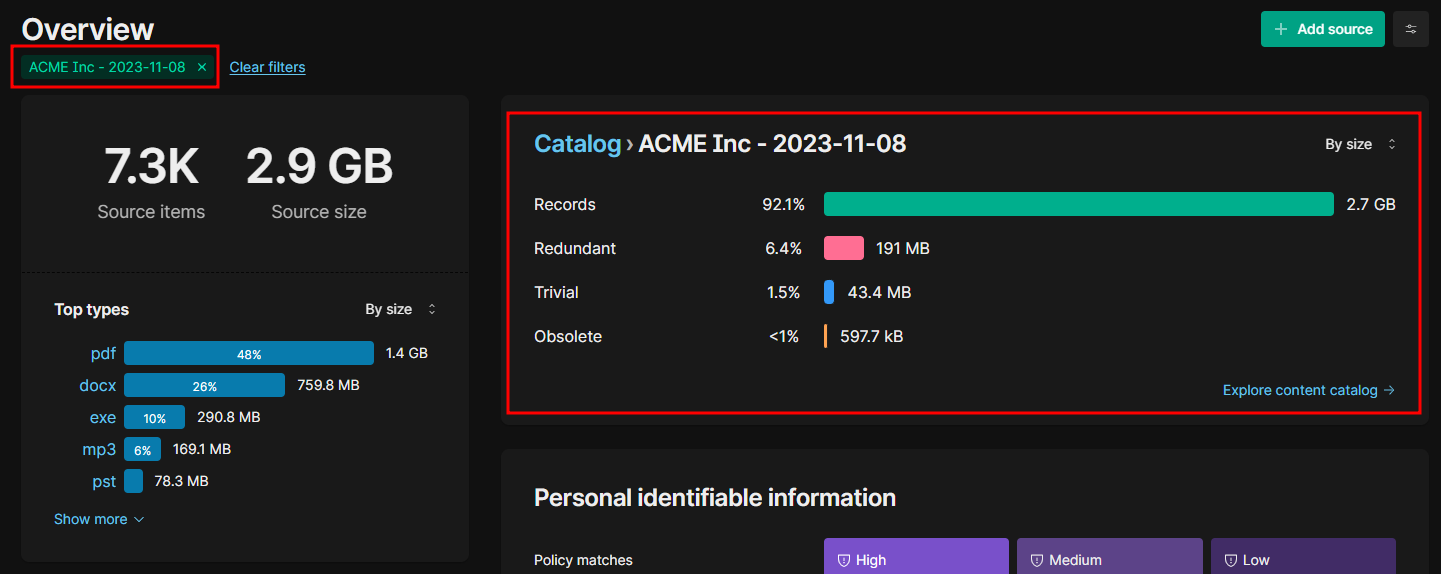
-
Selecting a data source from the ROT widget will filter down all the widgets on this page to that data source. This further refines the ROT widget to each ROT category for that data source.
-
Selecting the “Explore content catalog” option will bring you to the Control Center “Catalog” pages (see “Catalog” below for more details)
PII
-
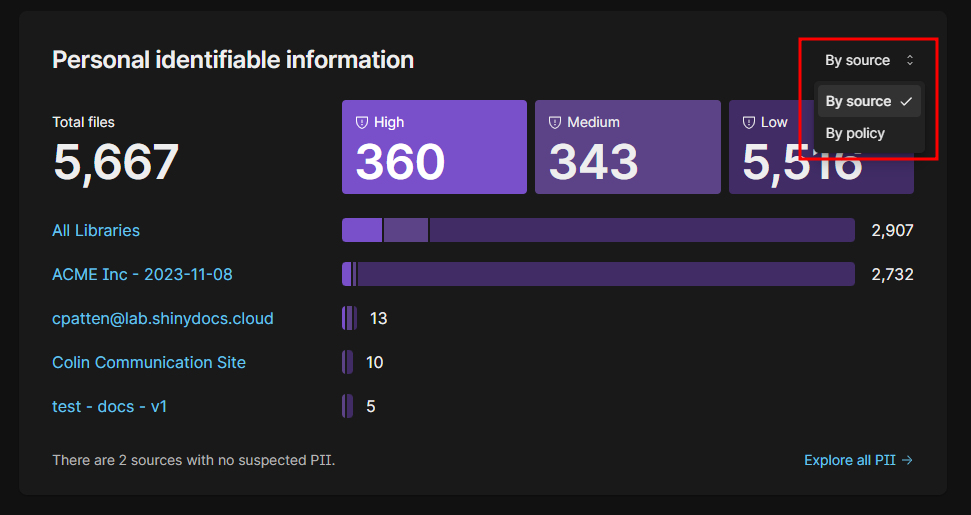
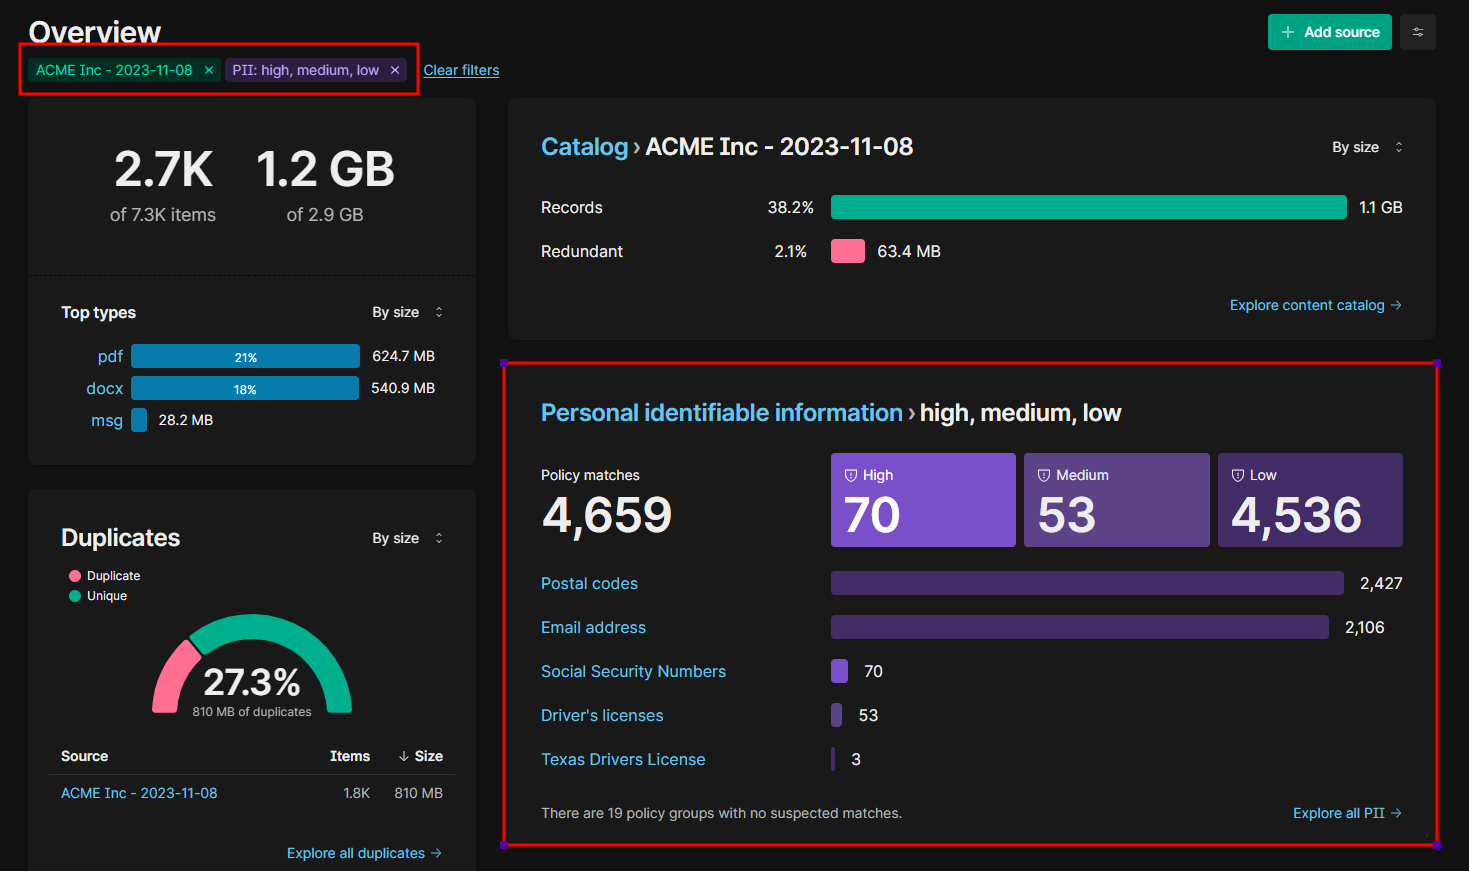
From the Control Center “Overview” page, the PII widget will show the total amount of PII, total amount per rule (or “DisplayGroup”), and amount by “Sensitivity”
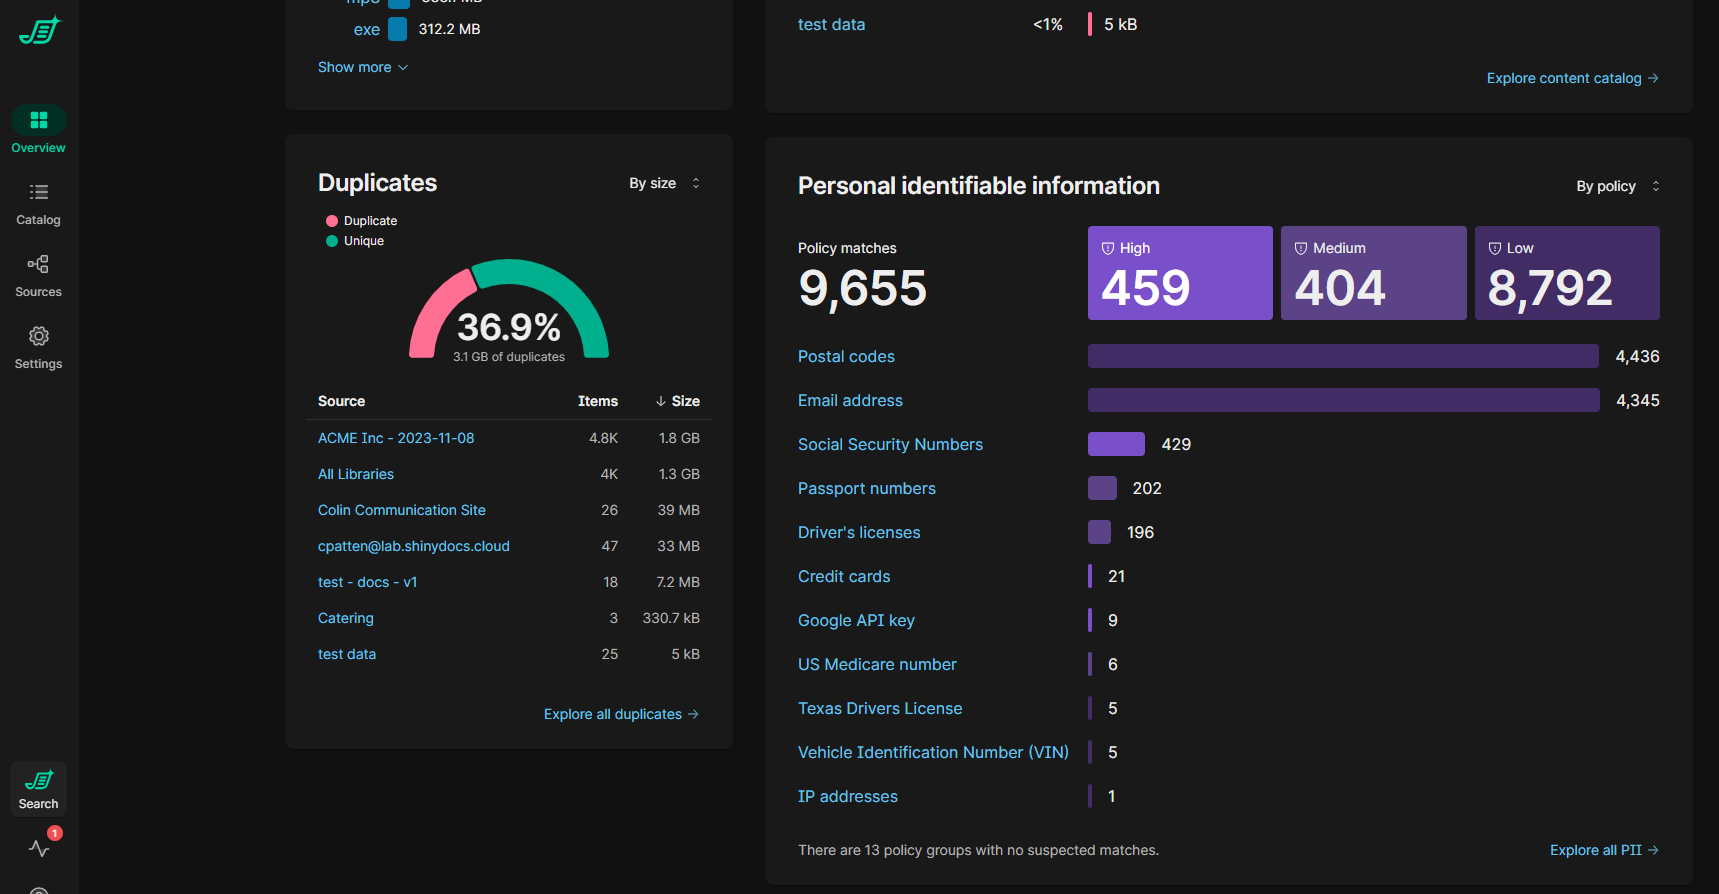
-
You can switch between “By policy” and “By source”
-
Selecting a PII rule, Source or Sensitivity on the PII widget will apply a filter to the whole Overview page accordingly
-
Selecting the “Explore all PII” option will bring you to the Control Center “Catalog” page (see “Catalog” below for more details), pre-filtered to all PII
Catalog
ROT
-
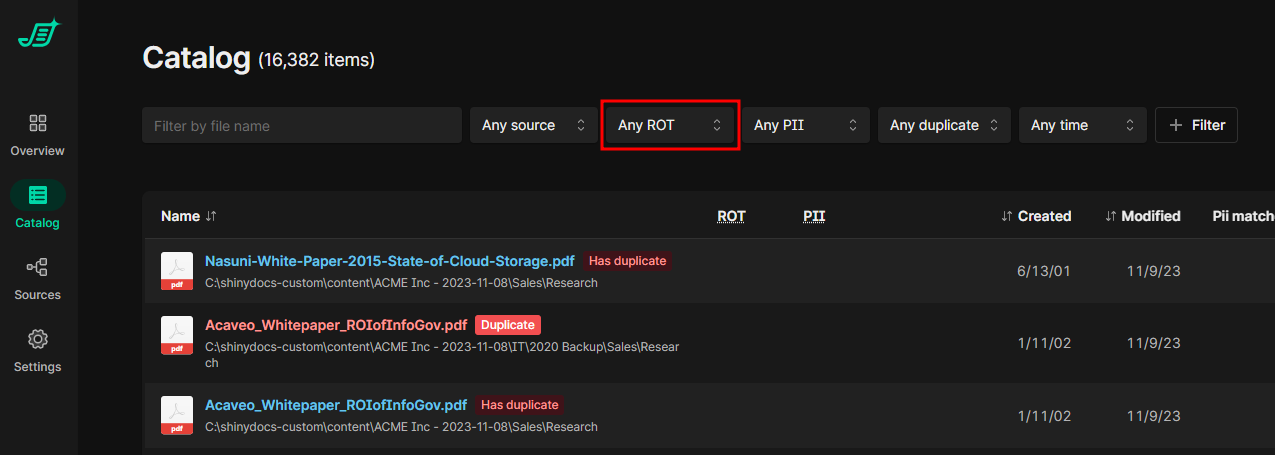
From the Control Center “Catalog” page, there is a drop-down menu/filter for ROT
-
By default, it’s set to “Any ROT”, which displays all items, whether they have a ROT tag or not
-
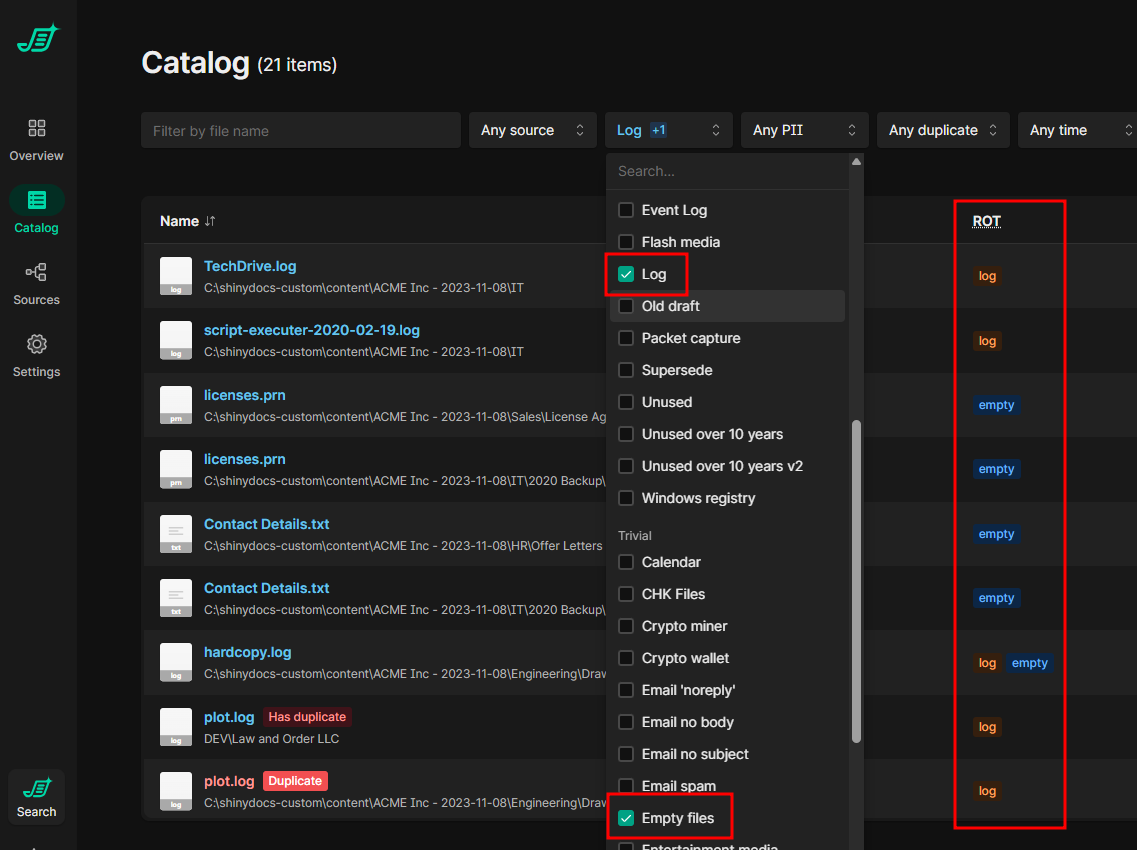
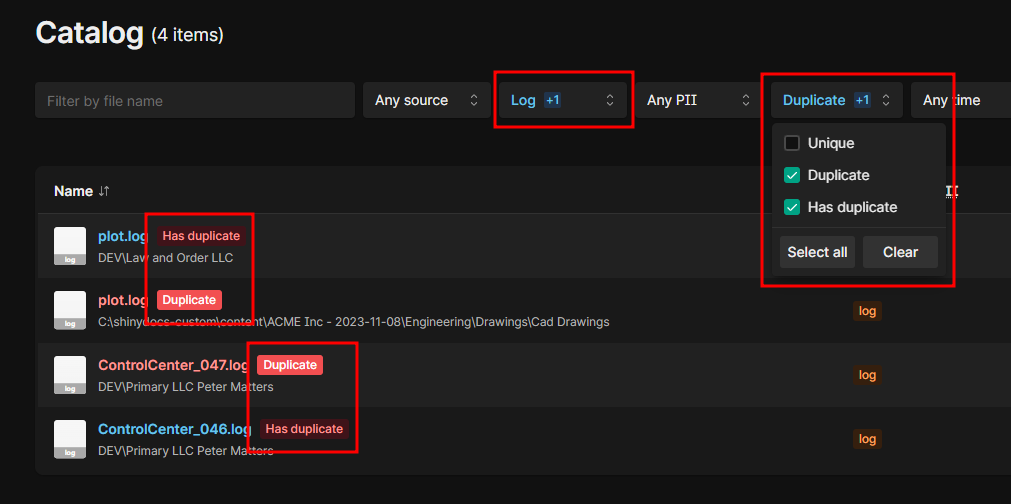
Selecting (checkmarking) at least one value from that list will filter down to any items that have the selected ROT tag
-
Selecting multiple values from that list will filter down to any items that have at least one of the selected ROT tags
-
These can be combined with other filters to refine the results further
PII
-
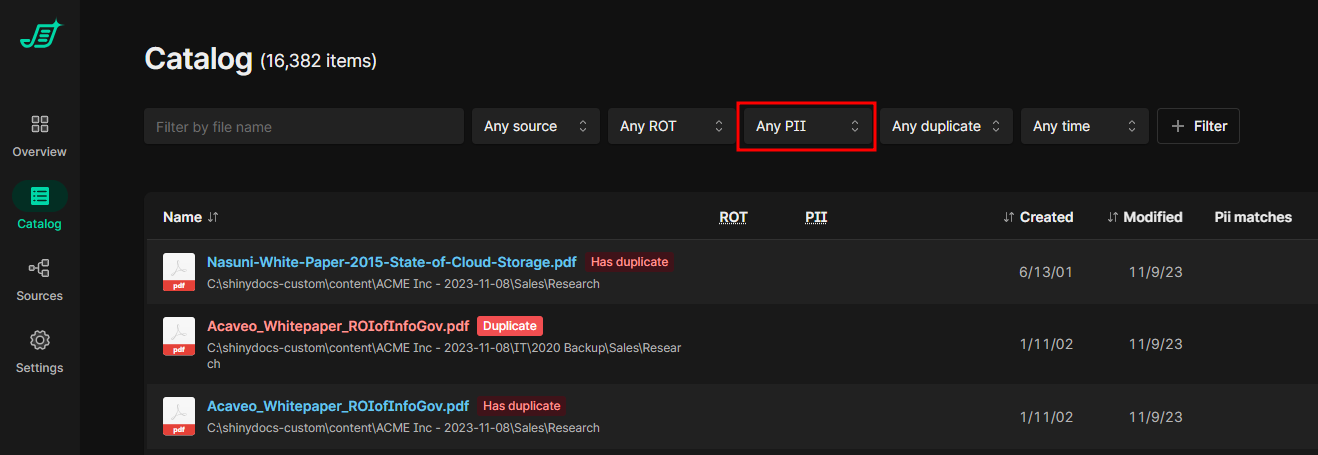
From the Control Center “Catalog” page, there is a drop-down menu/filter for PII
-
By default, it’s set to “Any PII”, which displays all items, whether they have a PII tag or not
-
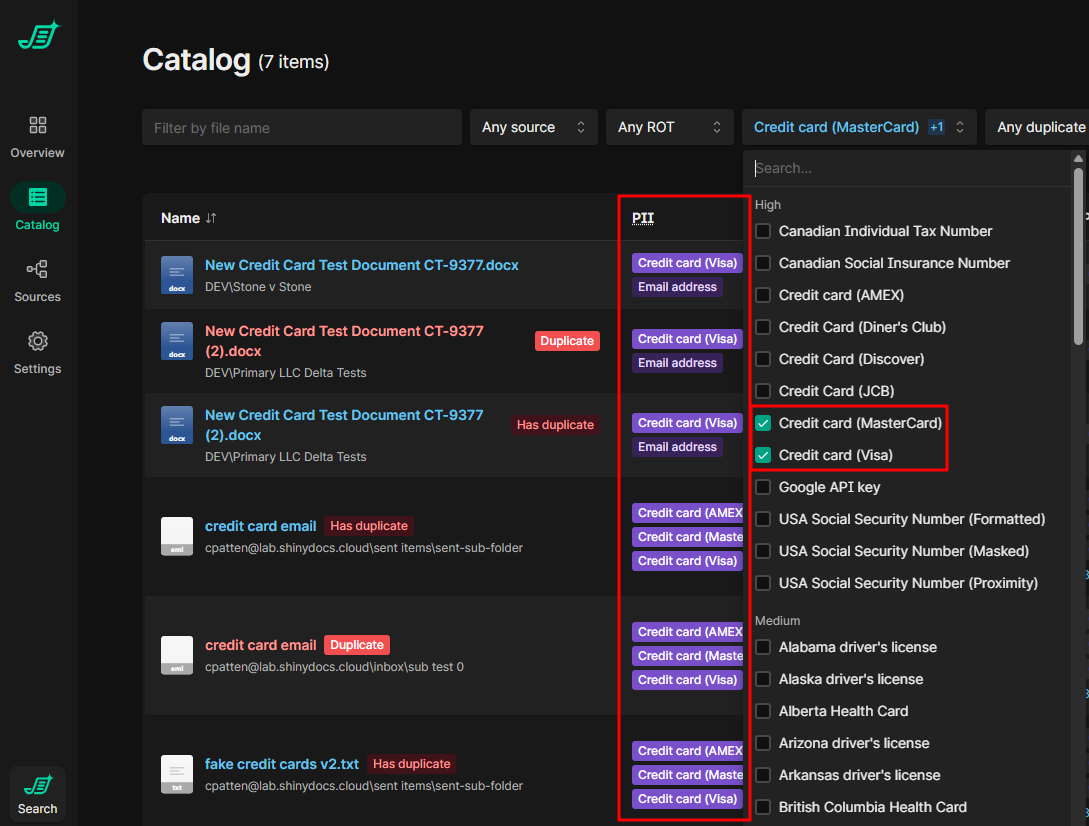
Selecting (checkmarking) at least one value from that list will filter down to any items that have the selected PII tag
-
Selecting multiple values from that list will filter down to any items that have at least one of the selected PII tags
-
These can be combined with other filters to refine the results further

-
For PII, you can also view the specific criteria/pattern that was matched to see what string(s) triggered it to become tagged. To do this, select “View”, then toggle on “Pii matches”

Disabling PII / ROT rules
If you want to disable a rule and remove the tagging, the steps are similar to the “Enabling custom PII / ROT rules in Control Center” section, except you are ‘removing’ instead of ‘adding’
-
In Control Center, go to “Settings” > “Tagging”
-
Select the “ROT” or “PII” tab select to rules you would like to enable
-
Select (checkmark) one of more of the rules from the “Available Rules” (right) column that you would like to disable, then select “Remove”
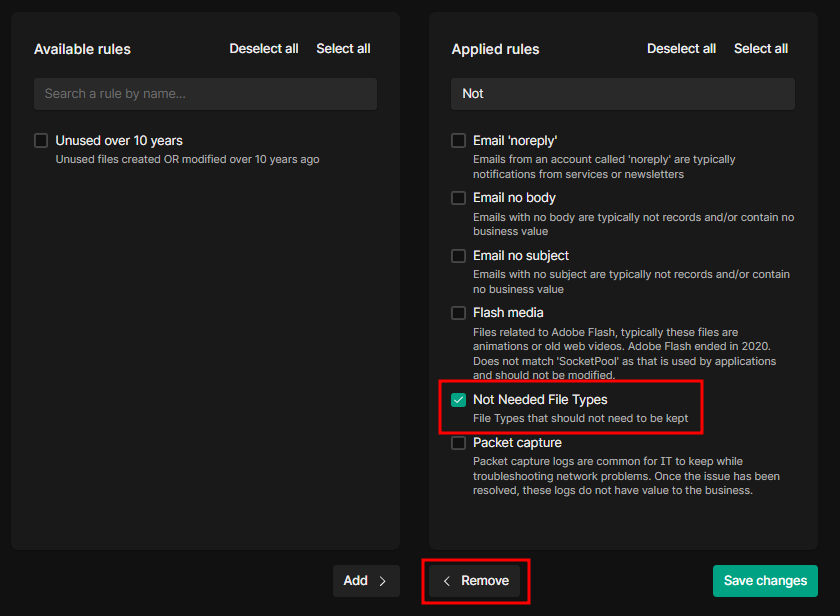
-
Select “Save Changes”
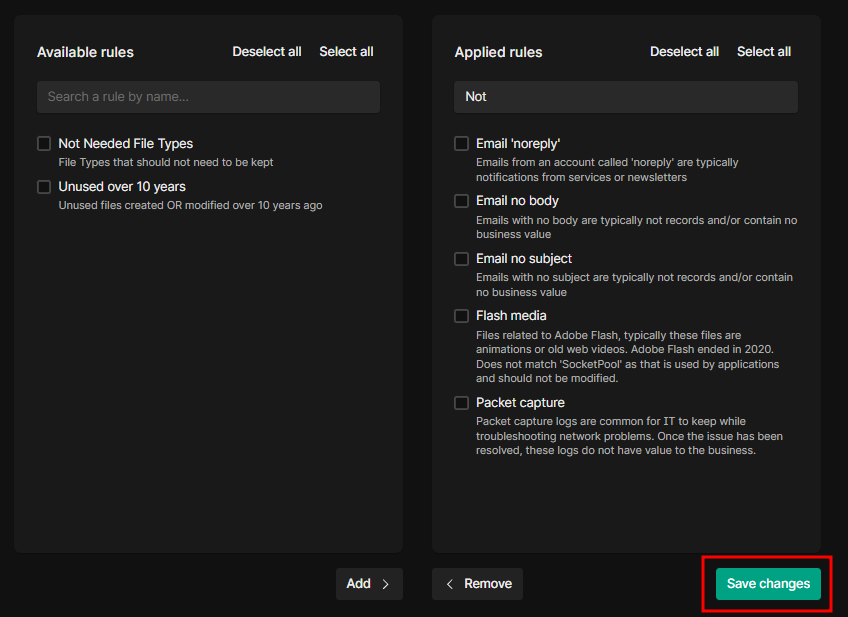
-
You will get a prompt to confirm your changes; if correct, select “Save Changes”
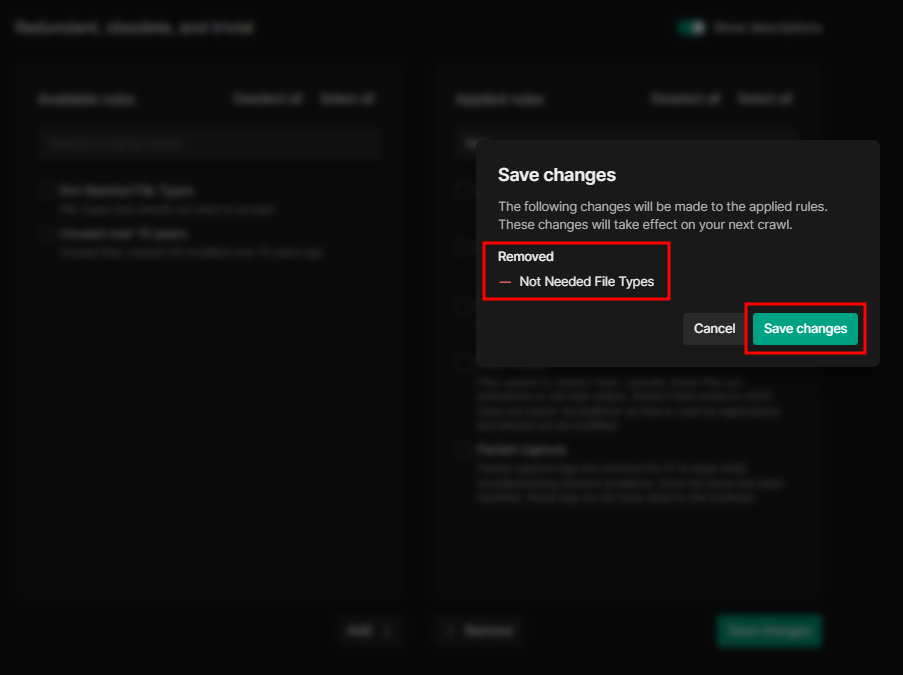
Note that if you want to apply both PII and ROT rules, these changes will need to be selected and saved in each separate tab (“ROT”/“PII”)
-
Similar to the “Applying PII / ROT rules to data sources” section, running a job (scheduled or on-demand) should remove the tagging for disabled rules against that data source.