For disk management purposes sometimes an implementation might require the relocation of the Search Engine’s data to an alternate drive, i.e. from C: drive to E: drive. This article outlines the process.
To relocate the OpenSearch data folder, use the following steps:
-
Create a new folder in the desired location, i.e. E:\SearchIndexes
-
Ensure the service account for the Shinydocs Search Engine has full access to this folder.
-
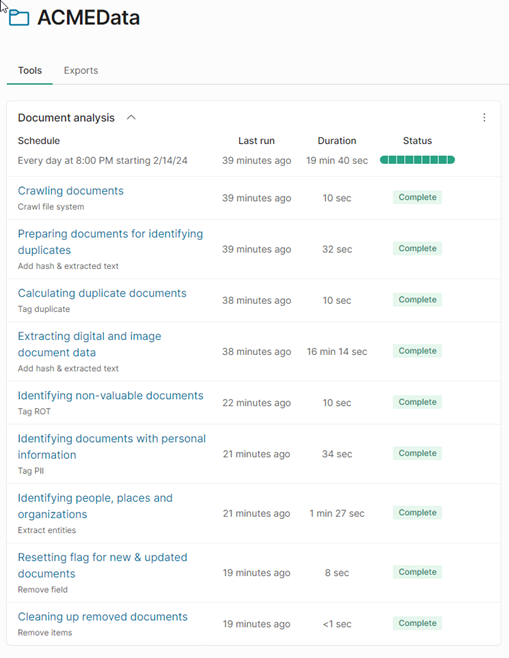
Confirm that all crawling has been stopped within Shinydocs Pro by inspecting the available data sources:

Click on the “hamburger” menu in the top-right corner.
-
Ensure that all actions are complete and the Status bar is all green.
-
Open the Services App (services.mcs) from the Windows Start menu.
-
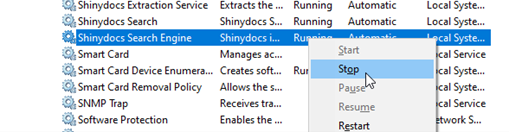
Locate the Shinydocs Search Engine, right-click on the service:
-
Stop the service.
-
Using Windows Explorer, locate the folder
C:\ProgramData\Shinydocs\SearchEngine\config or
C:\Program Files\Shinydocs Professional\SearchEngine -
Open the config folder and locate the opensearch.yaml file.
-
Create a backup of this file (i.e. opensearch.yaml.bak) then open the original in Notepad++ or Notepad.
-
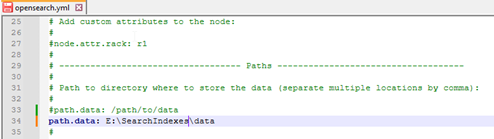
Locate the remarked-out entry for #path.data:
-
Add a new entry below the original example for your new location:
-
Save this file.
-
Return the folder C:\Program Files\Shinydocs Professional\SearchEngine and locate the data folder.
-
Cut this folder, then move to the new location (E:\SearchIndexes) and paste the data folder into that location.
-
Return to the Services App and start the Shinydocs Search Engine.
-
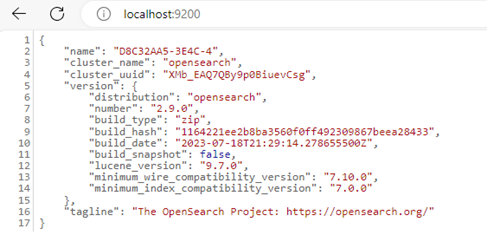
Wait for 2 to 3 minutes then access http://localhost:9200 from the browser.
-
You may then connect to the Shinydocs Professional Overview (https://localhost:9701)
