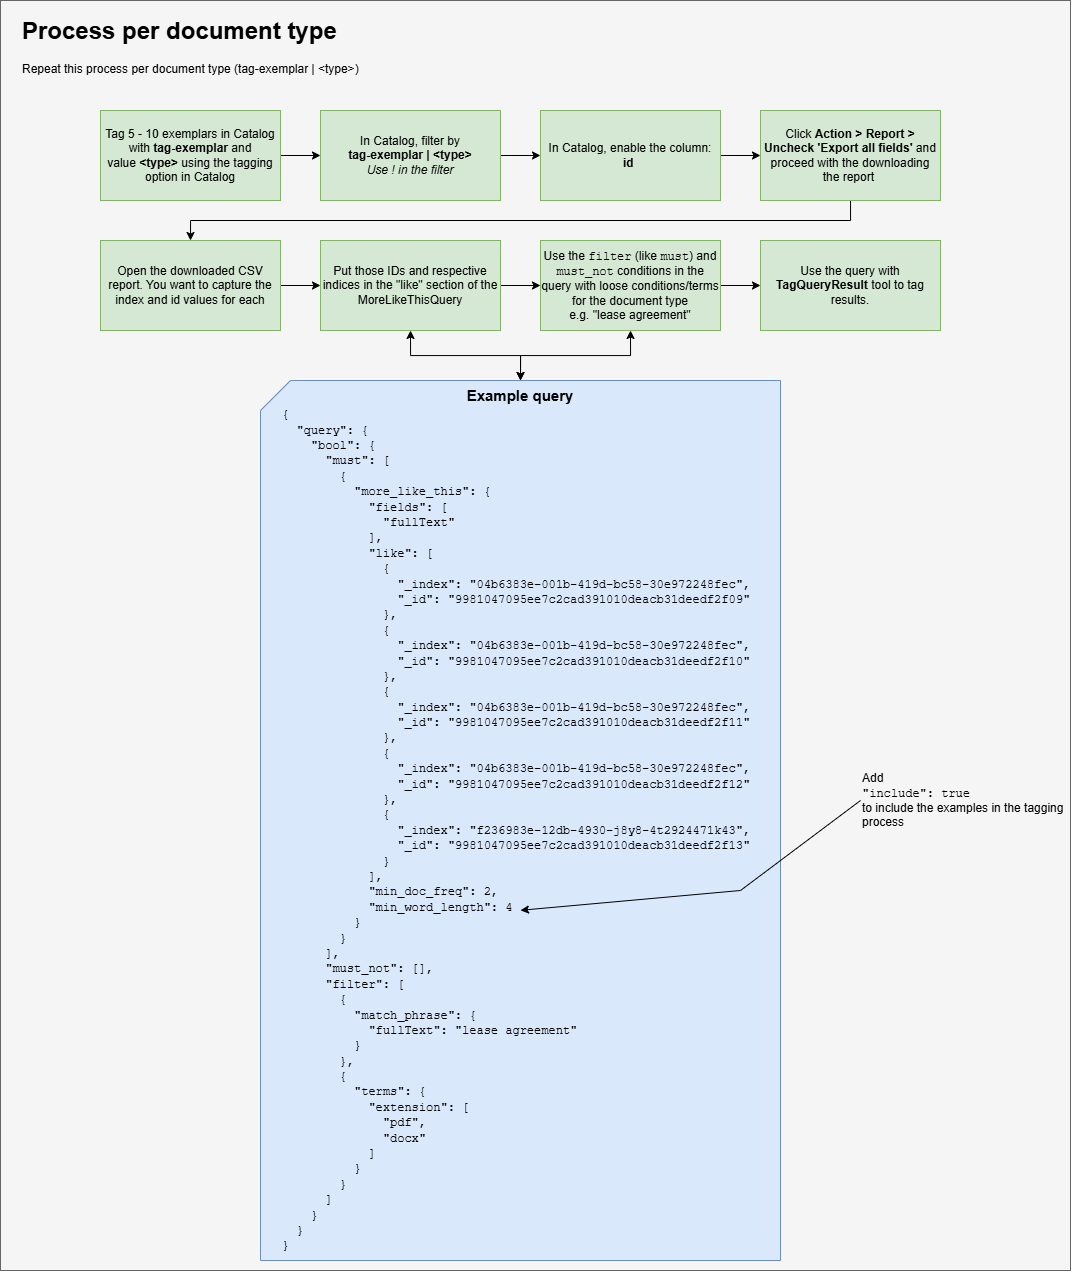
Using "More Like This" to Tag Document Types
This process uses Shinydocs Pro's TagQueryResult command (part of CognitiveToolkit.exe) to find and tag documents that are similar in content to a set of known examples. Run it once per document type you want to classify.
A PDF version of this diagram is also available
Before you start
You need:
-
Shinydocs Pro installed with CognitiveToolkit.exe available under
C:\Program Files\Shinydocs Professional\ControlCenter\ -
At least 5 to 10 representative example documents for each document type you want to tag
-
Access to the Catalog in Shinydocs Pro
Step 1: Tag your exemplar documents in the Catalog
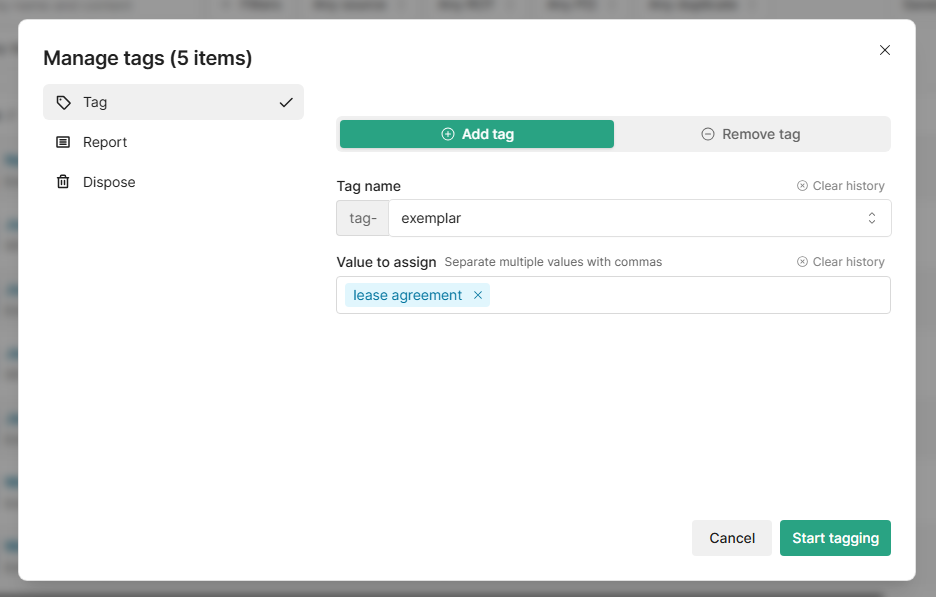
In the Catalog, locate 5 to 10 files that are good, clean examples of the document type you want to classify (for example: lease agreements, invoices, HR policy documents).
Select those files and use the Action menu to apply a tag. The tag name should follow the pattern tag-exemplar and the value <type>, where <type> describes the document category. For example: tag-exemplar | lease-agreement.
What to think about here: Choose exemplars that are typical of the type, not outliers. More diverse exemplars generally produce better results. Avoid documents that are very short or have minimal text.
Step 2: Get the index IDs for your exemplars
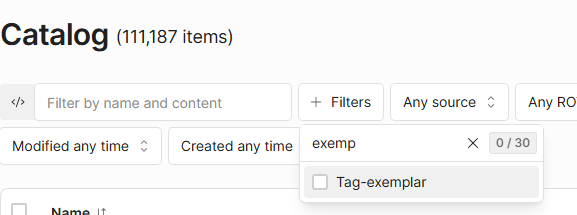
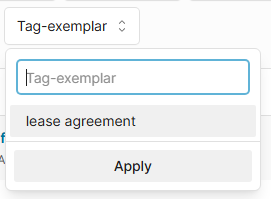
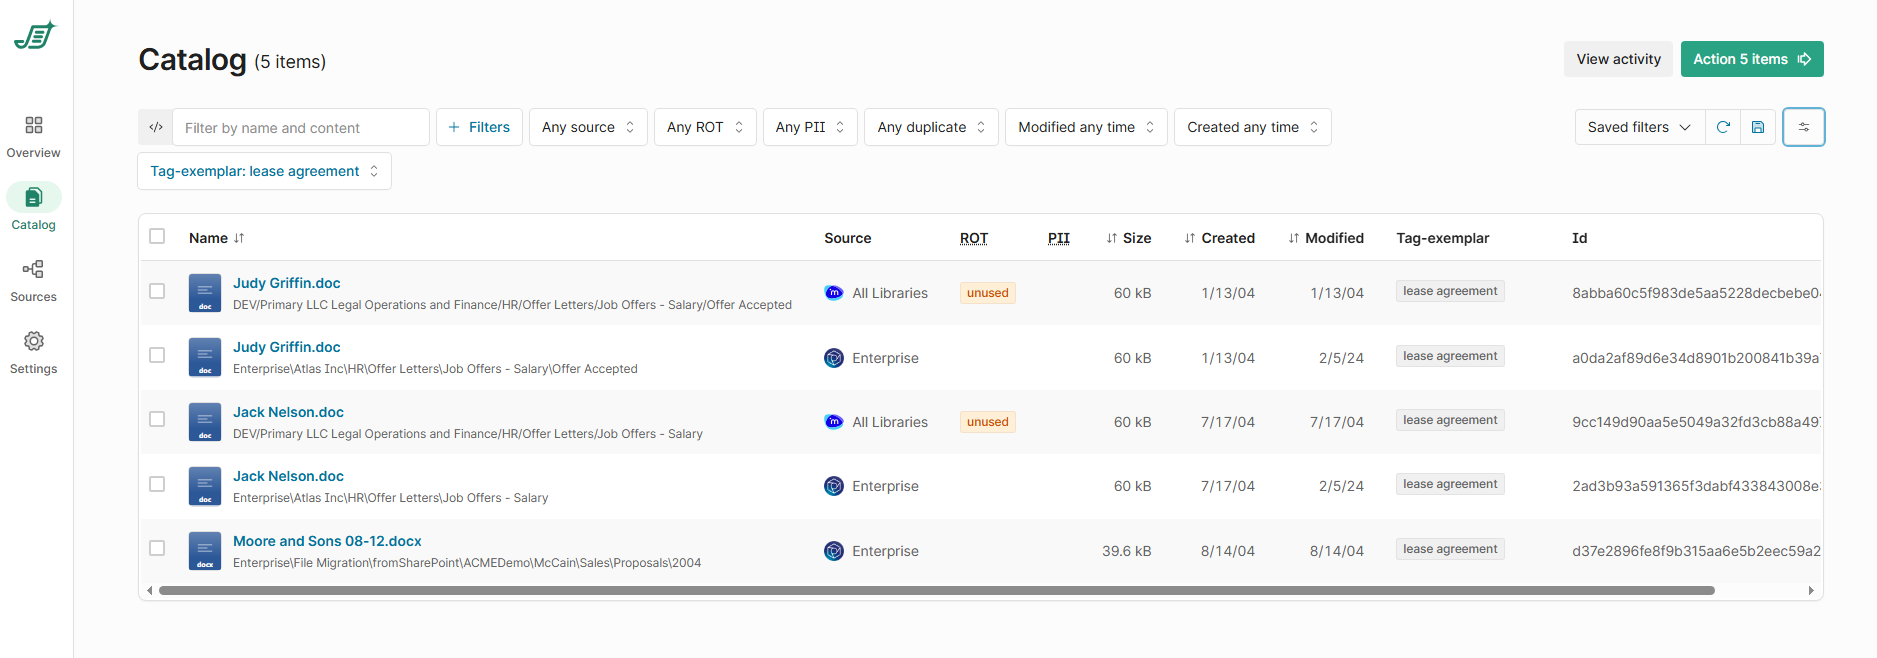
Once tagged, filter the Catalog by the tag you just applied (use tag-exemplar | <type> as the filter). Filter on the exemplar type
Before exporting, make sure the id column is visible. Open the View column selector and enable id if it is not already shown.
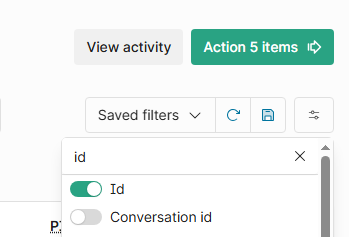
At this point, you should see the exemplars only and their IDs
Then click Action > Report. In the report dialog, uncheck Export all fields and proceed to download the CSV. This keeps the export clean and small.

Open the downloaded CSV (after you unzip it). You need two values from each row: the index value and the id value. These identify each exemplar document in the search index.
Step 3: Build the query
Use the MoreLikeThis bool query structure. The query has three main sections you need to configure: the "like" array, the "filter" conditions, and the "must_not" array.
It’s valid to have an empty array like this if you want to keep it for template purposes or if you might need to add to it later.
"must_not": []
The "like" array
Paste your collected index and ID pairs into the "like" array. Each entry identifies one exemplar document in the search index:
{
  "_index": "your-index-id-here",
  "_id": "your-document-id-here"
}
Add one entry per exemplar. If your exemplars come from more than one source, their "_index" values will differ. That is fine as long as each entry references the correct index for that document.
Other query settings
Three additional parameters in the more_like_this block are worth noting:
-
"include": true: ensures the exemplar documents themselves are included in the tagging process. -
"min_doc_freq": the minimum number of documents a term must appear in before it is used for similarity matching. The default in the example is2. -
"min_word_length": the minimum character length a word must have to be considered. The default in the example is4, which filters out short, common words.
You can adjust "min_doc_freq" and "min_word_length" if your results are too broad or too narrow.
The "filter" array
The filter acts as a safety net to prevent the More Like This algorithm from returning documents that happen to share vocabulary but are not actually the right type. Two filters are recommended:
-
A
match_phrasecondition with a characteristic phrase for this document type. Keep it general enough to cast a wide net, but specific enough to exclude unrelated content. For example:"lease agreement"or"purchase order". -
A
termsfilter on theextensionfield to restrict results to relevant file types, such aspdfanddocx.
The "must_not" array
This can be left empty to start. If you find false positives after a test run, you can add terms or conditions here to explicitly exclude them.
Save the completed query as a .json file before moving to the next step.
Example Query
{
	"bool": {
		"must": [
			{
				"more_like_this": {
					"fields": [
						"fullText"
					],
					"like": [
						{
							"_index": "04b6383e-001b-419d-bc58-30e972248fec",
							"_id": "9981047095ee7c2cad391010deacb31deedf2f09"
						},
						{
							"_index": "04b6383e-001b-419d-bc58-30e972248fec",
							"_id": "9981047095ee7c2cad391010deacb31deedf2f10"
						},
						{
							"_index": "04b6383e-001b-419d-bc58-30e972248fec",
							"_id": "9981047095ee7c2cad391010deacb31deedf2f11"
						},
						{
							"_index": "04b6383e-001b-419d-bc58-30e972248fec",
							"_id": "9981047095ee7c2cad391010deacb31deedf2f12"
						},
						{
							"_index": "f236983e-12db-4930-j8y8-4t2924471k43",
							"_id": "9981047095ee7c2cad391010deacb31deedf2f13"
						}
					],
					"min_doc_freq": 2,
					"min_word_length": 4,
                    "include": true
				}
			}
		],
		"must_not": [],
		"filter": [
			{
				"match_phrase": {
					"fullText": "lease agreement"
				}
			},
			{
				"terms": {
					"extension": [
						"pdf",
						"docx"
					]
				}
			}
		]
	}
}
Step 4: Run TagQueryResult
Open a command prompt as Administrator and navigate to the CognitiveToolkit directory (included in the Shinydocs Control Center installation):
Your installation location may be different.
cd "C:\Program Files\Shinydocs Professional\ControlCenter"
Run the TagQueryResult command with the required parameters:
CognitiveToolkit.exe TagQueryResult -q "C:\path\to\your-query.json" -f "tag-field-name" -v "tag-value" -u "http://localhost:9200" -i "your-index-name"
Required parameters:
-
-q/--query: path to your.jsonquery file -
-f/--field: the index field to apply the tag to -
-v/--field-value: the tag value to assign -
-u/--index-server-url: URL of your OpenSearch/Analytics Engine instance -
-i/--index-name: name of the index to run against
What to think about here: If you want , you can pass multiple index names to the -i parameter as a comma-separated list, for example -i "index1,index2".
Step 5: Repeat for each document type
This entire process runs once per document type. Start fresh with a new set of exemplars, a new tag name, and a new query file for each type you want to classify. This process can be further automated with Windows Task Scheduler.
Running these enrichments as a collection
When you have several document types to tag, put the commands into a Windows .bat file so you can run the full collection in one pass instead of starting each TagQueryResult command manually. Create one query JSON file per document type, then update the -q, -f, and -v values for each line.
@echo off
set "CTK=C:\Program Files\Shinydocs Professional\ControlCenter\CognitiveToolkit.exe"
set "SERVER_URL=http://localhost:9200"
set "INDEX_NAME=your-index-name"
set "QUERY_DIR=C:\path\to\queries"

"%CTK%" TagQueryResult -q "%QUERY_DIR%\lease-agreement.json" -f "tag-document-type" -v "lease-agreement" -u "%SERVER_URL%" -i "%INDEX_NAME%"
"%CTK%" TagQueryResult -q "%QUERY_DIR%\invoice.json" -f "tag-document-type" -v "invoice" -u "%SERVER_URL%" -i "%INDEX_NAME%"
"%CTK%" TagQueryResult -q "%QUERY_DIR%\purchase-order.json" -f "tag-document-type" -v "purchase-order" -u "%SERVER_URL%" -i "%INDEX_NAME%"

pause
Run the .bat file from Command Prompt and quote all paths, especially anything under Program Files or folders with spaces. Keep each query JSON focused on one document type so the output tag value matches the documents returned by that query.