This guide assumes you are using Windows Server edition. If you are using Windows 10 or 11, use Turn Windows features on or off.
Using this configuration will provide an authentication gate to access the platforms, once authenticated, configured users will have access to all content in the respective platform.
This guide covers configuring an IIS reverse proxy to configure which AD users and groups can access Shinydocs Dashboards.
Preconditions
Hold up!
Before you proceed, you will need to think about which ports you will use. You cannot use the same port (443) for each.
-
Have Shinydocs Pro installed
-
Have IIS installed along with the URL Rewrite & Application Request Routing modules
-
(Dashboards only) A service account (or user account) that will be used to authenticate the connection between Shinydocs Pro and Dashboards
-
This process will enable Windows Authentication when accessing Dashboards, therefore account credentials are needed to make the Dashboard links work in Shinydocs Pro

-
IIS Installation and Configuration
Install IIS - Windows Server
-
Open Server Manager
-
Click Manage → Add Roles and Features
-
Click Next until Server Roles
-
Check Web Server (IIS)
-
In the pop-up, click Add Features
-
Click Next until Role Services
-
Ensure these are checked:
-
Web Server → Security → Windows Authentication
-
Web Server → Security → URL Authorization
-
-
Click Next, then Install
Install IIS - Windows 11
-
Press Windows + R, type:
optionalfeatures, press Enter -
Check:
-
Internet Information Services
-
Expand:
-
Web Management Tools
-
World Wide Web Services → Security → check Windows Authentication
-
World Wide Web Services → Security → check URL Authorization
-
-
-
Click OK to install
Download and Install Additional IIS Modules
Download and install the following:
They will be automatically added to IIS (you may need to close IIS and re-open for URL Rewrite to appear).
Step 1: Add Your Website
-
Open IIS Manager.
-
Right-click Sites and select Add Website.
-
Fill out the following fields using your values:
-
Site name: The name of your site as it will appear in IIS
-
Suggestions:
-
Shinydocs Pro Control Center
-
Shinydocs Pro Dashboards
-
-
-
Physical path:
C:\inetpub\wwwroot\ShinydocsPro-
You can choose any physical path you like, it will create the web.config file for IIS in this directory.
-
-
Type: HTTPS
-
IP address: All Unassigned
-
Port: 444 (you can use 443 if you are not using it for Shinydocs Control Center)
-
🛑Ensure that this port is not currently in use
-
You can use any port you would like that is available
-
-
Host name: Your hostname
-
SSL certificate: Select your certificate (e.g., my self-signed certificate JARVIS)
-
For more information, please see How to Set Up SSL on IIS 7 or later | Microsoft Learn
-
-
-
Click OK to create the site.


Step 2: Configure the Reverse Proxy
-
Select your website in IIS Manager, then click URL Rewrite.
-
In the Actions panel, click Add Rules.
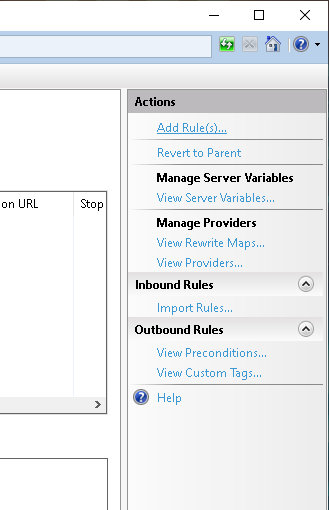
-
Select Reverse Proxy and click OK.
-
Enable Rewriting of domain names under Outbound Rules
-
Set the inbound URL and the outbound URL.
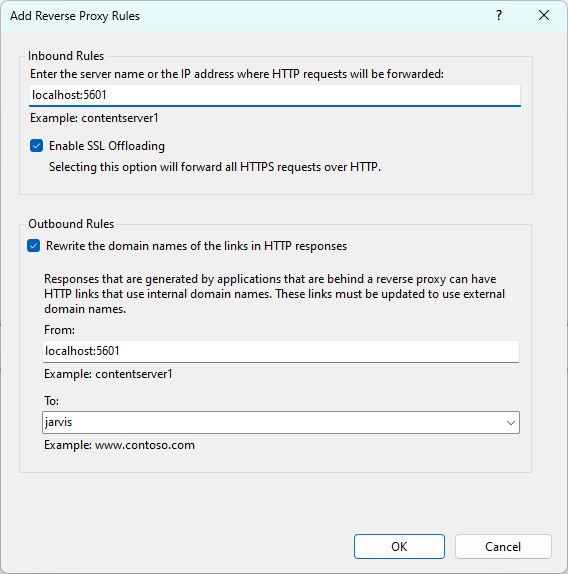
-
For inbound rules:
-
Dashboards:
localhost:5601
-
-
For Outbound rules
-
From:
localhost:5601 -
To: your machine hostname
-
-
-
Click OK to save the settings.


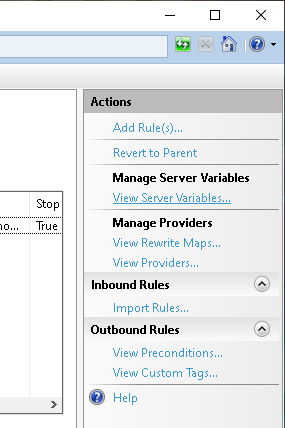
Step 3: Configure Server Variables
-
With your site selected, go to URL Rewrite and click View Server Variables.
-
Add these variables:
-
HTTP_ACCEPT_ENCODING -
HTTP_X_ORIGINAL_ACCEPT_ENCODING
-
-
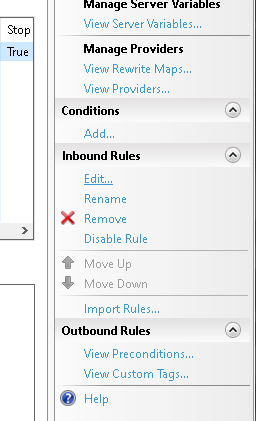
Go back, select the Inbound Rule in URL Rewrite and click Edit.
-
Under Server Variables
-
Add
HTTP_X_ORIGINAL_ACCEPT_ENCODINGto{HTTP_ACCEPT_ENCODING}. -
Add
HTTP_ACCEPT_ENCODINGwith a placeholder value (e.g.,abc).
-
-
-
Click Apply (top-right) to save the configuration.
-
Edit the
web.configfile in your site's directory (C:\inetpub\wwwroot\ShinydocsPro):-
Replace the placeholder value (
abc) with an empty string. -
Add the following under
<configuration>:<system.web> <httpRuntime requestPathInvalidCharacters="" relaxedUrlToFileSystemMapping="true" /> </system.web>
-
-
Save the file.
-
Go to URL Rewrite and click Add Rules. Choose Blank Rule under Outbound Rules
-
Name the rule
RestoreAcceptEncoding. In the settings, choose <Create New Precondition…>. -
Name the rule
NeedsRestoringAcceptEncoding, check Using is set toRegular Expressionsand Logical grouping is set toMatch All. -
Add a condition to the precondition:
-
For Condition input, type
{HTTP_X_ORIGINAL_ACCEPT_ENCODING}(include the curly braces). -
For Pattern, type
.+. -
Click OK twice to close the condition setup.
-
-
Back in the rule settings, go to Match and set Matching Scope to Server Variable.
-
For Variable name, type
HTTP_ACCEPT_ENCODING. -
For Pattern, type
^(.*).
-
-
In the Action section, do the following:
-
Set Action type to Rewrite.
-
For Value, type
{HTTP_X_ORIGINAL_ACCEPT_ENCODING}(include the curly braces).
-
-
Click Apply to save the rule.


Step 5: Configure User Authentication
-
Select your site in IIS Manager and click Authentication.
-
Disable Anonymous Authentication and enable Windows Authentication.
-
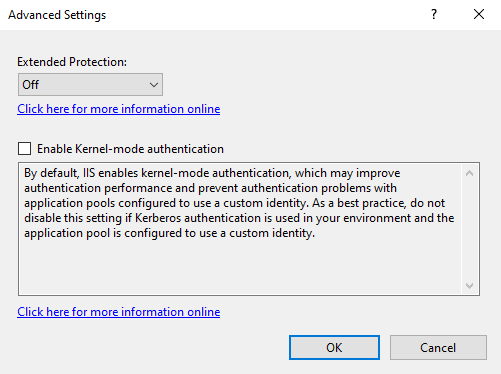
If you use an FQDN via DNS, you likely need to disable Kernel-mode authentication. You will know to disable this if accessing the dashboard URL causes a looping Windows authentication. To disable it, in IIS's Authentication section, select Windows Authentication > Advanced Settings > uncheck Enable Kernel-mode authentication.
-
Go back to the main IIS screen and select .NET Authorization Rules or Authorization Rules (whichever is available on your computer).
-
Delete the default Allow All Users rule.
-
Choose one of the following options based on your needs:
-
All users: Allows everyone to access the web content. Use this only if there are no security concerns about unrestricted access.
-
All anonymous users: Not recommended.
-
Specified roles or user groups: Restricts access to specific user groups. Use this option only when you want users in certain groups, such as administrators, to have access.
-
Specified users: Limits access to specific individuals. Use this for precise control over who can access the content.
-
-
Add an allow rule for the service account (or user account) that will be used to authenticate the connection between Shinydocs Pro and Dashboards
-
Add Allow Rule.
-
Select Specified users.
-
Enter the name of the account (ex. svcshinydocs).
-
Click OK to add the rule.
-
-
Configure the service account (or user account) in Shinydocs Pro
-
In Shinydocs Pro Control Center (https://localhost:9701) go to Settings.
-
Go to the Services setting page.
-
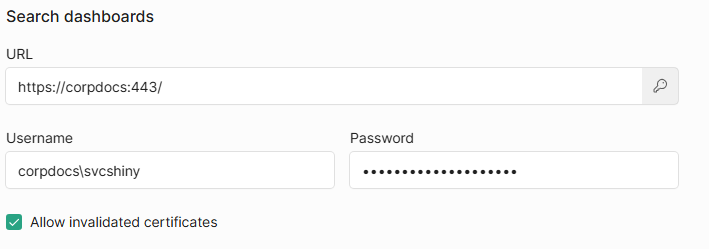
Under Search dashboards:
-
Set the URL to the reverse proxy URL (ie. https://servername:443/)
-
Click on the key

-
Enter the username and password for the Service account (or user account) used in Step 6.
-
Check Allow invalidated certificates.
-
-
Click Save changes.
-


Your Shinydocs Pro site should now be accessible securely and configured with user authentication. Try right-clicking on the site in IIS Manager > Manage Website > Browse. If you experience any issues, review the steps and ensure all configurations match the guide.