This guide covers everything you need to get Ollama and Shinydocs Pro working together. You’ll install the tools, set a couple of key environment variables, enable the right features in the Control Center, and be ready to start testing AI with your documents.
Shinydocs AI Interface is currently in early preview. Functionality and UI are subject to change and may differ slightly from this guide.
1. Ollama Installation (Windows)
Make sure you have the latest NVIDIA GPU drivers installed for your graphics card: Download The Official NVIDIA Drivers | NVIDIA
-
Download Ollama from https://ollama.com/
-
Install Ollama
-
Set your context length environment variable for Ollama
-
In Windows, search for View advanced system settings and open it
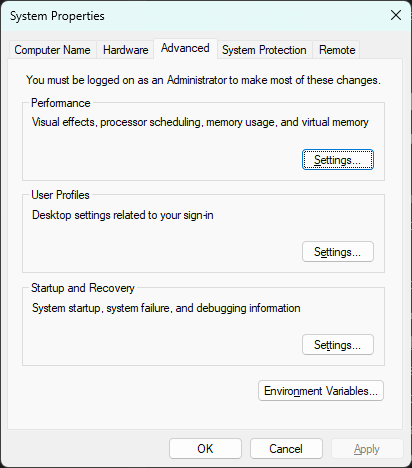
System Properties window -
Click Environment Variables
-
In the System variables section, click New
-
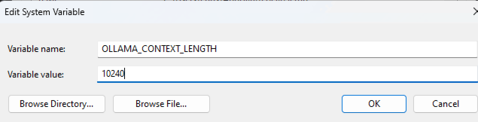
Create a new variable:
-
Variable name: OLLAMA_CONTEXT_LENGTH
-
Variable value: 10240
-
This will set Ollama to have a maximum context window of 10,240 tokens
-
-
-
Click OK
-
Click OK again
-
Restart Ollama by right-clicking on the icon in your task tray and selecting Quit Ollama
-
Start Ollama again to pick up the new environment variable
-
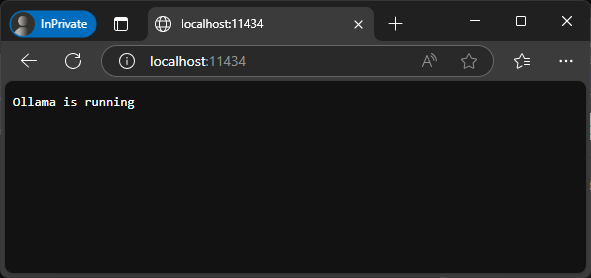
Verify Ollama is running by going to http://localhost:11434 in your browser
-
2. Shinydocs Pro Installation
-
Install Shinydocs Pro with the provided Shinydocs Pro Bundle (e.g. shinydocs-pro-25.1.15.exe)
-
An in-depth guide can be found on our Help Desk: Shinydocs Pro Control Center Guide
-
-
Use the default options during the installation unless you need to install it on another drive.
-
Click the Options button in the installer to change the location
-
-
Launch Shinydocs Pro Control Center or go to https://localhost:9701 in your browser
-
You will be prompted to upload your Shinydocs license. Upload it at this time to activate Shinydocs Pro
-
AI features are not available on a trial license at this time
-
-
Add a content source to Shinydocs Pro of your choice. For trying out the Shinydocs AI interface, we recommend targeting a data source with highly known information and that is less than 20 GB. While the size of the repository does not affect the AI features at this time, the bigger the source, the longer it will take to analyze and be ready for AI interactions.
-
Wait for the analysis to finish. This could take a few minutes/hours/days, depending on the size of your repository. You will know it is complete when you see Content analysis completed successfully.

3. Pull some models to try with Shinydocs Pro
We highly recommend using nomic-embed-text as your embedding model. You can pull this from Ollama by running the following command:
ollama pull nomic-embed-text:latest
Check out Ollama’s available models Ollama Models to find models you want to try. Different LLM models behave differently, and some are better at different tasks. To get you started, we recommend trying these models to start.
|
Model name What we have tried |
Accels at |
Link |
Ollama pull command |
|---|---|---|---|
|
Gemma3
|
|
|
|
|
Cogito
|
|
|
|
|
Llama3.2
|
|
|
4. Configure Shinydocs Pro AI interface with Ollama
-
Enable Streamlined Search and AI in /flags
-
Open Shinydocs Pro Control Center in your web browser (https://localhost:9701)
-
Once Shinydocs Pro Control Center is visible, change the URL in your browser to https://localhost:9701/flags
IMPORTANT: The flags page contains settings that could break your Shinydocs Pro install. Only change values on this page when instructed to by Shinydocs Support, like in this guide. -
Enable the following flags:
-
Enable Search App Selection
-
AI
-
-
Disable the following flags:
-
Streamlined Search Permission Checking
-
This feature is coming soon!
-
-
-
-
Switch from Enterprise Search to Streamlined Search
-
Go to https://localhost:9701/settings/search
-
Or in Shinydocs Control Center, click Settings > Search
-
-
Select Streamlined Search as the search product to use
-
Click Save changes
-
-
Configure the AI Interface in Shinydocs Pro
-
Go to Shinydocs Pro Control Center > Settings > AI
-
For AI Engine, select Ollama from the drop-down
-
Set the following (depending on your environment and which models you downloaded):
-
API endpoint:
http://localhost:11434
This is the Ollama endpoint that will be used -
Text model:
yourmodel:parameters
e.ggemma3:12b -
Embedding mode:
nomic-embed-text:latest
We highly recommend using nomic-embed-text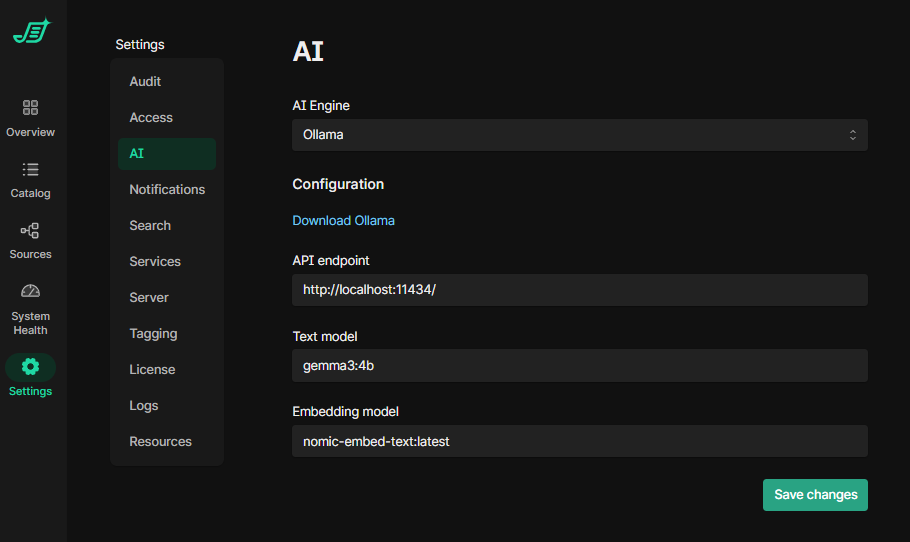
-
-
Click Save changes
-
You can come back here to change your models at any time
-
5. Try Streamlined Search with AI
Streamlined search is not production-ready and has no permission checking capabilities at this time.
Now that everything is set up, you will be able to use the LLM to converse with your documents in Search.
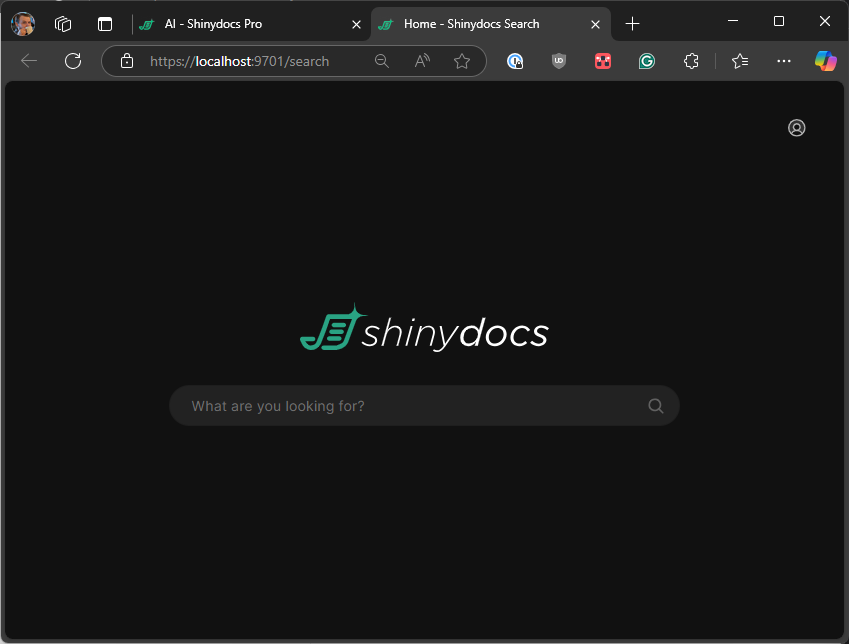
To get to the new streamlined search once it is enabled (done above), you can click on the Search button in the bottom left of Shinydocs Control Center or go to https://localhost:9701/search
-
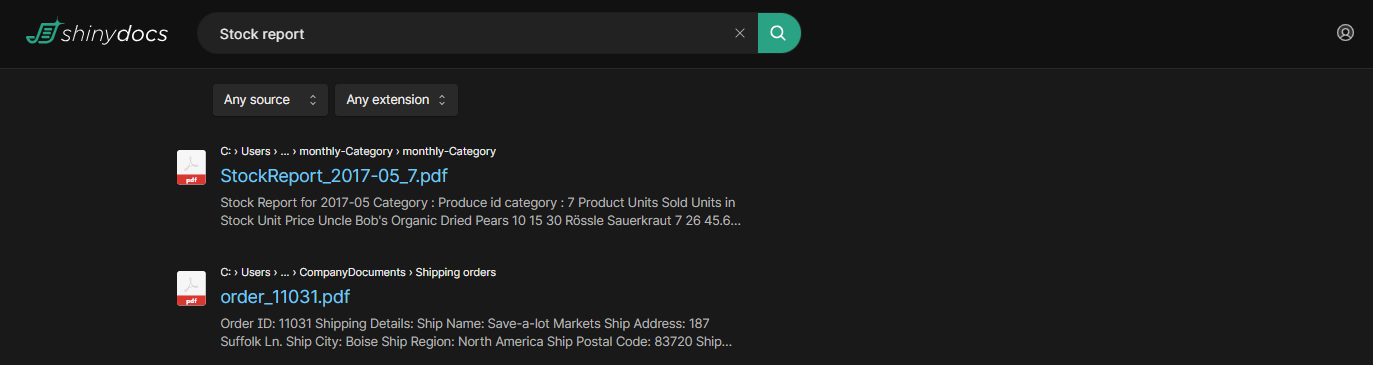
Perform a search for files you know exist in the source you analyzed
-
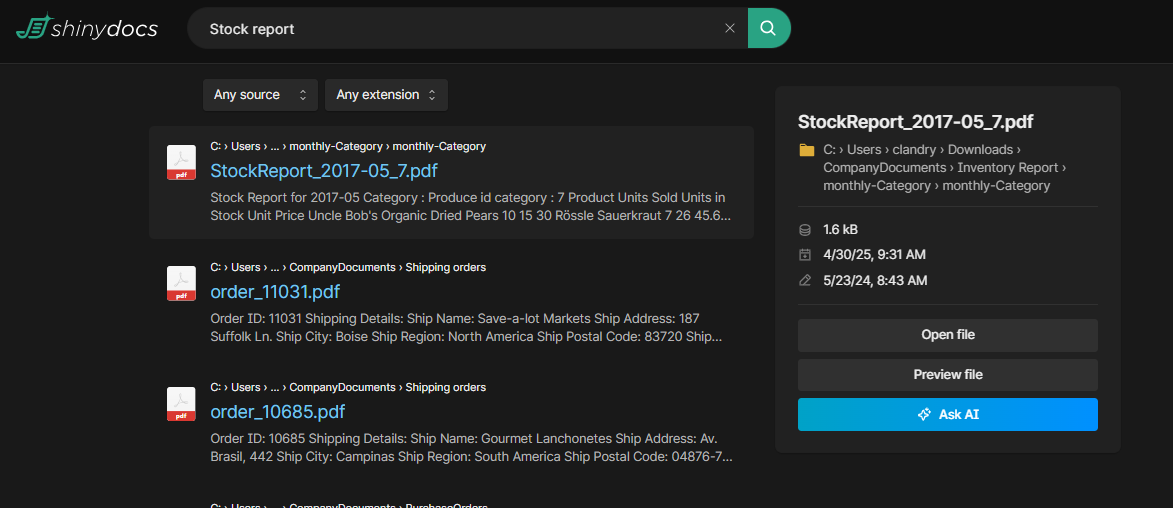
Click on a result’s file name to bring up the info panel, and click Ask AI
-
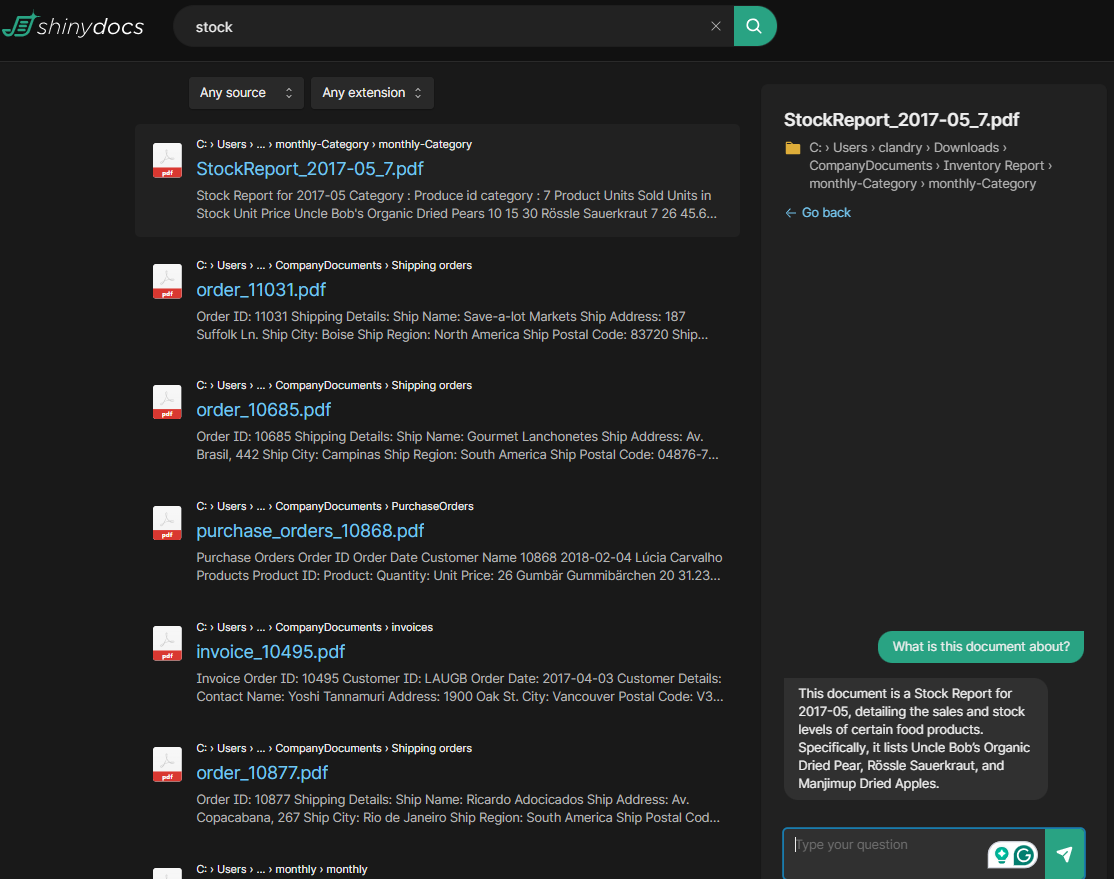
The chat window will open, and you will be able to ask any questions about the file’s contents
-
Experiment with different models and prompts, see what works best for your data!
Helpful tips
Ollama commands
The following Ollama commands can be run in your terminal (e.g. cmd) for helpful information
-
ollama list-
Returns all models Ollama has downloaded and available to use
-
-
ollama ps-
Returns current models in memory and if they are bound to CPU, GPU, or mixed
-
Ideally, all models should be bound to GPU when running
-