When Shinydocs Pro analyzes your iManage content, you'll see Export activity from the configured Shinydocs user. This process allows Shinydocs Pro to capture text data for searchability, PII identification, and various other analysis operations.
Shinydocs Pro supports iManage Server 10.2.x and higher for legacy iManage systems.
You must be an Administrator (NRTADMIN) in iManage Cloud to register an application.
Requirements
-
The server Shinydocs is installed on will require internet access to reach iManage.
Step 1 - iManage Set Up
Register the application
You will need to register the Shinydocs application to be used in your iManage instance. You probably have iManage Cloud, but if you have on-premise or use a managed private cloud provided by iManage, we have you covered.
You only need to do one of these configurations, based on what your iManage:
Registering in iManage Cloud
Or
Registering in iManage on-premise or private iManage cloud
Create the service user
The iManage user must have these options configured in iManage Control Center
-
Is a virtual user
-
Has an email address
-
The email address does not need to be valid, but will be used for authentication.
Note for iManage On-Premise customers:
We have found an inconsistency with iManage on-premise APIs, if using the email address of the virtual user does not work (e.g. svc_shinydocs@shinydocs.com) try to authenticate in Shinydocs Pro with just the username.
-
-
To analyze Private files in iManage, the Shinydocs service account will need to be a member of the NRTAdmin group.
-
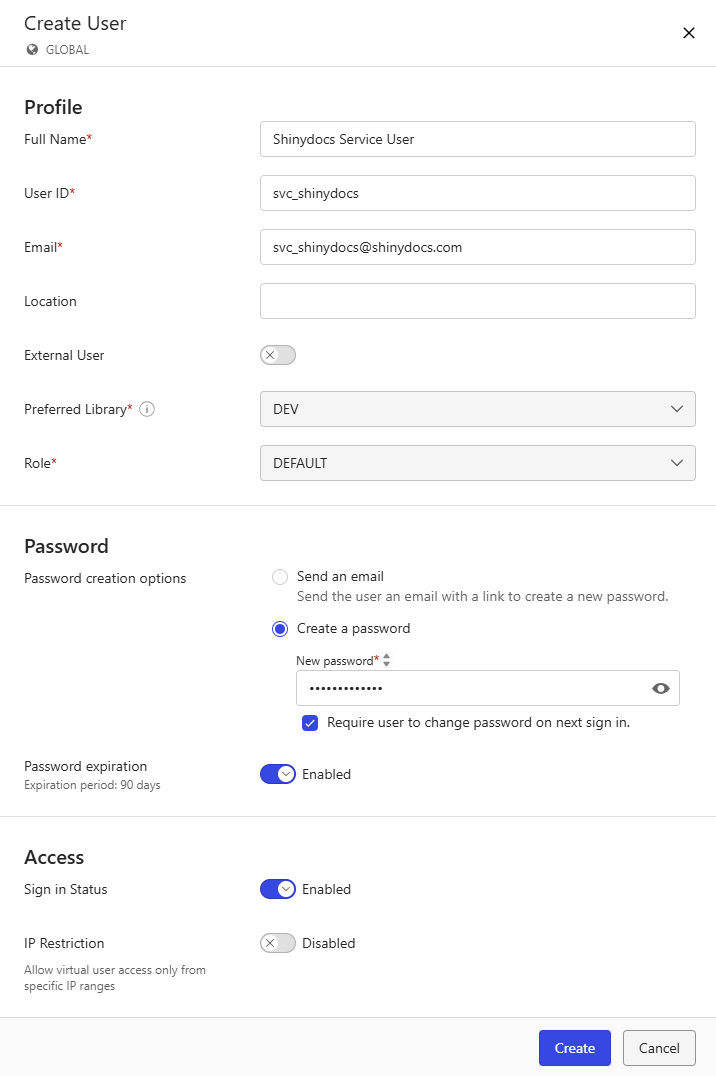
In iManage Control Center, select the Users tab and click + Create User

-
Fill in the required information, remember that the user must be Virtual (created in iManage, not your Active Directory) and have an email address (though it does not need to be valid).
-
Click Create to create the account.
-
Next, go to the Groups tab in iManage Control Center.
-
Find and select the group nrtadmin.
-
Select the Members tab for nrtadmin.
-
Click + Add Members
-
In the new panel, search for and add the previously created Shinydocs Service User
-
Congratulations! You have registered the account Shinydocs will use to analyze your iManage content. You will use the new account in the next step.
Step 2: Set up iManage Source in Shinydocs Pro
Once you have iManage configured, the next step is to add the source in Shinydocs Pro.
By default, iManage does not provide path information (crumbs) when gathering information about your iManage content. We have a new feature in early access that will allow Shinydocs Pro to get the crumbs from iManage during the Crawling content step. To enable this feature:
Note: Due to how iManage’s API works, additional API calls need to be made to get crumb information. This can greatly increase the time for the Crawling content step.
-
Navigate to Shinydocs Pro Control Center flags page (https://localhost:9701/flags) in your browser
IMPORTANT!
You can break things in/flags! We do not recommend changing any setting on this page unless instructed to by Shinydocs. -
Enable Add iManage crumbs

-
If you've previously analyzed an iManage source with Shinydocs Pro and now wish to include crumb data in your analysis, ensure the Advanced Sources Control flag is enabled in addition to Add iManage crumbs.

-
If an analysis is currently running, you can let it finish or end it.
-
Navigate to Sources > Select your iManage source title > click Re-crawl Only. Shinydocs Pro will only perform the Crawling content step and skip the other steps. The other steps will run in the next scheduled run.

-
Allow the crawl to complete
-
-
Now you will have a new field called crumbs in your catalog. You can enable this column along with many others with the View button.
-
In Shinydocs Pro Control Center, click + Add Source
-
If this is your first source, you will already be in the Add Source wizard
-
-
Select iManage from the list of options
-
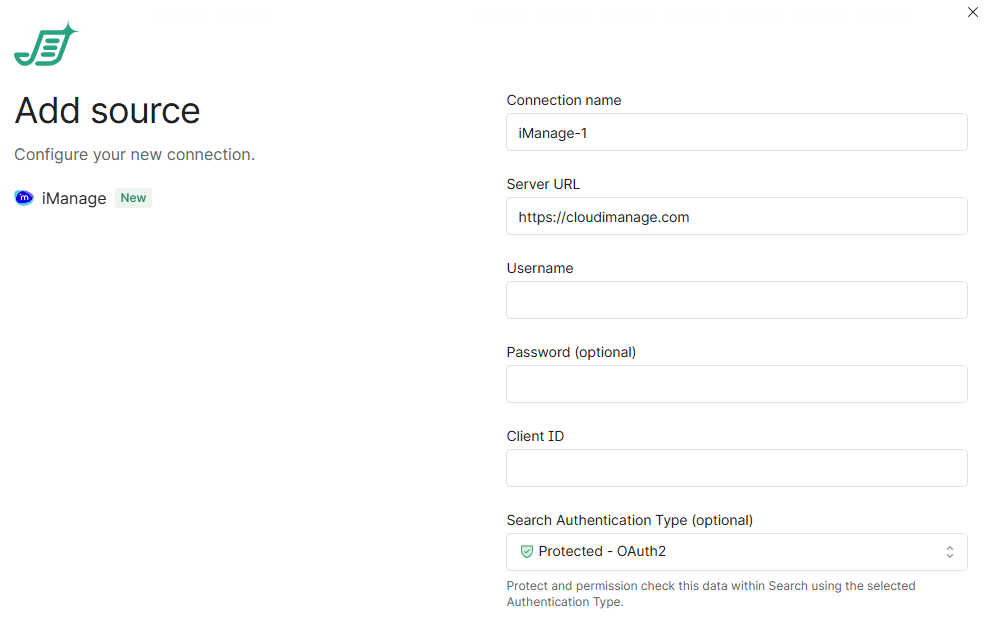
Input the required connection information:
-
Server:
iManage cloud: https://cloudimanage.com
iManage on premise/legacy cloud: https://yoururl.com -
Username: The username of the iManage account
(must be an email address, even if it is invalid) -
Password: The password for the supplied account
-
Client ID:
c0e5d05b-f8b8-4a26-afbf-4fa6953489da(this is the client id for Shinydocs Pro from iManage, it is always the same)
-
-
Set Search Authentication Type to Protected - OAuth2
-
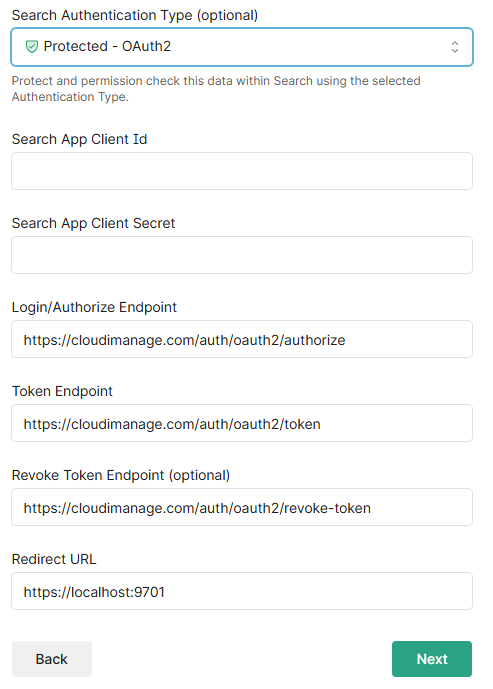
Search App Client Id:
-
iManage cloud: The client ID received from iManage support.
-
iManage on-premise: The client Id will be generated during the application registration.
-
-
Search App Client Secret:
-
iManage cloud: The client secret received from iManage support.
-
iManage on-premise: The client secret will be generated during the application registration.
-
-
Login/Authorize Endpoint:
-
iManage cloud:
https://cloudimanage.com/auth/oauth2/authorize -
iManage on-premise:
https://<iManage>/auth/oauth2/authorize
-
-
TokenEndpoint:
-
iManage cloud:
https://cloudimanage.com/auth/oauth2/token -
iManage on-premise:
https://<iManage>/auth/oauth2/authorize
-
-
Revoke Token Endpoint:
-
iManage cloud:
https://cloudimanage.com/auth/oauth2/revoke-token -
iManage on-premise:
https://<iManage>/auth/oauth2/authorize
-
-
Redirect URL:
https://<hostname>:9701
-
-
Click Next
-
Now you can choose to analyze a specific iManage library, workspace, or folder using the moniker or ID.
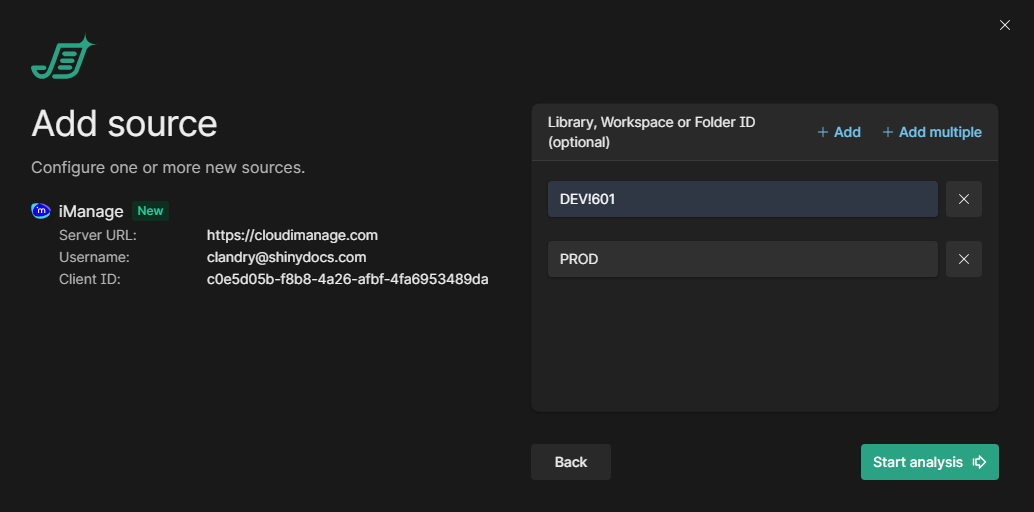
DEV!242 is an example value for a specific matter in iManage
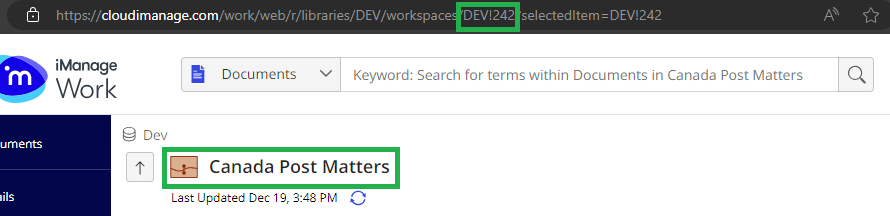
DEV is an example value for a library
More options
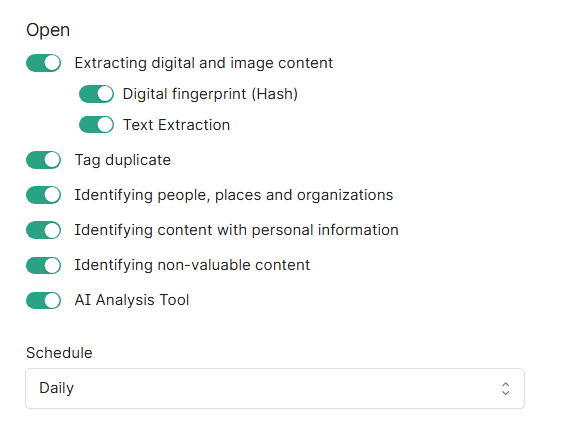
In Shinydocs Pro 26.1+, administrators can now by default select which analysis tools will run on the source.
-
Extracting digital and image content reads file contents, including images, for analysis.
-
Digital fingerprint (Hash): creates a unique identifier for each file to detect exact duplicates.
-
Text Extraction: extracts readable text from documents for searching and analysis (includes OCR).
-
-
Tag duplicate: marks files as duplicates based on their digital fingerprint across all Shinydocs Pro sources.
-
Identifying people, places and organizations: detects mentions of people, locations, and organizations within document content.
-
Identifying content with personal information: scans for personally identifiable information like names, addresses, and social insurance/security numbers (PII).
-
Identifying non-valuable content: flags redundant, obsolete, or trivial (ROT) content to identify cleanup candidates.
-
AI Analysis Tool (license dependent, requires setup before use): employs AI for deeper content classification beyond rules.
-
Schedule: controls how often analysis tasks run. "Daily" runs them once per day.
Click Start analysis to begin. Congratulations!