
Requirements
-
Network connection to eDocs API
-
eDocs account with at least read permission for the content you want to analyze
There is no configuration required in eDocs beyond an account with appropriate access (minimum Read).
Add eDocs as a source in Shinydocs Pro
-
In Shinydocs Pro Control Center, click + Add Source
-
If this is your first source, you will already be in the Add Source wizard
-
-
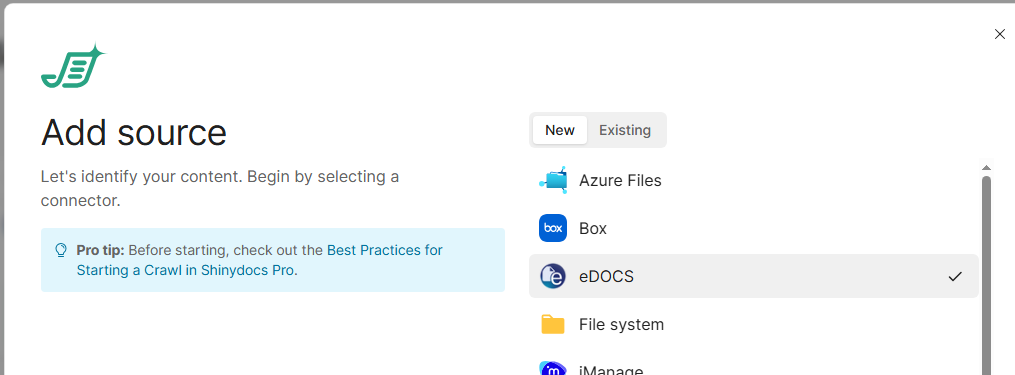
Select eDocs from the list of options
-
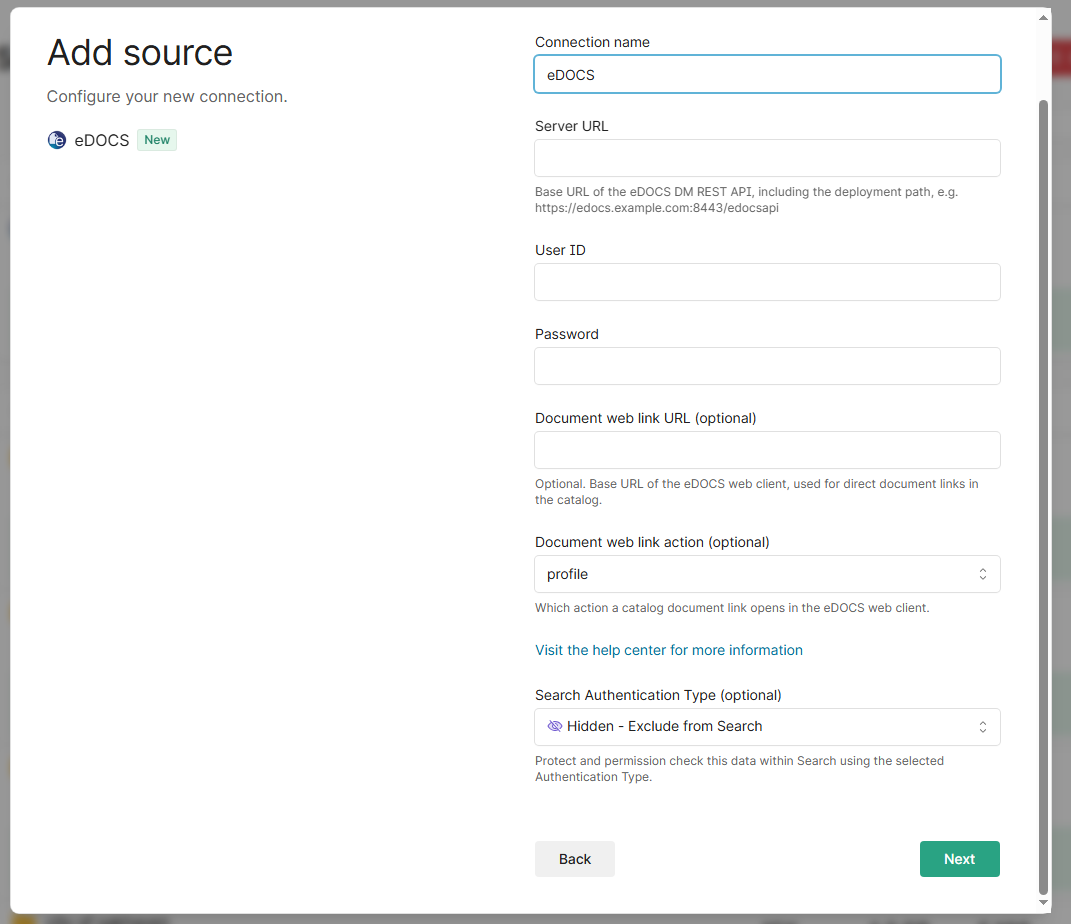
Enter your connection details for eDocs
-
Connection name: Leave as eDocs or enter a custom name
-
Server URL: URL for eDocs API (ends with
/edocsapi)
e.g.https://edocs.example.com:8443/edocsapi -
User ID: Username of the account with access to the eDocs content you want to analyze
-
Password: Password for the account
-
Document web link URL (optional): Base URL of the eDocs web client for direct document links in the catalog.
e.g.https://edocs.example.com:8443/#/doc/{library}/{docnum}-
Replace
edocs.example.com:8443with your eDocs server -
Your eDocs instance may use a different pattern; check with eDocs or inspect URLs when browsing the web client
-
-
Document web link action:
When you click a link in Catalog or Search, this sets how the link to the file resolves-
Profile: Open the document’s profile details in eDocs
-
Open: Open the file in the browser via eDocs
-
Download: Download the file from eDocs to your machine
-
-
Search Authentication Type (optional):
-
Hidden (default): The eDocs connector and content remain unavailable in Search (they remain available in the Catalog).
-
Public: The eDocs connector and content are fully searchable. Use this only if all content should be viewable by users.
Note: Clicking a result that links to eDocs still requires signing in with your eDocs account, which may have different permissions than the service account.
-
-